Table of Contents
Advertisement
Quick Links
MEASUREMENT SYSTEMS LTD
18, Pop Manol Street, Plovdiv 4003, Bulgaria, email: office@msyst.eu,
www.msyst.eu, tel./fax: +359 32 961 424
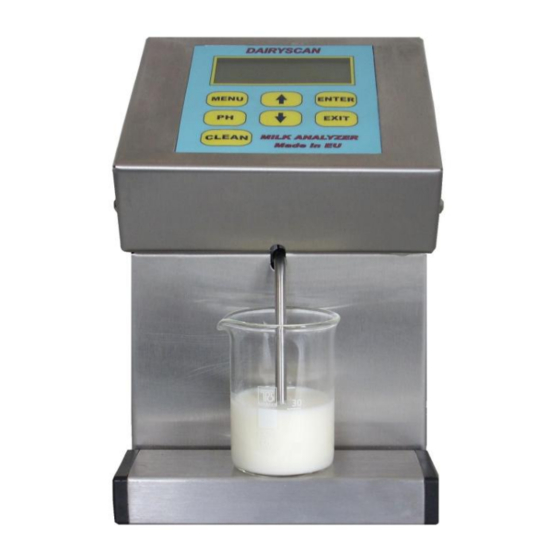
DAIRYSCAN
Milk analyzing device
Model – JET 1
Fat, Solids-Non-Fat (SNF), Density, Protein, Lactose, Salts, Water
content, Freezing point, Temperature and Conductivity
OPERATING INSTRUCTIONS
Advertisement
Table of Contents

Related Manuals for Measurement Systems DAIRYSCAN JET 1

Summary of Contents for Measurement Systems DAIRYSCAN JET 1
- Page 1 MEASUREMENT SYSTEMS LTD 18, Pop Manol Street, Plovdiv 4003, Bulgaria, email: office@msyst.eu, www.msyst.eu, tel./fax: +359 32 961 424 DAIRYSCAN Milk analyzing device Model – JET 1 Fat, Solids-Non-Fat (SNF), Density, Protein, Lactose, Salts, Water content, Freezing point, Temperature and Conductivity...
- Page 2 For optimum safety, proper use and maintenance of the device, Please read these instructions carefully! MEASUREMENT SYSTEMS LTD CAUTION! This device operates on 100-250V. In order to avoid electrical shock or to prevent the unit from damage, DO NOT REMOVE the...
- Page 3 Safety recommendations: Read carefully and make sure you understand all the instructions. For safety purposes this device is equipped with grounded power cable. If you do not have grounded electrical outlet please have one installed before using the device. ...
-
Page 4: Table Of Contents
Table of contents 1. Table of contents.……………………….………………..………….…..4 2. General description.……………..……………………………....5 3. Close-up view.………………………………….………………………...6 3.1 Front panel………………………………….…………………….6 3.2 Display…..…………………………………………………..7 3.3 Back panel................8 4. Samples preparation...…………………………………………………..9 5. Working description.………..…………………………………………..10 6. Cleaning and maintenance.…………….……………………………..24 6.1 Routine cleaning.……………………………………………….24 6.2 Complete flushing …………….……………………………..25 6.3 Weekly cleaning.……..………………………………………...26 7. -
Page 5: General Description
Most importantly, the one-button operation is extremely simple – you press only once to start measuring, you press only once for cleaning. DAIRYSCAN JET 1 can analyse three types of milk defined by user. The measuring cycle is 60/90 samples per hour. -
Page 6: Close-Up View
Close-up view 3. Close-up view 3.1 Front panel 1 – Intake pipette 2 – Sample cup... -
Page 7: Display
Close-up view Display 1 – LCD 2 – Components to be measured 3 – ENTER button 4 – EXIT button 5 – Arrow DOWN button 6 – MENU button 7 – CLEAN button 8 – Components to be measured 9 – Arrow UP button... -
Page 8: Back Panel
Close-up view 3.3 Back panel 1 – Serial port to printer 2 – Serial port RS 232 3 – Power out 12V (for printer) 4 – Power switch 220V AC 5 – Power socket 220V AC 6 – Hose 7 – Connection to flushing syringe 8 - Replaceable fuse 1,6A 9 –... -
Page 9: Samples Preparation
Samples preparation 4. Samples preparation In order that most accurate results are obtained it is important that the milk be kept for 2 hours after milking and stirred well before being used for sample material. A good way to stir up the milk is to pour it several times out of one vessel into another and back. -
Page 10: Working Description
Powering by an external 12V DC power source DAIRYSCAN JET 1 can be used in places where no regular electrical supply is available, DAIRYSCAN JET 1 can be powered by your car battery or other 12V DC external power sources. DAIRYSCAN JET 1 has provided a cable suitable for this purpose. - Page 11 If the unit does not start up after it is connected to the power source, check the fuse inside the connector plugged into the electrical lighter socket. SELECTING A WORKING MODE After DAIRYSCAN JET 1 is turned on from the POWER switch, the display reads first: Milk Analyzer...
- Page 12 Working description In the meantime you should have dipped the intake pipette into the sample milk in the cup and should have put them in a vertical position. The following text will appear: MEASURING… Please Wait In about 40/60 sec. the results of analyzing will appear on the display as follows: F=xx.xx P=xx.xx S=xx.xx L=xx.xx...
- Page 13 Working description Example: MENU > Mode > Correction > Cow milk > Fat. To select Mode, Options or Settings use the ↑↓ (up and down) arrows and press ENTER. Mode Options Settings In Submenu Mode Use the ↑↓ (up and down) arrows and press ENTER to select Correction, Calibration, Back up or Restore.
- Page 14 Working description After choosing the type of milk use the ↑↓ (up and down) arrows and press ENTER to choose a component for correction (mind that there are 2 (two) pages of components thus scroll up and down). Density Protein Lactose Solids Water...
- Page 15 Working description MENU > Mode > Calibration Calibration: In order to perform calibration of the device for a certain type of milk /for example – cow milk/. You need two samples of milk with known values of their parameters – one with comparatively high percentage of Fat and one with comparatively low percentage of Fat.
- Page 16 Working description ENTER to confirm. Then the cursor goes to the figure to the right. Use the same procedure to enter the second and third figure. After confirmation of the last figure the cursor goes to the next parameter for entering new values (mind that there are 2 (two) pages of components thus scroll up and down).
- Page 17 Working description Follow the procedure until the 5 measurement. After performing the last measurement the following text appears on the display: Put Sample Low Milk 1/5 times and Press ENTER The sample of milk with low Fat must be measured 5 consecutive times.
- Page 18 Working description Please note: Before each sample measurement stir the milk by pouring it from one vessel to another. The temperature of the samples should be in the range of 15 to 25 degrees. Before starting calibration it is recommendable to back up the parameters of the existing calibration: MENU >...
- Page 19 Working description MENU > Options > System info Choose Options and press ENTER. System Info Language Time and Date Choose System info, Language or Time and Date, and press ENTER. DAIRYSCAN Model: Jet 2 Ver: x.xx SN: XXXXXX MENU > Options > Language Language: Not available for this model...
- Page 20 Working description MENU > Settings > Set Fr. Point. Choose Settings and press ENTER. Set Fr. Point Set pH Set thermometer Choose Set Fr.point or Set pH and press ENTER. Set f. Point Cal.1 Set f. Point Cal.2 Set f. Point Cal.3 Use ↑↓(Up and Down) arrows to choose a type of milk and press ENTER.
- Page 21 Working description MENU > Settings > Set pH Set pH: Press Enter and the following text will appear on the display: Not available For this version MENU > Settings > Set Thermometer Press Enter and the following text will appear on the display: Put probe 15...
- Page 22 CONNECTING TO PRINTER DAIRYSCAN JET 1 can be connected to an optional serial printer for printing out the results. DAIRYSCAN JET 1 is set to work only with printers supplied by Measurement systems Ltd. We warn you that the unit is not set to work with other types of printers.
- Page 23 Working description At this point the sample cup can be removed from under the pipette. The instrument will continue to show the measured values until a new analysis is initiated. WARNING! Make sure that the instrument is at rest during analysis. Any shaking of the device will cause inaccurate results.
-
Page 24: Cleaning And Maintenance
Cleaning and maintenance 6. Cleaning and maintenance For high accuracy and reliability of the device, the following cleaning procedures should be performed on due times. 6. 1. Routine cleaning When the interval between 2 consecutive measurement analyses is more than 30 minutes or a considerable number of measurements have been performed the device begins to issue continuing beep sounds. -
Page 25: Complete Flushing
Cleaning and maintenance 6.2. Complete flushing At the end of the working day the following procedure should be performed: Unplug the power cable from the electrical outlet. On the rear panel of the device pull out the silicone hose from the upper nozzle marked PULL and connect that end of the hose to the flushing syringe(the other end of the hose must remain connected to the nozzle marked FLUSHING ). -
Page 26: Weekly Cleaning
Cleaning and maintenance Disconnect the hose from the syringe again and since you have finished flushing the flow system, connect it back to the nozzle PULL where it was previously connected to. WARNING! If during work the electrical supply is interrupted and sample material remains inside the flow system, immediately blow the sample out of the system using the syringe;... -
Page 27: Troubleshooting
Troubleshooting 7. Troubleshooting Error Possible Repair/remedy message Problem /cause Check that there are no air bubbles in the sample. - Check if after starting measurement, Insufficient milk sample in the sample holder quantity of decreases. In other case – there is the milk damage in the suction system. -
Page 28: Technical Specifications
Technical specifications 8.Technical specifications: 1. Measured components: Fat Solids-Non-Fat (SNF) Protein Lactose Water content Temperature (°C) Freezing point Salts Density Conductivity (option) 2.Ranges of measurement: 0.01% to 20% 3% to 20% Density * 1015 to 1100 kg/m3 Proteins... - Page 29 Technical specifications 3. Accuracy: 0.08% ± 0.15% ± Density 0.3 kg/m³ ± Proteins 0.15% ± Lactose 0.2% ± Salts 0.05% ± Added Water ± Freezing point 0.001ºC ± Sample Temperature 1ºC ± Conductivity (option) 0.05% ± 10˚C to 40˚C (option 43°С) Air temperature Relative Humidity 30% to 80%...
-
Page 30: Guarantee Card
MEASUREMENT SYSTEMS LTD 18, POP MANOL Street 4003 PLOVDIV BULGARIA GUARANTEE CARD Dairyscan JET1 Guarantee period is 1 (one) year after purchasing date. Improper handling, transport and storage will invalidate the guarantee. Guarantee is void if warranty labels are removed.
Need help?
Do you have a question about the DAIRYSCAN JET 1 and is the answer not in the manual?
Questions and answers