Subscribe to Our Youtube Channel
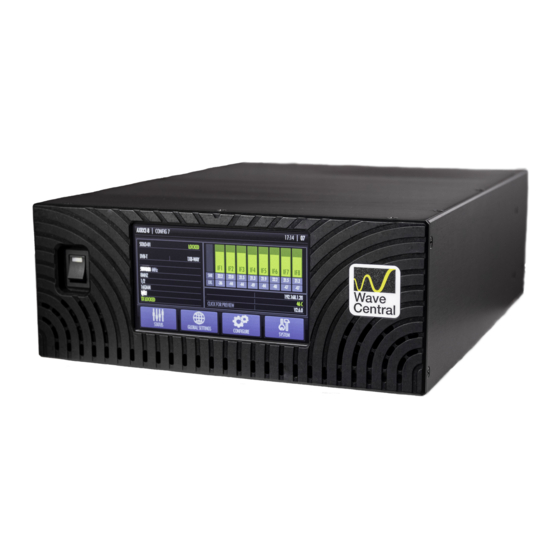
Summary of Contents for Wave Central AXIS AXRX3
- Page 1 AXIS AXRX3 Receiver Kiss manual (Keep It Simply Simple) GETTING STARTED AXRX3 Out of the shipping box AXRX3-6 Out of the box, rear panel view Wave Central LLC April 2019...
- Page 2 This document will be featuring the AXIS AXRX3-6 6 Way Diversity 5.8GHz Single Decoder (D331 Main board) Receiver. LCD Display protective cover removed Initial power and Ethernet control connections. When your receiver ships from Wave Central, it is pre-programmed with your frequency band (16 pre-sets).
- Page 3 Set up of computer Ethernet adapter to communicate with the AXRX3 receiver. Wave Central engineering’s test computer uses Windows 7. Other Microsoft OS’ should set up similarly. The above menu screen shots take you to the location to enter the IP address for your computer, subnet mask and default gateway.
- Page 4 LED will illuminate. Also the internal cooling fans will spool up and with be audible. Boot Wheel is displayed after several seconds and turning clockwise during the booth up cycle. Menu displayed after boot sequence has completed. Wave Central LLC April 2019...
- Page 5 The next entry is for the NETWORK MASK and GATEWAY address. These addresses will be entered in the same sequence. Pressing the button will delete the entry and return to the main IP SETTING menu. Wave Central LLC April 2019...
-
Page 6: The Next Steps
The next steps: Prior to the sales process and subsequent purchase(s) all aspects of your expectation of this receiver and any other Wave Central products in your operational environment will have been fully explored. Most of the AXIS receivers are part of a system consisting of a camera transmitter(s), camera paint and antennas. -
Page 7: The Web Browser
The screen default is the Status and sub menu: Overview. Prior to going forward, you need to know what the television standard your facility is using. In our test setup Wave Central our test standard is HD/SDI: 1080i 59.94. 1080i 59.94. The test transmitter source is using this line standard and is 1080i 59.94. - Page 8 HD/SDI 1, HDMI 1, CVBS (NTSC) and the BDC to IF inputs 1 and 6 should be connected at this time. We also check and verify each analog outputs; Audio 1 through 4 are functional. Your system will most likely be using embedded audio. Rear panel as configured for testing Wave Central LLC April 2019...
- Page 9 Decoder 1 displays Using. Adjusting Genlock Wave Central uses a Leader Multi Monitor LV5570. The reference (Genlock) is the same signal feeding the Genlock input to the receiver. The HD/SDI 1 output, in our case feeds input B of the LV5570 and the monitor is set to external.
- Page 10 Decoder 1, Genlock Mode (Off) the check and click. A drop down menu will appear high light external external external external and click. Then click the Apply tab. Click OK The Receiver Genlocked to the reference Wave Central LLC April 2019...
- Page 11 H H H H orizontal Phase: 1.510 us or 112 Pixels. The procedure below sets the Genlock parameters for the receiver. Enter the pixel offset of 112 in the box above. Select Apply to set. Then click OK. Wave Central LLC April 2019...
- Page 12 Now that you can communicate with the receiver from the web menu more menus can be explored. It’s important to browse the menus to get familiar with the receivers capabilities. Most of the menus are self-explanatory. Wave Central LLC April 2019...
- Page 13 Downconverters menu: Shows configuration, these parameters are set during systems testing. Note Note: 12 VDC is sent to the Block Down Converters Note Note with the IF output BNC connectors located on the rear panel. Wave Central LLC April 2019...
- Page 14 Status Menu: Input Spectra Services Wave Central LLC April 2019...
- Page 15 8MHz. The GI & FEC are set to auto. Decoder 1 menu’s BNC Output is labeled HD/SDI 1 on the rear connector panel of the receiver. This BNC output can select Composite, ASI and HD-SDI (default). This setting does not change the HDMI 1 output. Wave Central LLC April 2019...
- Page 16 Set Clock. In the pop menu all the parameters Set Clock Set Clock are entered. Time format is 24 hours separated with colon (14:07). Click S S S S et et et et, and then click OK Wave Central LLC April 2019...


Need help?
Do you have a question about the AXIS AXRX3 and is the answer not in the manual?
Questions and answers