Asko WL6511XXL Training Program
Hide thumbs
Also See for WL6511XXL:
- Operating instructions manual (32 pages) ,
- Owner's manual (31 pages) ,
- Operating manual (31 pages)

Related Manuals for Asko WL6511XXL


Summary of Contents for Asko WL6511XXL
- Page 1 WL6511XXL WASHER TRAINING PROGRAM WL6511XXL WASHER TRAINING PROGRAM 2nd Edition 05/04/2008...
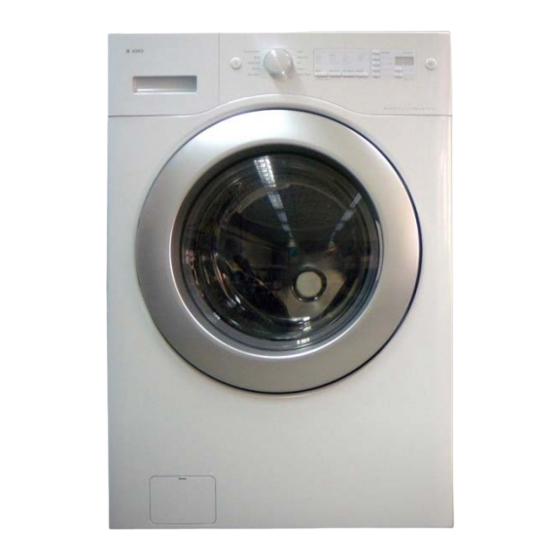
- Page 2 WL6511XXL Washer Training Program WL6511XXL Washer Training Program • Product Description & Features • Warranty • Installation • Operation • Testing From Board • Disassembly • Door Reversal • Wiring Diagram • Service Tips • Teardown...
-
Page 3: Product Description & Features
Product Description & Features Product Description & Features • Extra Large Capacity – 3.8 cu ft Extra Large Capacity – 3.8 cu ft • Easy Control System with LineConcept programming, • Easy Control System with LineConcept programming, multiple option buttons and LED display window multiple option buttons and LED display window •... - Page 4 Product Description & Features Product Description & Features … … Continued Continued • QuattroPlus – 4 shock suspension, 2 springs & QuattroPlus – 4 shock suspension, 2 springs & automatic load balancing system ensures quiet, virtually automatic load balancing system ensures quiet, virtually vibration free spin vibration free spin •...
- Page 5 Product Description & Features Product Description & Features … … Continued Continued • The QuickWash program Facilitates a faster wash The QuickWash program Facilitates a faster wash cycle that uses less water and energy cycle that uses less water and energy •...
-
Page 6: Product Specification
Product Specification Product Specification External Measurements (inches ” (width) x 32 ” (depth) x 40 3/8 ” (height) Depth 52 ” with door open External Measurements (inches ” (width) x 32 ” (depth) x 40 3/8 ” (height) Depth 52 ”... -
Page 7: Warranty
Year Full From date of purchase. Asko Appliances Inc. will pay for: Asko Appliances Inc. will pay for: ASKO replacement parts and/or repair labor to correct defect in materials or ASKO replacement parts and/or repair labor to correct defect in materials or workmanship. - Page 8 Warranty… Continued Third year full Third year full ASKO replacement parts and/or repair labor to correct defect in materials or ASKO replacement parts and/or repair labor to correct defect in materials or workmanship. Service must be performed by an authorized ASKO ser vice agent.
-
Page 9: Installation
Installation Installation Hint: Hint: Save the Save the shipping bolts shipping bolts and the and the wrench in wrench in case you ever case you ever have to move have to move the machine the machine Remove the shipping bolts from the rear of the unit with the wre nch supplied. - Page 10 Installation … Installation … Continued Continued...
- Page 11 Installation … Installation … Continued Continued The machine operates on 120 VAC and should have a The machine operates on 120 VAC and should have a dedicated 15 or 20 amp outlet. dedicated 15 or 20 amp outlet. Water supply is Hot & Cold fill and requires a water Water supply is Hot &...
-
Page 12: Operating Mechanism Diagram
Operating Mechanism Diagram Operating Mechanism Diagram CONTROL ASSEMBLY CONTROL ASSEMBLY 4. WATER FILL SYSTEM 4. WATER FILL SYSTEM Main PCB Main PCB Cold water. 3 ports Cold water. 3 ports Front PCB Front PCB Cold water pre Cold water pre washing washing Harness... - Page 13 Operation … Operation … Fascia Panel Fascia Panel...
- Page 14 Operation … Operation … Controls Controls Choice of 4 Choice of 4 spin speeds spin speeds 5 Wash 5 Wash When knob is turned to When knob is turned to or no spin or no spin Temperatures Temperatures selected program the selected program the Auxiliary Programs Auxiliary Programs...
- Page 15 Operation … Operation … Controls Controls 5 Wash Temperatures 5 Wash Temperatures Water Temp. Target Temp. Rinse Temp. Extra Hot 155 F (67 C) Cold Extra Hot 155 F (67 C) Cold 105 F (41 C) Cold 105 F (41 C) Cold Warm Warm...
- Page 16 Operation … Operation … Controls Controls Spin cycle consists of … Spin cycle consists of … 1. Load sensing 1. Load sensing Is done while the laundry is Is done while the laundry is still wet, tumbles @ 75 r.p.m. still wet, tumbles @ 75 r.p.m.
- Page 17 Operation … Operation … Controls Controls Child Lock Feature… To activate child lock, first start a program. Next press child lock button for To activate child lock, first start a program. Next press child lock button for 3 seconds, child lock will be illuminated. Once in this mode onl y the power 3 seconds, child lock will be illuminated.
- Page 18 Operation … Operation … Controls Controls Delay Start… Will delay the start of a chosen program by 1 – 12 hours Will delay the start of a chosen program by 1 – 12 hours After selecting the delay start time, cycle options can be chang ed before After selecting the delay start time, cycle options can be chang ed before...
- Page 19 Operation … Operation … Controls Controls Load Sensing…water level… Load sensing to determine water level … is carried out when Everyday wear, Load sensing to determine water level … is carried out when Everyday wear, Sanitary, or Towels / bedding wash cycles are selected. The sens ing is done while Sanitary, or Towels / bedding wash cycles are selected.
- Page 20 Operation … Operation … Detergent Dispenser & Fill Valves Detergent Dispenser & Fill Valves Hot valve for main wash Hot valve for main wash Cold valve for main wash Cold valve for main wash All coils should All coils should measure measure –...
- Page 21 Operation … Operation … Pressure Sensor / Water Level Sensor Pressure Sensor / Water Level Sensor Controls the water intake • based on program selected Controls the refilling if water is • soaked up by clothes will do this up to 10 times during wash cycle Pink Controls door opening...
- Page 22 Operation … Operation … Pressure Sensor / Water Level Sensor Pressure Sensor / Water Level Sensor Voltage readings at the Voltage readings at the sensor sensor Pink White Grey Pink White Grey 2.2 Volts 3 Volts 2.2 Volts 3 Volts 5.2 Volts DC 5.2 Volts DC...
- Page 23 Operation – Direct Drive Induction Motor Operation – Direct Drive Induction Motor The washing Machine drum is driven by the BLDC motor, (brushless 3 phase DC direct drive induction motor). The pulley is the rotor which has 24 permanent magnets attached to the inside circumference. The stator is attached to the rear tub assembly and consists of 36 individual coils Stator...
- Page 24 Operation – Door Lock / Switch Operation – Door Lock / Switch Door Lock / Switch … consists of a bi metal switch Door Lock / Switch … consists of a bi metal switch & a solenoid operated lock. & a solenoid operated lock. Door locking: Door locking: As soon as start button is pressed bi...
- Page 25 Operation – Drain Pump Operation – Drain Pump Heavy duty auto reversing pump with manual drain hose Heavy duty auto reversing pump with manual drain hose Clean out pin & coin trap Clean out pin & coin trap Pump Operation: Pump Operation: During drain cycle pump runs continuously During drain cycle pump runs continuously...
- Page 26 Operation – Heating Element Operation – Heating Element 120 Volt element 120 Volt element 1000 Watt 1000 Watt Resistance 11.8 Ohms Resistance 11.8 Ohms Built In thermal fuse Built In thermal fuse disables element @ disables element @ 363 degrees F 363 degrees F Element has built Element has built...
- Page 27 Operation – Thermister NTC Operation – Thermister NTC Note: These temperatures are in These temperatures are in centigrade. Voltages are centigrade. Voltages are D.C. volts D.C. volts...
- Page 28 Voltage checks from the board Voltage checks from the board Input Voltage Neutral Neutral Input voltage Input voltage into board 120 into board 120 Relay Hot is brown Hot is brown wire on WF03 wire on WF03 plug, connector plug, connector # 3.
- Page 29 Voltage checks from the board Voltage checks from the board Motor Motor From motor Plug From motor Plug WFO9 connector WFO9 connector # 1 to ground # 1 to ground measures measures – 185 VAC – 185 VAC 3 2 1...
- Page 30 Voltage checks from the board Voltage checks from the board Motor Motor From motor Plug From motor Plug WFO9 connector WFO9 connector 2 or 1 2 or 1 measures measures – 11 VAC – 11 VAC 3 2 1...
- Page 31 Voltage checks from the board Voltage checks from the board Heater From Plug WF03 connector #2 Relay (Orange wire) to blue wire on relay measures 120 VAC when calling for heat...
- Page 32 Voltage checks from the board Voltage checks from the board Drain Pump From Plug WFO1, connector # 6 (black wire) to blue Relay neutral wire on relay should measure 120 VAC when calling for pump operation...
- Page 33 Voltage checks from the board Voltage checks from the board Reactor Plug WFO5 (2 RED wires) Line Voltage comes out of board through reactor (transformer coil) and back into board. If reactor fails, unit will not work...
- Page 34 Resistance checks from the board Resistance checks from the board Thermister Connector # 1 Brown wire to connector # 7 Pink wire measures 14 -- 15 Ohms at room temperature Note Disconnect 11 10 9 8 7 plug from 4 3 2 1 board before checking Plug WF10...
- Page 35 Resistance checks from the board Resistance checks from the board Hall Sensor Connector # 5 (green wire) to connector # 6 (yellow wire) reads 18,000 Ohms 11 10 9 8 7 4 3 2 1 Plug WF10...
- Page 36 Resistance checks from the board Resistance checks from the board Hall Sensor Connector # 11 (violet wire) to connector # 12 (black wire) reads 10,000 Ohms 11 10 9 8 7 4 3 2 1 Plug WF10...
- Page 37 Resistance checks from the board Resistance checks from the board Motor Stator Measure between any 2 of the 3 connectors. Should read 7 – 8 ohms Plug WF09...
- Page 38 Resistance checks from the board Resistance checks from the board Heater From Plug WF03 connector #2 Relay (Orange wire) to blue wire on relay measures 14 Ohms...
- Page 39 Resistance checks from the board Resistance checks from the board Drain Pump From Plug WFO1, connector # 6 (black wire) to blue Relay neutral wire on relay should measure 14 Ohms...
- Page 40 Resistance checks from the board Resistance checks from the board Reactor Plug WFO5 (2 RED wires) Measures 0.2 Ohms...
- Page 41 Disassembly – Fascia Panel Disassembly – Fascia Panel 1. Remove dispenser by pressing 2. This exposes two screws 3. Remove the two screws in middle section & pulling out 4. Lift up on Fascia panel 5. Clear the tabs in top panel 6.
-
Page 42: Control Console Assembly
Disassembly – Control Console Assembly Disassembly – Control Console Assembly 1. Remove Fascia panel from unit 2. Remove 7 screws holding control console to housing Selector knob and power button can only be removed when console is disassembled... - Page 43 Disassembly – Top Cover Disassembly – Top Cover 1. Fascia panel removed Remove 3 screws from front of cover Remove 3 screws from front of cover Note: Top cover can not be removed without first 3. Remove 4 screws from rear removing the 4.
- Page 44 Disassembly Front Cabinet Disassembly Front Cabinet 1. Release tension on gasket spring 2. Remove wire 3. Fold gasket inside drum 4. Remove 4 screws at top of panel 5. Lean panel out & lift clear 6. Disconnect door switch harness...
-
Page 45: Disassembly - Drain Pump
Disassembly Drain Pump Disassembly Drain Pump 1. Drain water from sump Remove Drain Hose Clamp 3. Remove two screws & sump hose Remove Drain Hose Clamp 4. Disconnect the two spade connectors 5. Remove Pump 5. Remove Pump The two hose clamps The two hose clamps can be released by can be released by... - Page 46 Disassembly – Door Switch Disassembly – Door Switch...
- Page 47 Disassembly – Direct Drive Inverter Motor Disassembly – Direct Drive Inverter Motor To remove the Stator, first disconnect the 3 pin motor harness plug and then the 4 pin “Hall Sensor” plug. Next remove the 6 - 10mm set screws, lock washers & flat washers, this will release the stator retaining plate.
- Page 48 Disassembly – Main PCB Assembly Disassembly – Main PCB Assembly 1. Remove single screw 2. Undo wire tie & free harness 3. Slide box up & to left to free tabs 4. Remove cover by disengaging tabs 5. Remove connectors or test from board...
- Page 49 Disassembly – RF filter & Thermal Fuse Disassembly – RF filter & Thermal Fuse Attached to the rear lower wall of the cabinet is a plastic Attached to the rear lower wall of the cabinet is a plastic bag containing wire connectors the RF filter and a bag containing wire connectors the RF filter and a plastic holder containing an IN plastic holder containing an IN...
- Page 50 Disassembly – Tub & Drum Removal Disassembly – Tub & Drum Removal Follow the steps for disassembly of: Control Panel Top Cover Front Panel 10 mm bolts Motor Boot Seal Then remove the hose which goes from the dispenser to the front half of the tub. Lay the machine on its back.
- Page 51 Door Reversal … Door Reversal … Changing from left hinge to right hinge Changing from left hinge to right hinge 1. Remove dispenser by pressing 2. This exposes two screws 3. Remove the two screws in middle section & pulling out 6.
- Page 52 Door Reversal … Door Reversal … Continued Continued 7. Release tension on gasket spring 8. Remove wire 9. Fold gasket inside drum 10. Remove 4 screws at top of panel 11. Lean panel out & lift clear 12. Disconnect door switch harness...
- Page 53 Door Reversal … Door Reversal … Continued Continued 13. Remove the 4 set screws from hinge, It will stay in place. 14. Slide hinge to right & lift up & out of panel 16. From inside the panel push on labels which cover mounting holes and peel off carefully to re-use.
- Page 54 Door Reversal … Door Reversal … Continued Continued Disengage wiring harness for lock from right side & bottom panel retainers, & secure to left side of unit Lift inner door to free glass 18. Loosen screws around inner door, lift slightly with Door reversal a flat blade &...
- Page 55 PCB Manual Test Mode PCB Manual Test Mode 1. Press the power button to turn on. 2. Press & hold the “Wash” button The PCB and other electronic parts can be tested without having a water supply to test their operation 3.
- Page 56 PCB Manual Test Mode … PCB Manual Test Mode … Continued Continued 2. Running times count 3, 4, 5, & 6 – E5-E8 Error codes logged 9. Cold valve on 7. Not used 8. Hot valve on...
- Page 57 PCB Manual Test Mode … PCB Manual Test Mode … Continued Continued 10. Pre wash valve on 11. Do not use 12. Bleach valve on 13. Drain pump on...
- Page 58 PCB Manual Test Mode … PCB Manual Test Mode … Continued Continued 14. Door lock open 1. Back to door lock close The PCB manual test mode enables the technician to see how many cycles the machine has run, and the number of E5-E8 errors. All the valves can be activated plus the door lock and the drain pump.
- Page 59 Error Codes the consumer may see Error Codes the consumer may see...
- Page 60 Error Codes the consumer may see Error Codes the consumer may see...
- Page 61 Error Codes the Technician may see Error Codes the Technician may see...
- Page 62 Error Codes the Technician may see Error Codes the Technician may see...
- Page 63 Error Codes the Technician may see Error Codes the Technician may see...
- Page 64 Error Codes the Technician may see Error Codes the Technician may see...
- Page 65 Error Codes the Technician may see Error Codes the Technician may see...
- Page 66 Error Codes the Technician may see Error Codes the Technician may see...
- Page 67 Error Codes the Technician may see Error Codes the Technician may see...
- Page 68 Error Codes the Technician may see Error Codes the Technician may see...
- Page 69 Error Codes the Technician may see Error Codes the Technician may see...
- Page 70 Error Codes the Technician may see Error Codes the Technician may see...
- Page 71 Error Codes the Technician may see Error Codes the Technician may see...
-
Page 72: Wiring Diagram
Wiring Diagram Wiring Diagram... - Page 73 Wiring Diagram … Wiring Diagram … Heater Circuit Heater Circuit...
Need help?
Do you have a question about the WL6511XXL and is the answer not in the manual?
Questions and answers