Advertisement
Advertisement

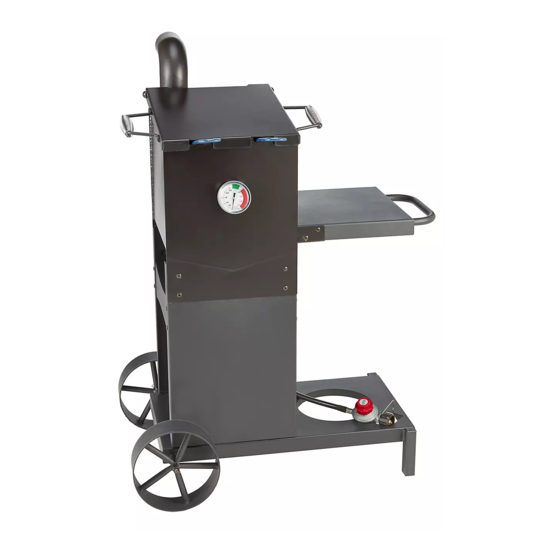
Related Manuals for Outdoor Gourmet FSOGBG4302


Summary of Contents for Outdoor Gourmet FSOGBG4302
- Page 1 Assembly Instructions & User’s Manual Double Basket Jet Fryer FSOGBG4302 Please keep this instruction manual for future reference Customer Service: (888) 922-2336 7:00 am to 12:00 am Central Standard Time (daily) Live Chat at: www.academy.com Email: customerservice@academy.com (Made in China)
-
Page 2: Table Of Contents
Table of Contents Warnings………………………………………………………………..2-8 Tools, hardware, and Parts………………………………….……… - 9 Exploded View………………………………………………………..11 Assembly Instructions……………………………………………… 12-19 Operating/Cooking Instructions..........20-21 Care and Maintenance……………………………………………..22 Frequently Asked Questions............23 Warranty………………………………………………………………….23 Note: Before beginning assembly of product, make sure all parts are present. Compare parts with package content list and hardware contents. - Page 3 WARNINGS THIS APPLIANCE IS NOT FOR FRYING TURKEYS THIS COOKER IS FOR OUTDOOR USE ONLY THIS APPLIANCE IS NOT INTENDED FOR COMMERCIAL USE SAFETY SYMBOLS: When using this appliance, basic safety precautions should always be observed. Read and understand the meaning of these symbols before assembling and using this appliance.
-
Page 4: Warnings
If you continue to smell gas, immediately contact the fire department (e.g. 911) and do not go near the appliance. Model No. FSOGBG4302 Main Max. Input Rating: 54,000 Equipped for use on: Propane BTU/H Certified under ANSI 21.89 - CSA 1.18 -2013 Outdoor Cooking Specialty... - Page 5 WARNINGS 1. Do not store a spare LP-gas cylinder under or near this appliance. 2. Never fill the cylinder beyond 80 percent full;This may cause release of gas from the safety release valve. 3 If the information in (1) and (2) is not followed exactly ,a fire causing death or serious injury may occur.
- Page 6 WARNINGS The gas supply must be turned off at the LP-gas supply cylinder when this outdoor cooking gas appliance is not in use. Storage of this fryer indoors is permissible only if the cylinder is disconnected and removed from the fryer. Cylinder must be stored outdoors out of reach of children and must not be stored in a building,garage,or any other enclosed area.
- Page 7 WARNINGS LP Cylinder Connections To check your local codes,see your local LP gas dealer or natural gas company. This appliance is not intended to be connected to a natural gas supply line. When purchasing or exchanging a cylinder for your gas cooker, it must be constructed and marked in accordance with the specifications for LP gas cylinders by the U.S.
- Page 8 WARNINGS REGULATOR HOSE ASSEMBLY CHECK: WARNING Before each use, check to see if there is evidence of abrasion, wear, cuts or leaks on the hose. If damage is evident, the hose must be replaced prior to appliance use. INSTRUCTIONS FOR LIGHTING BURNER: •Read and understand all instructions and warnings before lighting.
- Page 9 WARNINGS Be sure the LP cylinder valve is closed. If the LP cylinder is still leaking, contact your LP dealer or local fire department. Do not use any matches, open flame or smoke during leak testing. Do not light a burner during leak testing. FOR YOUR SAFETY 1.
-
Page 10: Tools, Hardware, And Parts
Tools Required Adjustable wrench (not included) Phillips Screwdriver (not included) Hardware List A Washers 2pcs B Cotter pins 2pcs C Bolt M6X15 2 pcs D Acorn nut 6pcs E Spacer 2pcs F Bolts M6x22 Page 9 of 23... - Page 11 Parts List wheel 2pcs axle ③ bottom frame ④ front panel ① ② ⑤ back panel cross panel 2pcs ⑦ fire rod main body 1pc ⑥ ⑧ ⑪ thermometer 1pc ⑫ lid handles 2pcs ⑨ side table 1pc side table handle ⑩...
-
Page 12: Exploded View
Exploded View Page 11 of 23... -
Page 13: Assembly Instructions
Assembly Instructions Step 1: Insert the wheel axle (part # ) (1PC) ② through the frame bottom (part# ③ Install the wheel (part ) to axle with ① washers (A) (1 pc) ,bolt (E) (1pc) and cotter pin (B) (1 pc). Repeat step with other wheel. - Page 14 Assembly Instructions Step 3: Install cross panel (part # ) (2pcs) with ⑥ Bolts (C) (8pcs). Step 4: Hang fire rod (part # ⑦ on cross panel (part ⑥ Page 13 of 23...
- Page 15 Assembly Instructions Step 5: Install main body (part ) to frame with Bolts ⑧ (C) (4 pcs). Step 6: Install side table handle (part # ) to ⑩ side table (part # ⑨ with bolts (C) (2 pcs). Page 14 of 23...
- Page 16 Assembly Instructions Step 7: Install the side table (part# ) to body with ⑨ bolts (C) (4 pcs). Step 8: Wind the PTFE tape (part thermometer as image. Don't go beyond the threads. step Insert the thermometer ⑪ (part # ) to the body, then turn right to tighten.
- Page 17 Assembly Instructions Step 9: Install lid handle ( part ⑫ ) with bolts (C) (2 pcs) and nuts (D) (2pcs). Repeat step with other handle. Step 10: Install regulator (part ⑬ ) on air intake with nuts (D) (2 pcs). Page 16 of 23...
- Page 18 Assembly Instructions Step 11: Assemble the f l i ter tank(part#⑭) into the body. Step 12: ⑯ Assembly the basket handle (part#⑯) to basket (part#⑮).As shown in the figure. Page 17 of 23...
- Page 19 Assembly Instructions Step 13: Hang the two baskets (part #⑮) inside the body, see figure to the right. Step 14: Place gas cylinder into a of bottom t nk h lder ( part# frame ③ T ighten wing bolt to secure tank in place as shown on the image.
- Page 20 Fully Assembled Page 19 of 23...
-
Page 21: Operating/Cooking Instructions
Operating / Cooking Instructions WARNING When using the fryer never fill over 4.0 gallons ( 15.1 L) . Doing so could result in the unit becoming top heavy and creating an unsafe condition. OPERATING INSTRUCTIONS • Follow all instructions for assembly and testing. Do not skip the warnings and instructions. •... - Page 22 Operating / Cooking Instructions COOKING OIL FILLING THE FRYER WITH OIL: •Make certain that bottom drain valve is closed and burner is turned off. •Set baskets inside the empty fryer. IMPORTANT ! •Pour cool oil into the fryer vessel. •Watch closely as oil rises and reaches the bottom of the basket. •Maximum oil is 4.0 gallons ( 15.1 liters).
-
Page 23: Care And Maintenance
Care and Maintenance WARNING Allow unit and oil to thoroughly cool before performing any cleaning. Proper care and appliance maintenance will keep your product operating smoothly. CLEAN THOROUGHLY AFTER EVERY USE. SUGGESTED CLEANING MATERIALS: •Warm water •Mild dishwashing liquid detergent •Soft, nylon cleaning pad HOW TO CLEAN: •... -
Page 24: Frequently Asked Questions
Frequently Asked Questions and Answers Q: What is the problem if the fryer takes too long or will not heat oil?My fryers' flame appearance is very weak. A: If the hose assembly has Type1 Connection (black/green knob), it is equipped with a flow limiting device.
Need help?
Do you have a question about the FSOGBG4302 and is the answer not in the manual?
Questions and answers
Where to get replacement parts?
Why is my cooker not getting above 250