Advertisement
Quick Links
Advertisement

Summary of Contents for Positive Gaming iDANCE
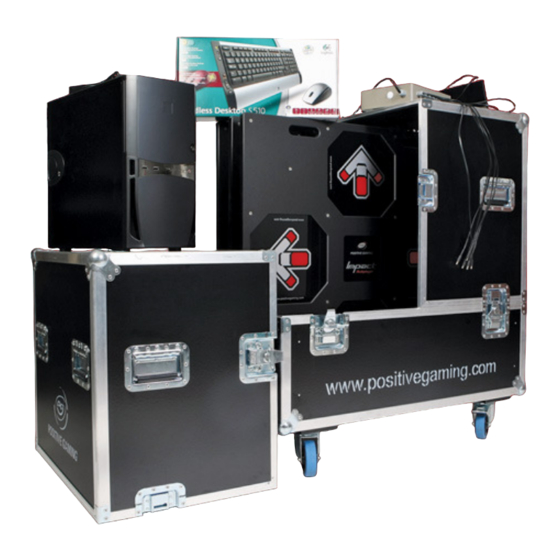
- Page 1 Positive Gaming™ iDANCE Positive Gaming™ iDANCE System Overview System Overview...
- Page 2 Status LED You have the option to connect up to You have the option to connect up to 32 wireless Positive Gaming™ dance pads Positive Gaming™ dance pads. When the power switch is in the ‘on’ position, a green light the ‘on’...
- Page 3 Up, Down, Up, Down, Left, Right Left, Right Back ‘OK’ button ‘OK’ button - /+ volume /+ volume Assist & Assist & Rhythm Rhythm Freeze Connection & Connection & battery indicators battery indicators The game is controlled with the use of the wireless The game is controlled with the use of the wireless remote control.
- Page 4 ‘1’ & ‘2’ Buttons Connection & battery indicator You can sync the remote to the system by You can sync the remote to the system by pressing the ‘1’ and ‘2’ buttons simultaneously until the 4 connection indicators start blinking until the 4 connection indicators start blinking slower.
- Page 5 Press the ‘OK’ button on your remote to button on your remote to continue.
- Page 6 Your Your Logo Logo If desired, a personalized personalized logo can be placed in the subsequent screen. subsequent screen.
- Page 7 In the Main Menu you can select individual songs in you can select individual songs in ‘Multiplayer’, set up a preset selection of songs in set up a preset selection of songs in ‘Playlist’ or make advanced selections in or make advanced selections in ‘System Settings Settings’.
- Page 8 If you select ‘Multiplayer’ with the with the ‘OK’ button you will go to the songwheel where you can select a song by to the songwheel where you can select a song by pressing the up and down arrows and pressing pressing the up and down arrows and pressing ‘OK’...
- Page 9 Pressing the ‘Option Button’ Option Button’ in the songwheel will give you access to an additional menu with options to sort you access to an additional menu with options to sort the song list and to activate the assisting tools. the song list and to activate the assisting tools.
- Page 10 Once the song is selected, you can navigate to the Once the song is selected, you can navigate to the select up to 3 difficulty levels by pressing the right select up to 3 difficulty levels by pressing the right arrow.
- Page 11 During game play, all players get During game play, all players get direct, real-time feedback on timing and accuracy. feedback on timing and accuracy. The top of the screen displays a time bar and the ranking of the top screen displays a time bar and the ranking of the top performing players.
- Page 12 If more than one difficulty level is chosen, the player scoring boxes If more than one difficulty level is chosen, the player scoring boxes automatically align to the column of arrows that they are following. automatically align to the column of arrows that they are following. In this instance, all of the blue boxes are those of the players In this instance, all of the blue boxes are those of the players following the arrows in the left column.
- Page 13 Again, the score boxes will automatically be arranged so the will automatically be arranged so the feedback stars will be the closest to the level chosen. This allows feedback stars will be the closest to the level chosen. This allows players to easily see how they are performing relative to other players to easily see how they are performing relative to other players on the same level and it prevents players from having to...
- Page 14 Pad # Step timing feedback Combo Active pad indicator Percentage accuracy Comprehensive, easy to understand scoring system: Comprehensive, easy to understand scoring system: Three yellow stars Perfect Two green stars Great One blue star Good Three black stars with red border Three black stars with red border Miss Stars on the left indicate that the step was too early while...
- Page 15 After every song, players can scroll through three After every song, players can scroll through three different individual results screens by stepping on the left different individual results screens by stepping on the left and right arrows on the dance pads. The player rankings and right arrows on the dance pads.
- Page 16 Choose ‘Playlist’ to create a preset song list. to create a preset song list.
- Page 17 Playlist settings can be adjusted according to the needs Playlist settings can be adjusted according to the needs of the group. of the group.
- Page 18 With the ‘Options’ button in button in ‘Playlist’, you can set the number of difficulty levels and size of the dificulty range. number of difficulty levels and size of the dificulty range.
- Page 19 For advanced settings within iDANCE, select ‘ For advanced settings within iDANCE, select ‘System Settings’ Settings’...
- Page 20 Various game settings can be adjusted by selecting Various game settings can be adjusted by selecting ‘Gameplay’ from the ‘System Settings’ ‘System Settings’ menu.
- Page 21 In ‘Gameplay’, you can set the following: you can set the following: -The number of decimals the displayed score contains The number of decimals the displayed score contains -The amount of time before a timeout screen disappears The amount of time before a timeout screen disappears -The interval between advice screens The interval between advice screens -The brightness of the background...
- Page 22 The syncronization of the audio and video elements The syncronization of the audio and video elements within the game can be adjusted by selecting within the game can be adjusted by selecting ‘Synchronization’ from the from the ‘System Settings’ menu.
- Page 23 To adjust the audio synchronization, select To adjust the audio synchronization, select ‘Input Adjustment’ and either manually adjust it using the up and either manually adjust it using the up and down arrows or automatically adjust it by stepping on and down arrows or automatically adjust it by stepping on pad 1 in sync with the audio indicator that plays.
- Page 24 To adjust the video elements (the timing of the arrows To adjust the video elements (the timing of the arrows within the game), select ‘Video Adjustment’ ‘Video Adjustment’ and make manual adjustments using the up and down arrows until manual adjustments using the up and down arrows until the sound coincides with the disappearance and the sound coincides with the disappearance and reappearance of the arrow...
- Page 25 Select ‘Audio’ to make adjustments to the audio settings to make adjustments to the audio settings within the game. within the game.
- Page 26 Under the ‘Audio Settings’ ‘Audio Settings’ menu, you can preset the volume and the audio balance or you can mute all audio volume and the audio balance or you can mute all audio elements within the game. elements within the game.
- Page 27 Select ‘Video’ to make adjustments to the video settings to make adjustments to the video settings within the game. within the game.
- Page 28 Under ‘Video Settings’, you can select the aspect ratio you can select the aspect ratio that matches the video device (flat screen or projector) that matches the video device (flat screen or projector) that you are using to display the game. You can also that you are using to display the game.
- Page 29 To sync the wireless remote control to the system, select To sync the wireless remote control to the system, select ‘Register Remote Control’ from the ‘System Settings’ menu. The initial registration of the remote must be done menu. The initial registration of the remote must be done in the ‘System Settings’...
- Page 30 To sync the remote, simulanteously press the To sync the remote, simulanteously press the ‘1’ and ‘2’ buttons on your remote and then press buttons on your remote and then press ‘OK’ to start detection. detection.
- Page 31 The four connection indicator lights will start flashing The four connection indicator lights will start flashing slower when the remote has been connected. slower when the remote has been connected. If less then four lights flash, it is indicative of low battery If less then four lights flash, it is indicative of low battery power and the remote batteries should be replaced.
- Page 32 Once settings have been adjusted, select Once settings have been adjusted, select ‘Save Settings’ to save your ammendments to the disc. to save your ammendments to the disc.
- Page 33 Press ‘OK’ to confirm saving the new settings to the disc. to confirm saving the new settings to the disc.
- Page 34 To restore saved settings, select To restore saved settings, select ‘Reload Settings’ from the ‘System Settings’ ‘System Settings’ menu.
- Page 35 Press ‘OK’ to confirm saving the restored settings to the to confirm saving the restored settings to the disc. disc.
- Page 36 Choose ‘System Maintenance’ ‘System Maintenance’ under the ‘System Settings’ menu to restore original factory settings or to menu to restore original factory settings or to retreive data (from a USB drive) for software updates. retreive data (from a USB drive) for software updates.
- Page 37 Choose ‘Factory Defaults’ ‘Factory Defaults’ to restore original factory settings. settings. Choose ‘Copy log files’ to retrieve system data from a to retrieve system data from a USB drive USB drive...
- Page 38 Select ‘Credits’ to view software version details or to to view software version details or to view software creation credits. view software creation credits.
- Page 39 Have fun playing iDANCE! Have fun playing iDANCE!
Need help?
Do you have a question about the iDANCE and is the answer not in the manual?
Questions and answers