Table of Contents
Advertisement
Quick Links
Advertisement
Table of Contents

Summary of Contents for EM EPURE Series
- Page 2 INFORMATION ELECTRIC MOTION ZAC VIA DOMITIA 280 Rue du Trident 34740 VENDARGUES FRANCE +33 467 411 090 www.electric-motion.fr emotion.sav@gmail.com manon.zorzi@electric-motion.fr info@electric-motion.fr These informations are not contractual and can be changed without any notice. USER MANUAL - 2020...
-
Page 3: Table Of Contents
3.8 Parts and consumables............12 Table of contents 1. 1. Manual introduction ..............5 3.9 Operation under extreme conditions ........12 1.1 Important message from Electric Motion........ 5 3.10 Reception of the motorcycle ..........12 1.2 About this manual ..............6 4. - Page 4 7.4 Turn signals ................18 9.9 Motorcycle storage ............... 36 7.5 Left-hand side handlebars switches ........19 10. Setting the motorcycle controls ..........37 7.6 Main magnet switch and map button ........19 7.7 Side stand ................20 7.8 Vue d’ensemble du tableau de bord ........20 7.9 Battery pack ................
-
Page 5: Manual Introduction
Because the Electric Motion team is continuously improving their 1. 1. Manual introduction products, it is possible that some information contained in this manual might change due to updates. If you have any doubt, do not 1.1 Important message from Electric Motion hesitate to check our website www.electric-motion.fr and download the latest version of the manual. -
Page 6: About This Manual
1.2 About this manual This manual only includes all the operating and maintenance information for the Epure model of the Electric Motion brand. Under no circumstances should these instructions be used for the maintenance of other models of the brand. Keep the user manual in an easily accessible location, so that it is close to hand when required. -
Page 7: Safety Instructions
2.2 Operating information 2. Safety instructions In order to guarantee a safe operation of the motorcycle, it is 2.1 Regulatory use forbidden to carry out any modification on the vehicle. The Electric Motion Epure has been designed and built to withstand For example, it is formally prohibited to use the vehicle if the mechanical stress resulting from road and off-road use. -
Page 8: Protective Clothing
2.3 Protective clothing 2.4 Environment To reduce the risks of potential injury while riding an Epure In order to guarantee the durability of motorcycle driving, it is motorcycle, on road or off road, it is necessary to be equipped with necessary to respect the rules of goodwill on the road with other all compulsory protective clothing. -
Page 9: Location Of Important Labels
2.5 Location of important labels Never remove the warning labels. They allow the driver to avoid getting injured by exposing himself to a danger that cannot be Safety instructions are present in various places on the motorcycle. recognized without the presence of these stickers. They allow the user to protect himself from certain risks associated with the maintenance of the motorcycle and to preserve the 2.6 Fire hazard... -
Page 10: Important Observations And General Information
3.3 Vehicle range 3. Important observations and general information The Epure range is defined as the distance the vehicle travels on a 3.1 Emission information single full charge of the battery. It is then easy to understand that the range of the vehicle depends The development of the Epure by Electric Motion has made it on how it is used. -
Page 11: Transport Of The Vehicle
3.5 Spare parts and accessories The range values in this manual are measured according to different standards, which may vary depending on the country of For safety reasons, we recommend that users of Epure only use use. spare parts and accessories authorized and recommended by Electric-Motion and have them fitted by a professional. -
Page 12: Power Supply
3.7 Power supply The battery life of the Epure model depends on the operating temperature: Modèle Epure Epure Epure Epure Lite Sport Race Escape Operating -15°C -10°C 0°C 25°C 40°C 55°C Tension Min: 42V / Nom: 50.4V / Max : ≈58V temperature (5°F) (14°F) -
Page 13: Vehicle Identification
4.3 Engine number (references) 4. Vehicle identification 4.1 Chassis number 4.2 European certification label 4.4 Battery number (references) USER MANUAL - 2020... -
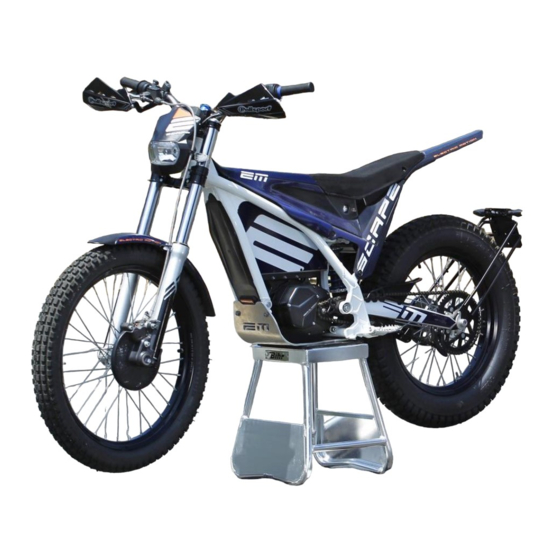
Page 14: Overall View Of The Vehicle
5. Overall view of the vehicle 5.1 Right view 5.2 Left view USER MANUAL - 2020... -
Page 15: Technical Data
6.3 Fork 6. Technical data EPURE Lite / ESCAPE : TECH Steel Ø 39 mm 6.1 Engine EPURE Sport / EPURE Race : M4 Aluminium Air Ø 39 mm BLDC permanent magnet Motor type 6.4 Shock absorber motor Nominal power 6 kW Peak power 11 kW... -
Page 16: Controls And Components
7.2 Throttle grip 7. Controls and Components The throttle grip is located on the handlebars right-hand side. 7.1 Front/rear brake system and adjustment The front brake lever is located on the handlebars right-hand side. The rear brake pedal is located near to the right foot peg. Throttle Front brake lever... -
Page 17: Lighting System
7.3 Lighting system Taillight : The headlight is installed on the forks located on the vehicle front and the taillight is installed on the rear subframe of the vehicle. Electric Motion advises to always have the lights turned on. Headlight : Make sure that the lighting system is always in working order. -
Page 18: Turn Signals
7.4 Turn signals Rear turn signals : Front turn signals : USER MANUAL - 2020... -
Page 19: Left-Hand Side Handlebars Switches
7.5 Left-hand side handlebars switches 7.6 Main magnet switch and map button Magnet Map button switch On the left side of the handlebar, the magnet switch is needed to switch ON the motorcycle. When the magnet is installed, the motorcycle is ON. Cluster switch ON. -
Page 20: Side Stand
7.7 Side stand 7.8 Vue d’ensemble du tableau de bord Right and left turn signals indicator Low battery Indicator High temperature indicator Headlight high beam Indicator “Ready to ride” Indicator System warning indicator Stand Speed (km/h à mph : 10sec on MODE button) Battery charge indicator Total motorcycle mileage or trip odometer Select button... -
Page 21: Battery Pack
7.9 Battery pack It is important to note that the maximum capacity of the battery will be obtained after about 10 cycles of full charge / discharge of the vehicle. The battery pack is dimensioned to achieve the best possible reliability / performance ratio. - Page 22 Battery management system (BMS) Battery charge level The BMS (battery management system) is an internal component of The battery pack is connected to the dashboard and therefore the battery pack. It allows the management and the control of all allows the display of the state of charge directly on the dashboard. the battery cells during charging and discharging of the vehicle.
- Page 23 Battery level indicator OFF ROAD version (hors UE) When this indicator light turns on, the battery is in low voltage, which means that the motorcycle can cut off in order to prevent any damages to the cells. It is important to avoid excessive speeds and abrupt accelerations when the low battery indicator lights up and to reach a charging station as fast as possible.
-
Page 24: Battery Charger
7.10 Battery charger Use the battery charger only with an Electric Motion battery pack. Use the battery charger only by connecting it to a safe electric The Epure model can be delivered with 3 different types of battery socket in accordance with the regulations in force in the country of chargers with different charge speeds: a 10A charger, a 15A charger use. -
Page 25: Commissioning
Install the again the handlebar holder and the 4 M8 screw 8. Commissioning with a 6mm allen key, tightening them at 20 Nm and taking care of the position of the handlebar. 8.1 Preparation on receipt of the motorcycle in a shipping box On receipt of the vehicle, the handlebar is disassembled. -
Page 26: Instructions For Initial Commissioning
8.2 Instructions for initial commissioning no way a breakdown. After charging the battery, full power will be available again. Before using the motorcycle, the user must carefully read the entire user manual. When the battery has been over discharged, the motorcycle will Because driving an electric motorcycle is a new driving experience, a not start charging straight away. -
Page 27: Battery Charging Procedure
8. Battery Charging Procedure Plug the charger on the wall plug. The procedure for charging the vehicle being meticulous, it is important to be familiar with this procedure before the first charge of the battery. The battery must be charged over a temperature range from 0°C to 40°C. - Page 28 Plug the charger to the battery When the connector is inserted in the battery, a “click” can be Epure Escape heard indicating that the battery has switched to a charging mode. The battery will then start charging automatically. When switching to charging mode, both charger’s LEDs will be red.
- Page 29 Disconnect the charger from the battery. When the motorcycle is charging, do not turn on the motorcycle using the ignition key, it would immediately stop the charging process. Regardless of the charger used, do not leave the battery charging for too long, otherwise damage may occur. If the battery has a failure, the charger’s LED n°2 will not be red but green indicating that the battery is not charging.
-
Page 30: Operating The Motorcycle
9. Operating the motorcycle 9.1 Inspection before use It is important that the user of the ETrek motorcycle checks that the condition of the vehicle is intact and that it can be safely used before each journey. In order to be used, the motorcycle must be in perfect technical condition. -
Page 31: Starting The Motorcycle
9.2 Starting the motorcycle The motorcycle is now ON, in security map. Switch on the battery by pushing main switch Then push the map button to be in the first map and change then as desired wth map button. Epure Battery Escape battery Map button selection... -
Page 32: Motor's Behavior Adjustment
9.3 Motor’s behavior adjustment EPURE Lite, Sport, Race / 1 - TRIAL 1 (GREEN LED) The motorcycle is equipped with 3 driving maps wich you can select by the map button. TRIAL 1 map is dedicated to hard conditions and where traction is needed. -
Page 33: Braking
9.5 PRB & PELS (option) The front brake lever, located on the right hand side of the To be perfectly adapted to trial driving, the EM trial has a PELS handlebars, brakes only the front wheel. (Progressive Electronic Lever Switch). -
Page 34: Clutch (Race Model)
Shift PELS – PRB : 9.6 Clutch (RACE model) To use the lever in PELS or PRB mode depending on what you want, The RACE model is equipped with multi-dic clutch with hydraulic you need : command who allow to uncouple the motor from the transmission. Remove the cover It can be very useful for trial, but it can be dangerous for amateur Remove the “shunt”... -
Page 35: Stopping Your Motorcycle
9.7 Stopping your motorcycle Do not clean the handlebars directly with a high pressure To turn off the vehicule, follow the procedure below : washer. Remove the magnet switch from his support. Switch off the battery (the LED around the battery switch igniton will goes to OFF). -
Page 36: Motorcycle Storage
9.9 Motorcycle storage Place the battery pack in an environment not exposed to direct sunlight and at temperatures below 25 ° C. Recharge the battery every month if not in use. In case of long-term storage of the vehicle, it is important to apply additional measures. -
Page 37: Setting The Motorcycle Controls
For the lever positioning, you have to adjust these 2 10. Setting the motorcycle controls screws. It is important to find your place on the motorcycle before starting to drive. Being at ease on your vehicle makes it possible to travel safely on public roads and to have a fluid riding style. - Page 38 Handlebars position adjustments The handlebars can be adjusted by untightening the 4 screws Please, frequently check that the screws holding the holding the handlebars on the bar mounts. handlebars on the bar mounts are tight. Loosen the 4 screws with 6mm Allen. Please, make sure that the handlebars are centered on the bar Adjust the Handlebar.
- Page 39 11. Maintenance 11.1 Front fork dismounting – mounting Dismounting Stop the motorcycle ( 9.5). Install the motorcycle on a stand ( 12.1). Remove the front plate ( 11.1). Install the front caliper with the M8 screws and a 5mm Remove the front mudguard ( 15.1).
- Page 40 11.2 Clean the fork 11.6 Air pressure adjustment It’s necessary to clean the fork after each use, to avoid any damaged Stop the motorcycle ( 9.5). seal. Install the motorcycle on a stand, wheels in air ( 12.1). Remove the upper cap of the fork with hand (it’s possible Stop the motorcycle ( 9.5).
- Page 41 - Less pressure = Less harder in compression and less faster in Basic settings: extension Extension : 10 clicks opened from closed position - More pressure = More harder in compression and more faster in extension Caoutchouc ring 11.3 Extension adjustment This ring is install to verify the maximal stroke of the fork.
- Page 42 12.1 Clutch oil maintenance (RACE) Wait the complete oil change Clean the magnet on the drain plug Remove the battery Install again the drain plug with the cooper washer, screw Process can be done with or without the engine plate tightening 17Nm protector mounted Fill the transmission with 260 ml of oil 75W...
- Page 43 INDEX Adapt the bike to the driver............. 37 Technical data.................. 15 Stop and crouch................35 Top up the brake fluid level............. 67 Braking..................33, 34 Using the vehicle................30 Charging the battery................ 27 View of the vehicle Check before use................30 Right view..................
Need help?
Do you have a question about the EPURE Series and is the answer not in the manual?
Questions and answers