Sony Cyber-Shot DSC-HX10V Instruction Manual
18.2 megapixels exmor r™, 16x optical zoom, full hd, 3d, 7.5cm lcd, intelligent sweep panorama, gps log recording
Hide thumbs
Also See for Cyber-Shot DSC-HX10V:
- Instruction manual (567 pages) ,
- User manual (273 pages) ,
- Product manual (73 pages)

Related Manuals for Sony Cyber-Shot DSC-HX10V


Summary of Contents for Sony Cyber-Shot DSC-HX10V
- Page 1 Digital Still Camera / Instruction Manual Цифровой фотоаппарат / Инструкция по эксплуатации RU Цифровий фотоапарат / Посібник з експлуатації DSC-HX10/HX10V 4-412-225-42(1)
-
Page 2: Checking The Supplied Items
“Cyber-shot User Guide” is an on-line manual. Refer to it for in-depth instructions on the many functions of the camera. 1 Access the Sony support page. 2 Select your country or region. 3 Search for the model name of your camera within the Checking the supplied items The number in parentheses indicates the number of pieces. -
Page 3: Important Safety Instructions
Owner’s Record The model and serial numbers are located on the bottom. Record the serial number in the space provided below. Refer to these numbers whenever you call your Sony dealer regarding this product. Model No. DSC-HX10/DSC-HX10V Serial No. _____________________________ Model No. -
Page 4: Battery Pack
• Be sure to charge the battery pack using a genuine Sony battery charger or a device that can charge the battery pack. • Keep the battery pack out of the reach of small children. • Keep the battery pack dry. -
Page 5: For Customers In The U.s.a
The number below is for the FCC related matters only. Regulatory Information Declaration of Conformity Trade Name: SONY Model No.: DSC-HX10V Responsible Party: Sony Electronics Inc. Address: 16530 Via Esprillo, San Diego, CA 92127 U.S.A. Telephone No.: 858-942-2230 This device complies with Part15 of the FCC Rules. Operation is subject to the... -
Page 6: For Customers In Canada
For Customers in Europe Hereby, Sony Corporation, declares that this DSC-HX10V Digital Still Camera is in compliance with the essential requirements and other relevant provisions of the Directive 1999/5/EC. For details, please access the following URL: http://www.compliance.sony.de/... -
Page 7: Notice For Customers In The United Kingdom
If the plug supplied with this equipment has a detachable fuse cover, be sure to attach the fuse cover after you change the fuse. Never use the plug without the fuse cover. If you should lose the fuse cover, please contact your nearest Sony service station. -
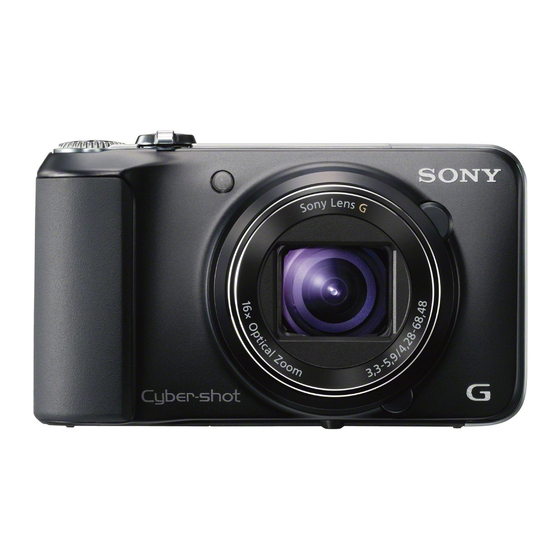
Page 8: Identifying Parts
Identifying parts A Shutter button B Mode dial (Intelligent Auto)/ (Superior Auto)/ (Background Defocus)/ (Program Auto)/ Selection)/ (Manual Exposure Shooting)/ (iSweep Panorama)/ (Movie Mode)/ (3D Shooting) C For shooting: W/T (Zoom) lever For viewing: (Index) lever/ (Playback zoom) lever D Self-timer lamp/Smile Shutter lamp/AF illuminator E ON/OFF (Power) button F Power/Charge lamp... -
Page 9: Inserting The Battery Pack
(In-Camera Guide/Delete) button S MENU button T Tripod receptacle • Use a tripod with a screw less than 5.5 mm (7/32 inches) long. Otherwise, you cannot firmly secure the camera, and damage to the camera may occur. Inserting the battery pack Open the cover. -
Page 10: Charging The Battery Pack
Charging the battery pack For customers in the USA and Canada For customers in countries/regions other than the USA and Canada Connect the camera to the AC Adaptor (supplied), using the micro USB cable (supplied). Connect the AC Adaptor to the wall outlet (wall socket). The Power/Charge lamp lights orange, and charging starts. -
Page 11: Charging Time (Full Charge)
(wall socket) immediately to disconnect from the power source. • When charging is finished, disconnect the AC Adaptor from the wall outlet (wall socket). • Be sure to use only genuine Sony brand battery packs, micro USB cable (supplied) and AC Adaptor (supplied). Charging time (Full charge) The charging time is approximately 175 min. -
Page 12: Charging By Connecting To A Computer
Charging by connecting to a computer The battery pack can be charged by connecting the camera to a computer using a micro USB cable. Note • Note the following points when charging via a computer: – If the camera is connected to a laptop computer that is not connected to a power source, the laptop battery level decreases. - Page 13 • The number of images that can be recorded is for shooting under the following conditions: – Using Sony “Memory Stick PRO Duo” (Mark2) media (sold separately) – The battery pack is used at an ambient temperature of 25°C (77°F).
-
Page 14: Supplying Power
Supplying power The camera can be supplied with power from the wall outlet (wall socket) by connecting to the AC Adaptor, using the micro USB cable (supplied). You can import images to a computer without worrying about draining the battery pack by connecting the camera to a computer using the micro USB cable. -
Page 15: Memory Cards That Can Be Used
Memory cards that can be used Memory card Memory Stick PRO Duo Memory Stick PRO-HG Duo Memory Stick Duo Memory Stick Micro (M2) Memory Stick Micro (Mark2) SD memory card SDHC memory card SDXC memory card microSD memory card microSDHC memory card •... -
Page 16: Setting The Clock
Setting the clock ON/OFF (Power) Press the ON/OFF (Power) button. Date & Time setting is displayed when you turn on the camera for the first time. • It may take time for the power to turn on and allow operation. Select a desired language. -
Page 17: Shooting Still Images/Movies
Shooting still images/movies : Intelligent Auto : Movie Mode Shooting still images Press the shutter button halfway down to focus. When the image is in focus, a beep sounds and the z indicator lights. Press the shutter button fully down to shoot an image. Shooting movies Press the MOVIE (Movie) button to start recording. -
Page 18: Viewing Images
Viewing images (Playback) (Delete) Press the • When images on a memory card recorded with other cameras are played back on this camera, the registration screen for the data file appears. Selecting next/previous image Select an image by pressing B (next)/b (previous) on the control wheel or by turning the control wheel. -
Page 19: In-Camera Guide
In-Camera Guide This camera is equipped with a built-in instruction guide. This allows you to search the camera’s functions according to your needs. MENU Press the MENU button. Select the desired MENU item, then press the / (In- Camera Guide) button. The operation guide for the selected item is displayed. -
Page 20: Control Wheel
Control wheel DISP (Display Setting): Allows you to change the screen display. (Cont. Shooting/Self-Timer): Allows you to use the self-timer and burst shooting mode. (Photo Creativity): Allows you to change [Brightness], [Color], [Vividness] and [Picture Effect] when shooting mode is set to [Intelligent Auto] or [Superior Auto]. - Page 21 When [Partial Color] is selected in Picture Effect, selects Extracted Color the color to extract. When [Watercolor] is selected in Picture Effect, sets the Watercolor Effect effect level. When [Illustration] is selected in Picture Effect, sets the Illustration Effect effect level. Adjust the exposure manually.
- Page 22 Viewing Slideshow Send by TransferJet Delete Retouch Picture Effect 3D Viewing View Mode Display Cont. Shooting Group Protect Print (DPOF) Rotate In-Camera Guide Select a method of continuous playback. Transfer data by closely aligning two products equipped with TransferJet. Delete an image. Retouch an image using various effects.
-
Page 23: Setting Items
Setting items If you press the MENU button while shooting or during playback, (Settings) is provided as a final selection. You can change the default settings on the (Settings) screen. Movie format/AF Illuminator/Grid Line/Clear Image Zoom/Digital Zoom/Wind Noise Reduct./Micref Level/ Shooting Settings Red Eye Reduction/Blink Alert/Write Date/Disp. -
Page 24: Install Pc Application (Windows)
• “PlayMemories Home” is not compatible to Mac OS. If you play back images on a Mac, use the applications that are installed on your Mac. For details, see http://www.sony.co.jp/imsoft/Mac/ Features of “PlayMemories Home” Below are examples of the functions available when you use “PlayMemories Home”. -
Page 25: Number Of Still Images And Recordable Time Of Movies
Number of still images and recordable time of movies The number of still images and recordable time may vary depending on the shooting conditions and the memory card. Still images Capacity Size 16:9(13M) Movies The table below shows the approximate maximum recording times. These are the total times for all movie files. -
Page 26: Notes On Using The Camera
Notes on using the camera Functions built into this camera • This manual describes each of the functions of TransferJet compatible/ incompatible devices, 1080 60i-compatible devices and 1080 50i-compatible devices. – To determine whether your camera supports the GPS function, check the model name of your camera. - Page 27 Notes on recording/playback • Before you start recording, make a trial recording to make sure that the camera is working correctly. • The camera is neither dust-proof, nor splash-proof, nor water-proof. • Avoid exposing the camera to water. If water enters inside the camera, a malfunction may occur.
- Page 28 Unauthorized recording of such materials may be contrary to the provisions of the copyright laws. No compensation for damaged content or recording failure Sony cannot compensate for failure to record or loss or damage of recorded content due to a malfunction of the camera or recording media, etc. Cleaning the camera surface Clean the camera surface with a soft cloth slightly moistened with water, then wipe the surface with a dry cloth.
-
Page 29: Specifications
Total pixel number of camera: Approx. 18.9 Megapixels Effective pixel number of camera: Approx. 18.2 Megapixels Lens: Sony G 16× zoom lens f = 4.28 mm – 68.48 mm (24 mm – 384 mm (35 mm film equivalent)) F3.3 (W) – F5.9 (T) While shooting movies (16:9): 25 mm –... - Page 30 [Input and Output connectors] HDMI connector: HDMI mini jack Micro USB connector: USB communication USB communication: Hi-Speed USB (USB 2.0) [Screen] LCD screen: 7.5 cm (3.0 type) TFT drive Total number of dots: 921 600 dots [Power, general] Power: Rechargeable battery pack NP-BG1, 3.6 V NP-FG1 (sold separately), 3.6 V AC Adaptor AC-UB10/UB10B,...
- Page 31 “Memory Stick Duo,” “Memory Stick Micro” • “AVCHD” and “AVCHD” logotype are trademarks of Panasonic Corporation and Sony Corporation. • Windows is registered trademark of Microsoft Corporation in the United States and/or other countries. • Mac is registered trademark of Apple Inc.
- Page 34 Адаптер переменного тока Дата изготовления изделия.
- Page 46 v V b B...
- Page 64 × × × ×...
- Page 82 v V b B...
- Page 100 × × × ×...
- Page 104 ©2012 Sony Corporation Printed in China...
Need help?
Do you have a question about the Cyber-Shot DSC-HX10V and is the answer not in the manual?
Questions and answers