Table of Contents
Advertisement
Quick Links
Advertisement
Table of Contents

Subscribe to Our Youtube Channel
Summary of Contents for QEO FR 77-MM
- Page 1 FR 77-MM & FR 77-MM Tracking USER MANUAL www.geo-fennel.com...
- Page 2 Precision by tradition. 1. Supplied with 2. Features 3. Power supply 4. Operation 5. Safety notes SUPPLIED WITH · Laser receiver FR 77-MM · 4 x AA alkaline batteries · Clamp for levelling rod · Special mount · User manual...
- Page 3 3 accuracy settings ± 2 mm / ± 5 mm / ± 9 mm mm-indication accuracy ± 1 mm Working range with class 2 laser 150 m Working range with class 3R laser 350 m Length of the receiving window 125 mm Length of the receiving area for mm-indication 100 mm...
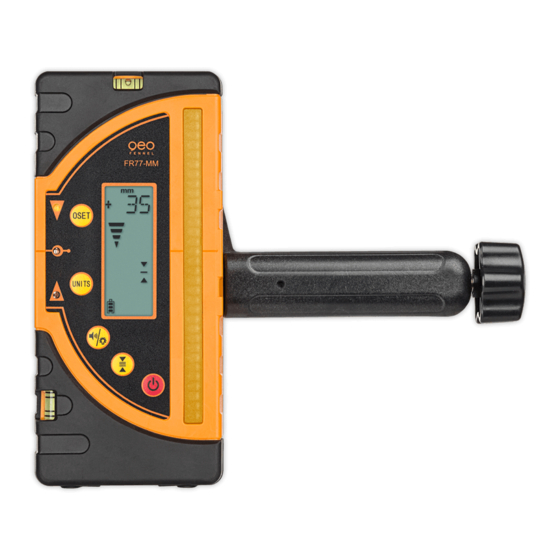
- Page 4 FEATURES Bubble vial Receiving window Magnetic strip 0SET button (Offset) LED indicators Front LCD Display Sound / illumination Units ON/OFF button Power ON/OFF Accuracy button Bubble vial Magnetic strip Loudspeaker Clamp alignment guide Clamp thread Side LED indicators 0-position (reference point) Rear LCD Display Rear LED indicatiors Battery compartment...
- Page 5 Units of measure Sign +/- Numerical indication 0SET symbol 0-position (reference point) Accuracy symbol Illumination symbol Battery status indicator Sound symbol ON/OFF button Power ON/OFF the receiver Accuracy button Select accuracy setting UNITS button Select units of measure Sound/illumination button Sound and/or illumination ON/OFF 0SET button Set a relative ZERO position...
-
Page 6: Power Supply
Always remove the batteries if the receiver will not be used for a long period of time to avoid leakage. BATTERY STATUS INDICATOR The FR 77-MM front LCD display has four power status symbols. The receiver will automatically power off when the batteries are empty. -
Page 7: Operation
OPERATION POWER ON Press the ON/OFF button once to power on the receiver. The LCD display will initialise taking about 0.5 seconds when all the display symbols are illuminated (see diagram, left). The receiver is now ready for use (see diagram, right). SELECT ACCURACY SETTING Power on the unit and select the receiving accuracy fine, normal or coarse by pressing the „accuracy button“... - Page 8 SWITCH ON/OFF THE DISPLAY ILLUMINATION Power on the receiver and keep the button „Sound/illumination“ pressed until the illumination is on. SELECT THE UNITS Power on the receiver and press the „UNITS“ button sucessively until the required unit symbol appears in the display. Millimetre Centimetre Inch...
- Page 9 RECEIVE A LASER BEAM Power on the receiver and make all required settings (i. e. accuracy fine, sound high). Carefully move the receiver up and down to detect the laser beam. Indication 1 Indication 2 Indication 3 The laser beam is high The laser beam is low The LED „0-position“...
- Page 10 MM INDICATION If the reference level of the receiver is e. g. 18 mm below the laser beam this height difference will be displayed by an exact numerical value (see the left diagram). further examples The laser beam is The laser beam is The laser beam is exactly on-level.
- Page 11 APPLICATION Connect the clamp to the receiver for use with a laser pole, levelling staff or similar accessory. For optimum accuracy always level the bubble vials on the receiver before taking measurements. SPECIAL MOUNT To increase the versatility and scope of the receiver a special mount is provided (see illustrations).
-
Page 12: Safety Notes
SAFETY NOTES SAFETY INSTRUCTIONS · Follow up the instructions given in the user manual. · Do not stare into the beam. The laser beam can lead to eye injury. A direct look into the beam (even from greater distance) can cause damage to your eyes. ·... -
Page 13: Exceptions From Responsibility
WARRANTY This product is warranted by the manufacturer to the original purchaser to be free from defects in material and workmanship under normal use for a period of two (2) years from the date of purchase. During the warranty period, and upon proof of purchase, the product will be repaired or replaced (with the same or similar model at manufacturers option), without charge for either parts or labour. - Page 14 geo-FENNEL GmbH Technische Änderungen vorbehalten. Kupferstraße 6 All instruments subject to technical changes. D-34225 Baunatal Sous réserve de modifications techniques. Tel. +49 561 / 49 21 45 +49 561 / 49 72 34 info@geo-fennel.de 04/2014 www.geo-fennel.de Precision by tradition.
Need help?
Do you have a question about the FR 77-MM and is the answer not in the manual?
Questions and answers