Advertisement
Advertisement
Table of Contents

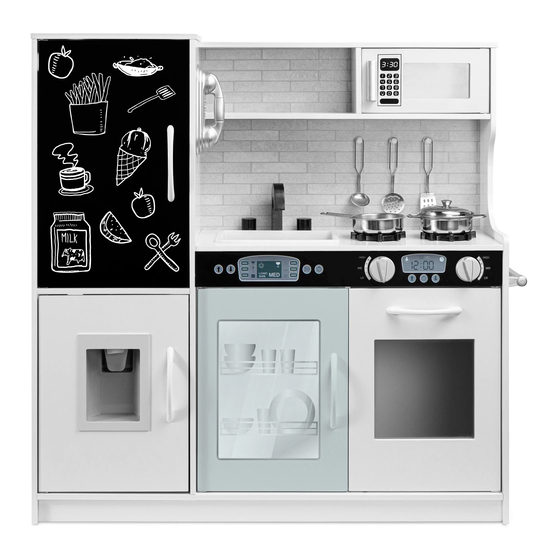
Summary of Contents for Best Choice Products SKY5969
- Page 1 INSTRUCTION MANUAL Kitchen Playset SKY5969 + SKY6009 Ver. 1...
-
Page 2: Tools Required
NOTICE Please retain these instructions for future reference. • This product requires adult assembly and supervision when in use. • This product is intended for indoor use only. • Do not stand on or use any part of this item as a step ladder. •... - Page 3 HARDWARE SCREW SCREW MICROWAVE LARGE HINGE HANDLE 3 PCS 22 PCS 1 PC 1 PC HANDLE DOOR CATCH DOOR INSERT FAUCET 4 PCS 5 PCS 5 PCS 1 PC TAPS SMALL HINGE SINK WAL NAIL 1 PC 5 PCS 1 PC 1 PC WALL WALL...
- Page 4 PARTS PANTRY LEFT PANTRY DIVIDER PANTRY RIGHT 1 PC 1 PC 1 PC PANTRY BACK UPPER SHELF SHELF DIVIDER 1 PC 1 PC 1 PC LOWER SHELF COUNTERTOP COUNTER PANEL 1 PC 1 PC 1 PC UPPER SHELF BACK MIDDLE SHELF BACK BASE 1 PC 1 PC...
- Page 5 PARTS SKIRT MICROWAVE SINK/OVEN DIVIDER 1 PC 1 PC 1 PC SINK CUPBOARD OVEN DOOR OVEN BACK PANEL 1 PC 1 PC 1 PC SINK BACK PANEL PANTRY DOOR REFRIGERATOR DOOR 1 PC 1 PC 1 PC OVEN SIDE PANEL PANTRY TOP ICE DISPENSER 1 PC...
-
Page 6: Before Assembly
BEFORE ASSEMBLY Insert two part B dowels into the part 5 Insert four part B dowels into the part 6 upper shelf. shelf divider. Attach one part I handle to the part 16 Insert four part B dowels into the part 8 sink cupboard door with two part F countertop. - Page 7 BEFORE ASSEMBLY Insert four part B dowels into the Attach four part X supports to the part part 12 base. 11 middle shelf back with four part C screws. Attach one part I handle to the part 17 Insert four part B dowels into the part 7 oven door with two part F screws.
- Page 8 BEFORE ASSEMBLY Insert two part B dowels into the part 9 Insert two part B dowels into the part 13 skirt. counter panel. Attach one part Z2 left holding peg and one part Z1 right holding peg with four part D screws, two screws each. Insert four part B dowels into the part 2 Insert two part B dowels into the part 22 pantry divider.
- Page 9 BEFORE ASSEMBLY Attach one part G microwave handle to Insert four part B dowels into the part 3 the part 14 microwave door with two pantry right. part F screws. Attach the part V phone receiver with Attach one part K door insert and one two part F screws.
-
Page 10: Product Assembly
BEFORE ASSEMBLY Attach one part I handle to the part 20 Attach one part I handle to the part 21 pantry door with two part F screws. refrigerator door with two part F screws. Attach one part K door insert and one Attach one part K door insert and one part H hinge peg with four part D part H hinge peg with four part D... - Page 11 PRODUCT ASSEMBLY Locate the part 2 pantry divider and Attach the part 15 sink/oven divider to insert it into the part 3 pantry right. the base with three part A screws. Attach the part 1 part pantry left with two part A screws and secure the divider with four part A screws.
- Page 12 PRODUCT ASSEMBLY Insert the part 4 pantry back between the pantry sides. Attach the shelf assembly to the part 3 pantry right and secure with two part A screws. Attach the part 23 pantry top to the pantry sides with four part A screws. Attach the part 22 oven side and secure with six part A screws.
- Page 13 PRODUCT ASSEMBLY Secure the part 10, 11, 18, and 19 back panels with eighteen part C screws and seven part S disk washers. Attach two part J door catches to the part 3 pantry right with four part D screws. Attach two part J door catches to the part 15 divider with four part D screws.
- Page 14 PRODUCT ASSEMBLY Insert the hinge peg on the part 20 pantry door into the opening on the part 23 pantry top. Insert one part N hinge peg into the opening on the part 2 pantry divider, and secure to the pantry door with two part D screws.
- Page 15 PRODUCT ASSEMBLY Insert the hinge peg on the part 21 refrigerator door into the opening on the part 2 pantry divider. Insert one part N hinge peg into the opening on the base and secure to the pantry door with two part D screws.
- Page 16 PRODUCT ASSEMBLY Insert the hinge peg on the part 16 sink cupboard door into the opening on the part 9 counter panel. Insert one part N hinge peg into the opening on the part 12 base, and secure to the part 16 cupboard door with two part D screws.
- Page 17 PRODUCT ASSEMBLY Insert the hinge peg on the part 17 oven door into the opening on the part 9 counter panel. Insert one part H hinge peg into the opening on the part 12 base, and secure to the part 17 oven door with two part D screws.
- Page 18 PRODUCT ASSEMBLY Insert the hinge peg on the part 14 microwave door into the opening on the part 5 upper shelf. Insert one part H hinge peg into the opening on the part 7 lower shelf, and secure to the part 14 oven door with two part D screws.
- Page 19 PRODUCT ASSEMBLY Combine the part P wall nail, part R wall washer, and part Q wall anchor and use a hammer to drive the nail into the wall through the opening on the part 4 pantry back. Insert the part O sink. NOTE: This step is optional...
-
Page 20: Help Center
All returns must be shipped back to the Best Choice Products Return Center at the customer’s expense. If the reason for return is a result of an error by Best Choice Products then Best Choice Products will provide a pre-paid shipping label via email. Boxes for return shipping will not be provided by Best Choice Products, and is the customer’s responsibility to either use the original shipping boxes or purchase new boxes.
Need help?
Do you have a question about the SKY5969 and is the answer not in the manual?
Questions and answers