Table of Contents
Advertisement
Quick Links
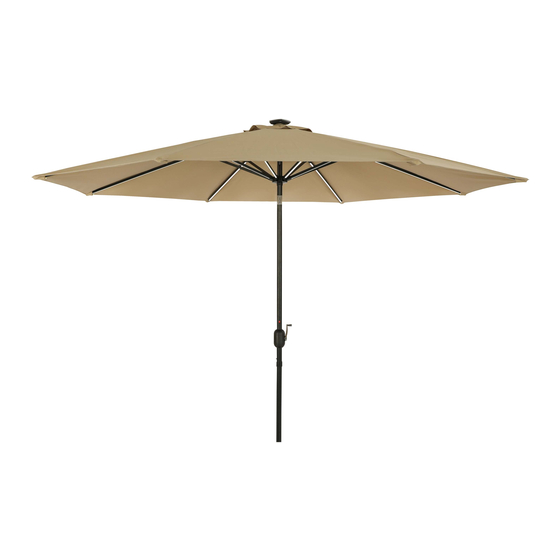
NU6854 (BLACK) / NU6855 (CHAMPAGNE) /
NU6856 (HUNTER GREEN) / NU6857 (CHAMPAGNE-TAUPE STRIPE)
NU6854 (NOIR) / NU6855 (CHAMPAGNE) / NU6856 (VERT CHASSEUR) /
NU6857 (RAYURES CHAMPAGNE-TAUPE)
CALYPSO II 11-FT
OCTAGON UMBRELLA
WITH LED STRIP LIGHTS
PARASOL OCTAGON AVEC BANDES
LUMINEUSES LED CALYPSO II 11 PIEDS
Assembly Instructions
Instructions d'assemblage
Questions, problems, missing parts?
Before returning to your retailer, call our Consumer Hotline at 1-800-759-0977, Monday – Friday, 8am – 5pm (CST).
Des questions, des problèmes, des pièces manquantes?
Avant de retourner chez votre détaillant, appelez notre ligne d'assistance aux consommateurs au 1-800-759-0977,
du lundi au vendredi, de 8 h à 17 h (HNC).
9' Auto-Tilt Solar LED Fiesta Market Umbrella
Parasol de marché Fiesta auto-inclinable LED solaire 2,7 m
NU5424CH • NU5424ST • NU5424R • NU5424TC
www.bluewaveproducts.com
Ver. 1119LP
• NU6814NB
V1: 022021
Advertisement
Table of Contents

Related Manuals for Island Umbrella NU6854


Summary of Contents for Island Umbrella NU6854
- Page 1 NU6854 (BLACK) / NU6855 (CHAMPAGNE) / NU6856 (HUNTER GREEN) / NU6857 (CHAMPAGNE-TAUPE STRIPE) NU6854 (NOIR) / NU6855 (CHAMPAGNE) / NU6856 (VERT CHASSEUR) / NU6857 (RAYURES CHAMPAGNE-TAUPE) CALYPSO II 11-FT OCTAGON UMBRELLA WITH LED STRIP LIGHTS PARASOL OCTAGON AVEC BANDES 9’ Auto-Tilt Solar LED Fiesta Market Umbrella LUMINEUSES LED CALYPSO II 11 PIEDS Parasol de marché...
-
Page 2: Safety Information
THANK YOU!/ MERCI! Thank you for purchasing this product! We work around the clock and around the globe to ensure that our products maintain the highest possible quality. However, in the rare case of issues during assembly or use of this product, please contact our Consumer Hotline at 1-800-759-0977 for immediate assistance before contacting your retailer. -
Page 3: Care And Maintenance
CARE AND MAINTENANCE/ ENTRETIEN ET MAINTENANCE • Clean with mild soap and lukewarm water, rinse, and air dry. • When not in use, close and cover umbrella with a protective cover (not included). • Allow a wet canopy to dry while in open position. •... -
Page 4: Installation And Assembly
/ CONTENU DE L'EMBALLAGE TS / CONTENU DE L'EMBALLAGE INSTALLATION AND ASSEMBLY/ INSTALLATION ET ASSEMBLAGE Bulbs/ampoule (x2), NUP0027 PARTS LIST — NU6854 (BLACK) Bulbs/ampoule (x2), NUP0027 N / CONSIGNES DE SÉCURITÉ PART PART PART ITEM ON / CONSIGNES DE SÉCURITÉ... - Page 5 / CONTENU DE L'EMBALLAGE TS / CONTENU DE L'EMBALLAGE INSTALLATION AND ASSEMBLY/ INSTALLATION ET ASSEMBLAGE Bulbs/ampoule (x2), NUP0027 LISTE DES PIÈCES — NU6854 (NOIR) Bulbs/ampoule (x2), NUP0027 N / CONSIGNES DE SÉCURITÉ DESCRIPTION NUMÉRO DES ITEM QTÉ ON / CONSIGNES DE SÉCURITÉ...
- Page 6 INSTALLATION AND ASSEMBLY/ INSTALLATION ET ASSEMBLAGE ASSEMBLY/ ASSEMBLAGE Before beginning assembly of product, make sure all parts are present. Compare parts with package contents list. If any part is missing or damaged, do not attempt to assemble the product. Estimated Assembly Time: 5 minutes. No tools required for assembly.
- Page 7 INSTALLATION AND ASSEMBLY/ INSTALLATION ET ASSEMBLAGE ASSEMBLY/ ASSEMBLAGE FERMER LE PARASOL: Tournez la manivelle dans le sens antihoraire pour remettre le parasol à une position horizontale. Continuez à tourner la manivelle dans le sens antihoraire pour refermer le parasol. FONCTIONNEMENT LUMIÈRES LED SOLAIRES: Step 5 Attach the Solar Panel ( part L ) on the top of Main Umbella ( part A ) .
- Page 8 INSTALLATION AND ASSEMBLY/ INSTALLATION ET ASSEMBLAGE BATTERY REPLACEMENT Change the batteries in the solar panel every year or when the light output is diminished • Only install new batteries of the same type in your product; (3) AA size Ni-MH 2000mAh rechargeable batteries.
- Page 9 INSTALLATION AND ASSEMBLY/ INSTALLATION ET ASSEMBLAGE BATTERY REPLACEMENT STEP 3: Place the solar panel upside down on soft, clean surface. Remove (3) screws on the bottom of the panel. STEP 4: Carefully lift the bottom panel, ensuring the wires remain intact. Gently remove the old batteries.
-
Page 10: Product Warranty
PRODUCT WARRANTY 1-YEAR LIMITED WARRANTY / 3-YEAR LIMITED WARRANTY ON BREEZ-TEX™ FABRIC This product, including aluminum ribs and pole, is warranted to the original purchaser to be free from defects in material or workmanship for a period of one (1) year from the date of the original retail purchase. Breez-Tex™... -
Page 11: Garantie Du Produit
GARANTIE DU PRODUIT GARANTIE LIMITÉE DE 1 ANNÉE / GARANTIE LIMITÉE DE 3 ANS SUR LE TISSU BREEZ-TEX™ Ce produit, y compris les baleines en aluminium et le mât, est garanti à l’acheteur d’origine contre tout défaut de matériau ou de fabrication pendant une période de un (1) an à...
Need help?
Do you have a question about the NU6854 and is the answer not in the manual?
Questions and answers