Table of Contents
Advertisement
Quick Links
Advertisement
Table of Contents

Related Manuals for teko Astra-712/4

Summary of Contents for teko Astra-712/4
- Page 1 Scientific & Development Center TEKO CONTROL PANEL Operation Manual...
-
Page 3: Table Of Contents
Content 1 Function ............................5 2 Delivery Set............................5 3 Labeling ............................6 4 Safety Instructions ..........................6 5 Device Key Data and Properties 5.1 Key Data ............................. 7 5.2 Properties ........................... 8 6 Specifications............................ 9 7 Structure ............................12 8 Terms and Definitions ........................14 9 Information Capacity ........................ - Page 4 The present operation manual is intended for description of operating principles, proper use, storage and technical maintenance of control panel Astra-712/4 and Astra-712/8 (hereinafter Control panel). List of abbreviations: CP – Control Panel BAT – Rechargeable Battery TRC - Wireless Transmitter Astra-TRC or Astra-TRC ver. M TM –...
-
Page 5: Function
- SA and LA control; - transmitting of alarm signals to CSP via relay outputs; - Voltage supply for active detectors and other units. Astra-712/4 and Astra-712/8 differ from each other by the following parameters: Astra-712/4 Astra-712/8 Number of zones:... -
Page 6: Labeling
3 Labeling 3.1 The label at the bottom of the control panel housing contains the following information: - trademark of the Manufacturer; - abbreviated name of the device; - firmware version; - month and year of manufacture (last two digits); - ingress protection level;... -
Page 7: Device Key Data And Properties
5 Device Key Data and Properties Key Data 5.1.1 Control panel provides for arming/disarming the system by 2 methods: - by means of TM identifiers or devices forming TM code, for instance, Astra-RVC (TRC is used as a ТМ identifier); - by means of control button or other devices having output with two constant states. -
Page 8: Properties
5.1.7 Control panel is protected against overheating of the transformer. Thermal protection actuat- ing temperature is 85+10°C Properties Flexibility in operating modes setting. Setting operating mode by means of jumpers or via PC. Easy to configure. Standard operating tactics and ways of notification transfer. -
Page 9: Specifications
6 Specifications Number of zones connected to the device: - Astra-712/4 ..........................4 - Astra-712/8 ..........................8 Number of relay outputs ........................ 3 Power supply from: - AC network with frequency (50 ± 1) Hz, V ............... 220 - BAT 7,2 A/h, V........................12 ... - Page 10 «+12V» output short-circuit current, mA, max ................40 «+12V» output voltage ripple, mV, max ..................100 BAT-powered operating time in stand-by mode (without outer load powering), h, min - Astra-712/4 ..........................48 - Astra-712/8 ..........................36 Battery discharge indication voltage (without mains voltage), V....................11,5±0,3 Battery voltage whereby device is switched to «sleep»...
- Page 11 Leakage resistance between Zone wires or each wire and «Ground», kOhm, min: - intrusion ............................ 20 - fire ............................. 50 Zone resistance, kOhm, in status: - «Norm» ........................…from 3 to 5 - «Violation» intrusion ................from 0 to 3 or more than 5 - «Violation»...
-
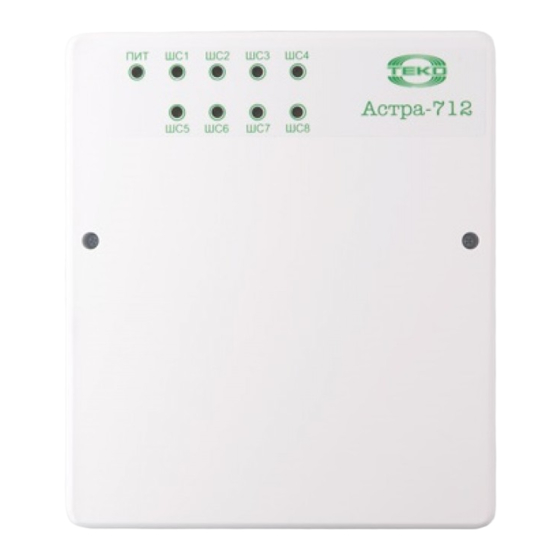
Page 12: Structure
7 Structure Control panel is designed as a block with a removable cover (Figure 1). Installed inside a block are printed circuit board (PCB) with radio elements, network transformer and fuse block for mains voltage switch. Built-in buzzer Figure 1... - Page 13 Mounted on PCB are plugs with jumpers for operating mode setting and two-color indicators for operability supervision and event indication. Mounted on PCB is a tamper switch that generates a notification on BZ and relay operated in «CSP – control» mode when opening the cover. Overall dimensions of battery compartment allow using rechargeable battery with capacity of up to 7,2 A/h.
-
Page 14: Terms And Definitions
Terms and Definitions Auto-arming – a function for one or group of intrusion-type zones, assigned to one relay, is in- tended for automatic arming on expiry of defined time period after «Alarm» event on condition of re- covery of one or group of zones to «Norm» state. Silent alarm –... - Page 15 «Any door» tactics - for Zone1 and Zone2 with exit delay time. Process of arming (exit delay time start) begins at any state of Zone. At that arming occurs on expiry of preset exit delay time if zone is in «Norm»...
-
Page 16: Information Capacity
9 Information Capacity Note – Type and number of notifications depend on set operating modes of the control panel. Table 1 – Control panel information capacity № Notification type Control panel response Relay (operating mode «CSP – alarm» by default) Relay is closed in «Armed»... - Page 17 Continuation of table 1 № Notification type Control panel response LED Indicator «Zone-x» Flashes green 1 time per 1s at «Norm» state in «Disarmed» mode Ready Does not light at transition of Zone-x parameters to “Failure” state Not ready in “Disarmed” mode Lights green at «Norm»...
- Page 18 Continuation of table 1 № Notification type Control panel response LED Indicator «POW» Lights green at presence of voltage 220 V and connected servicea- Power supply Norm ble BAT Flashes green 1 time per 1s at absence of voltage 220V and nor- BAT-powered mal BAT voltage Lights red at absence of voltage 220 V and BAT discharge below...
- Page 19 Continuation of table 1 № Notification type Control panel response Continuous sound at «Violation» state of intrusion-type zone in «Armed» mode (on expiry of entry delay time for Zone1 and/or Alarm Zone2) Intermittent sound 1 time per 2s at «Violation» state of fire-type Fire Zone Intermittent sound 2 times per 1s at «Failure»...
- Page 20 Continuation of table 1 № Notification type Control panel response Single sound impulse Zone Arming Double sound impulse Zone Disarming TM Identifier cancellation Three successive sound impulses at invalid TM identifier code Intermittent sound 1 time per 1s during entry/exit delay time Delay End of delay Short-time activation for 0,15s on expiry of exit delay time...
- Page 21 Continuation of table 1 № Notification type Control panel response Continuous sound at «Violation» state of intrusion-type zone in «Armed» mode (on expiry of entry delay time for Zone1 and/or Alarm Zone2) Intermittent sound 1 time per 2s at «Violation» state of fire-type Fire Zone Continuous sound at «Failure»...
- Page 22 Continuation of table 1 № Notification type Control panel response Disarmed Not lit, when at least one Zone is disarmed Lights constantly at «Norm» state of Zone in «Armed» mode Armed Flashes 1 time per 1s at «Violation» state of at least one zone in Alarm, Fire, Failure, «Armed»...
-
Page 23: Installation
10 Installation 10.1 Installation place selection The device should be installed on walls or other structures of secure zone in places protected from exposure to atmospheric precipitations, mechanical damage and unauthorized persons access. 10.2 Installation procedure Unscrew two fixing screws; take off the cover of the device. Perform mounting marking as per figure 2. - Page 24 Figure 3 Connect 220V voltage wires to free terminals of the socket 220V. Install BAT (if it is used), connect terminals of red and blue wires to corresponding pole termi- nals of BAT. Insert fuse-holder into socket jack. Apply voltage 220V. «POW» indicator lights up green. Install cover of the control panel on its place, tighten screws.
-
Page 25: Default Settings
11 Default Settings Control panel is delivered with default settings shown in table 2. To use control panel with default settings install jumper on one pin of F7 plug. Herewith position of other jumpers is ignored by the device. Table 2 Operating mode Parameters Intrusion, instant, integration time –... -
Page 26: Setting Operating Mode By Jumpers
12 Setting Operating Mode by Jumpers WARNING! Remove and install jumpers at the control panel switched off only. Operating modes set by jumpers (Figure 4) are given in the Table 3 Figure 4 Table 3 Jumper Plug Name of plug Operating mode position –... - Page 27 Continuation of table 3 Jumper Plug Name of plug Operating mode position All Zones are of intrusion-type Zone1 - delayed – – Other Zones - instant Zone1 – intrusion-type, delayed – Zone2- fire-type without double-event Zone Operating Other Zones – intrusion-type, instant F4, F5 mode All Zones are of intrusion-type...
-
Page 28: Setting Operating Mode Via Pc
Continuation of table 3 Jumper Plug Name of plug Operating mode position On two up- Operating mode setting via PC or firmware update Setup mode per plug pins Connection of Astra- – Connection of Astra-982/983 interface adapters 982/983 interface On two up- adapters or exten- Extension line connection per plug pins... - Page 29 Switch the control panel OFF (remove fuse-holder out of socket jack and disconnect BAT by removing terminal from one of its poles); Disconnect extension line wires from the control panel; Connect Astra-982 or Astra-983 interface adapter to control panel terminals in accordance with Figure 5, 6 or 7;...
- Page 30 Astra-983 Figure 7 Install jumpers on two upper pins of F7 plug; Switch the control panel ON (insert fuse-holder to socket jack), at that POW indicator lights up green; Run Pconf-712 software, select «on-line» mode; Establish connection with the control panel («Connect» button); Set required operating modes in accordance with software instructions;...
- Page 31 Control panel operating modes that can be changed via PC: any/closed door tactics (for Zone1 and Zone2); entry delay time, exit delay time (for Zone1 and Zone2); auto-arming (for intrusion-type zones); time for rearming; silent alarm (for intrusion-type zones); ...
- Page 32 Table 4 – Relay operating modes Mode name Mode description CSP – Alarm Relay is closed at arming, opened at alarm or disarming Relay is closed at arming (on expiry of exit delay time), switched over at alarm, Warning light closed at disarming Relay is closed at arming, opened at alarm or disarming with tamper switch CSP –...
-
Page 33: Tm Registration And Deletion
14 TM Registration and Deletion TM code recording (deletion) to control panel memory can be performed: - using TM button on printed circuit board; - via PC (refer to section 12). Connect TM reader or Astra-RVC ver.TM to control panel «+TM» and «–TM» terminals (Appendix A). TM Registration (deletion) by TM button Procedure: Unscrew two fixing screws and take the control panel cover off;... - Page 34 To register new TM identifiers: – Shortly press TM button, «Zone1» indicator flashes green (if «Zone1» indicator starts flashing red, the limit of possible quantity of registered TM is reached – 28 pcs), – bring TM identifier to TM reader or press a button on the TRC. ...
-
Page 35: Extension Line Connections
15 Extension Line Connections The following units can be connected to the control panel through the extension line (up to 200m length): Astra-TRB wireless transmitter– for transmitting notifications via radio channel (433,92 MHz) at a distance of up to 2500 m within the line-of-sight; ... -
Page 36: Pre-Starting Procedure. Operability Test
16 Pre-Starting Procedure. Operability Test Unscrew two fixing screws and take the control panel cover off. Check accuracy of wiring. Set operating modes if necessary (sections 10 – 14). Perform operability test: a) Switch the control panel OFF (remove fuse-holder out of socket jack and disconnect BAT by removing terminals from one of its poles);... -
Page 37: Control Panel Application
17 Control Panel Application 17.1 Intrusion Detection Application Arming – By control button: 1) Close all windows, air vents, doors, etc.; 2) Close control button; 3) Leave secure zone and close entrance door; 4) On expiry of exit delay time make sure LA switches ON and SA shortly switches ON (if LA and SA are used). -
Page 38: Fire Detection Application
In case time from the moment of door opening (Zone violation) till control panel disarming exceeds preset entry delay time, SA turns ON for the period specified during device setting. «Alarm CSP» message is transmitted to relay immediately after Zone violation at relay delay time cancelled or on expiry of delay time if relay delay time is set. -
Page 39: Firmware Update
18 Firmware Update Control panel firmware is continuously improved and available for free downloading from www.controlex.eu The following accessories are necessary to firmware update: – PC; – Astra-982/983 interface adapter (is not included into delivery set); – Flasher.exe software (available for free downloading from www.controlex.eu Procedure: Unscrew two fixing screws and take the control panel cover off;... - Page 40 Run firmware update procedure, POW indicator lights up red. In case of successful completion of firmware update short-duration sound signal occurs, POW indicator changes from red to green, corresponding message is displayed on PC screen. In case firmware update procedure is failed corresponding message is displayed on PC screen.
-
Page 41: Maintenance
19 Maintenance 19.1 In order to ensure reliable operation of the control panel annual maintenance of the control panel is recommended as follows: - verify control panel housing integrity; - ensure reliability of its mounting, wiring; - verify conformance of specification and operability to this manual. 19.2 Technical maintenance should be performed by qualified specialist. -
Page 42: Recycling
21 Recycling Control panel does not represent a danger to life, health and the environment, out-of-service utili- zation is carried out without taking special measures to protect the environment. 22 Warranty Terms 22.1 The Quality Management System meets provisions of ISO 9001-2011. 22.2 The manufacturer guarantees the compliance of the control panel to specifications if the user observes required conditions of transportation, storage, installation and operation. - Page 43 Appendix A Astra-712/4, Astra-712/8 Control Panel Connection Diagram Astra-RVC Astra-712/4,8 ver. TM ver. TM Figure А.1. Astra-RVC ver. TM connection diagram...
- Page 44 Figure A.2. Connection diagram for detectors with NO/NC relay outputs of «dry contact»-type...
- Page 45 Where: Е1 – is a detector with NC outputs; E2 – is a detector with NO outputs; GB1 – accumulator battery 12 V, 7,2 A/h; НА1 – sound alerter; HL1 – light alerter; К1 – TM reader; R1 – resistor 3,9 KOhm; S1 –...
- Page 46 Figure А.3 Connection diagram for active detectors.
- Page 47 Where: GB1 –accumulator battery 12 V, 7,2 A/h; НА1 – sound alerter; НL1 – light alerter; К1 – TM reader; n – number of detectors (n ≤ 30); R1…R30, R32…R61, R63…R92, R94…R123, R125…R154, R156…R185, R187…R216, R218…R247 – resistor 2 KOhm; R31, R62, R93, R124, R155, R186, R217, R248 –...
- Page 48 Manufacturer ТЕКО-TD Prospekt Pobedy str. 19 420138 Kazan, Russia Phone: +7 (843) 528-03-69 export@teko.biz Made in Russia Release 712-8v6_10_en...
Need help?
Do you have a question about the Astra-712/4 and is the answer not in the manual?
Questions and answers