
Related Manuals for Siemens WM14Y540ES


Summary of Contents for Siemens WM14Y540ES
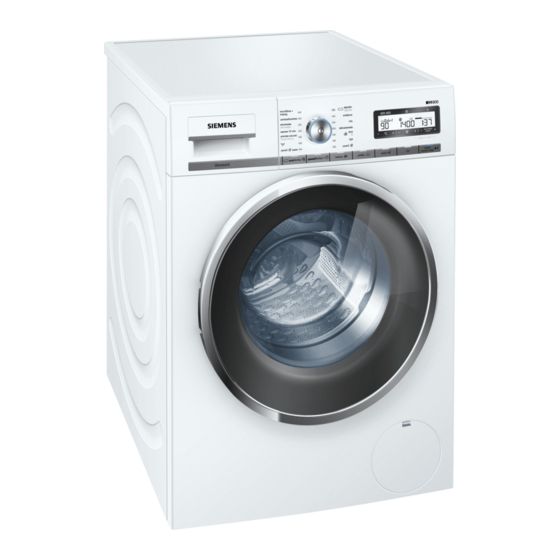
- Page 1 Washing machine WM14Y540ES siemens-home.com/welcome Register your product online...
- Page 2 Please take a few minutes to read and become familiar with the advantages of your washing machine. To meet the high quality demands required by Siemens, every washing machine that leaves our factory is carefully checked to ensure that it functions correctly and is in perfect condition.
-
Page 3: Table Of Contents
Contents e n W a s h i n g m a c h i n e I n s t r u c t i o n M a n u a l a n d I n s t a l l a t i o n I n s t r u c t i o n s Before washing Intended use... -
Page 4: Intended Use
Intended use B e f o r e w a s h i n g For use in the household only. Ø The washing machine is suitable for washing machine- Ø washable textiles and hand-washable wool in wash liquor. The washing machine is suitable to be operated with cold Ø... -
Page 5: Safety Instructions
Safety instructions Warning! Danger of death from electric shock! Danger of death if live parts are touched. – Never pull out the mains plug by tugging the power cord. – Insert/pull out the mains plug with dry hands only. Warning! Risk to children! –... - Page 6 Caution! Danger of scalding! When washing at high temperatures, you may be scalded if you touch the hot wash liquor (e.g. if draining hot wash liquor into a washbasin or if draining the washing machine in an emergency). Allow detergent solution to cool down. Caution! Risk of damaging appliance! –...
-
Page 7: Protection Of The Environment
Protection of the environment Packaging/Old appliance Dispose of packaging in an environmentally friendly manner. This appliance is labelled in accordance with European Directive 2012/19/EU concerning used electrical and electronic appliances (waste electrical and electronic equipment - WEEE). The guideline determines the framework for the return and recycling of used appliances as applicable throughout the EU. -
Page 8: The Main Points In Brief
The main points in brief Insert mains plug. Open the washing To switch on, press Select the Turn the tap on. machine door. programme, e.g. button. algodón/algodão (Cottons). Sort the washing. Insert the washing. Do not exceed maximum load. Open the detergent Dose detergent according to dosing Close the washing drawer. -
Page 9: Getting To Know Your Appliance
Getting to know your appliance... -
Page 10: Detergent Drawer
Detergent drawer Dispenser I Detergent for prewash Softener, starch. Do not exceed the maximum load. Dispenser Dispenser II Detergent for main wash, water softener, bleach, stain remover Insert A for dosing liquid detergent (not for all models) For models with insert for liquid detergent: The detergent drawer features an insert which is used as a dosing aid for liquid detergent. -
Page 11: Operating Elements/Display Elements
Operating elements/Display elements ² All buttons are sensitive, they only need to be touched gently. Press the main switch button. Switch inicio/pausa+carga (Start/Pause) Ü on and off the appliance. button to start, interrupt and cancel the j Programme selector can be rotated programme (e.g. -
Page 12: Before Each Washing
Before each washing O p e r a t i n g t h e a p p l i a n c e – Install and connect washing machine properly. ² Refer to ~ Page 43 – Before the 1st wash, wash once without any washing. ~ Page 53 1. - Page 13 2. Preparing the appliance Insert mains plug. Turn on water tap. 3. Selecting programme and loading laundry in the drum Open the washing machine door. Check whether the drum has been completely emptied. If required, empty. Otherwise, the load display may malfunction. ~ Page 31 Press the button.
- Page 14 Select the programme. You can use the displayed programme or select another programme. Programme overview, refer to ~ Page 22 Insert laundry The load screen for the selected programme (e.g. for Cottons) is indicated on the display panel. The load screen is indicated when the door is opened or when the amount of washing is changed.
- Page 15 = 75 % = 100 % The indicated % refers to the dosage recommendation of the detergent manufacturer. – Soiling, – Water hardness (depending on model can be determined using enclosed water hardness strip or is available from your water utility company). Dilute viscous fabric softener and fabric conditioner with water.
- Page 16 – The respective programme duration is displayed by selecting the programme. The programme duration is adjusted while the programme is running if the programme duration requires changing, e.g. due to changes in the programme settings, foam detection, unbalanced load detection, the load or soiling.
- Page 17 6. Starting the programme Select inicio/pausa+carga (Start/Pause) . The indicator Ø Ü light is on.
-
Page 18: Washing
Washing Programme sequence While the programme is running, the programme progress is indicated on the display panel via corresponding symbols and a progress bar. The bar progresses in the course of the wash cycles. The combined symbol indicates the following programme Æ... - Page 19 The activated childproof lock is indicated on the display panel by the symbol If the programme selector is adjusted or a button is selected while the childproof lock is active, the symbol flashes briefly. Ø Topping up laundry When the programme has started, washing can be reloaded or taken out as required.
- Page 20 (Rinse Hold). Programme Ø End of programme by flot stops in the last rinse cycle. – Select inicio/pausa+carga (Start/Pause) Ü The programme continues with the drain and spin cycles (if required change spin speed). – If only the drain cycle, but not the spin cycle, is required, select and start the (Drain) programme.
-
Page 21: After Washing
After washing Open washing machine door and remove washing. – Do not leave any items of washing in the drum. In the next ² wash they may shrink or discolour something else. – Remove any foreign objects from the drum and the rubber seal –... -
Page 22: Programme Overview
Programme overview The presettings of the programmes are highlighted in bold. Programme/Type of washing Settings/Information max. load Name of the programme Brief explanation of the programme and selectable temperature as °C for which textiles it is suitable. selectable spin speeds in rpm, the max. - Page 23 The presettings of the programmes are highlighted in bold. Programme/Type of washing Settings/Information lana/lã (Wool) max. 2 kg Hand or machine-washable wool or rich- cold – 30 – 40 °C wool textiles. 0 ... 800 rpm Especially gentle wash programme to prevent shrinkage, longer programme pauses (textiles rest in wash liquor).
- Page 24 The presettings of the programmes are highlighted in bold. Programme/Type of washing Settings/Information express 15 min. (Super 15’) max. 2 kg Extra short programme approx. cold – 30 – 40 °C 15 minutes, suitable for lightly soiled 0 ... 800 ... 1200 rpm washing as a small amounts of laundry.
- Page 25 Starching The washing should not be treated with fabric softener. ² Liquid starch can be used in all wash programmes. Pour starch into the dispenser according to manufacturer’s specifications (if required clean beforehand). Dyeing/Discolouring Dye in household quantities only. Salt may attack stainless steel!Observe specifications of the dye manufacturer! Do not discolourwashing in the washing machine! Soaking...
-
Page 26: Programme Settings
Programme settings Depending on the programme, you can use the programme settings to adjust the washing process even more efficiently to your items of washing. Programme settings: – are active without acknowledgement. ² – not retained after appliance is switched off. –... - Page 27 Buttons Notes For heavily soiled washing. prelav. Pour detergent into dispensers I and II. (Pre-wash) Additional rinse cycles depending on the extra programme, prolonged programme duration. (Extra rinse) + 1 Rinse ² . Recommended application: for particularly + 2 Rinses sensitive skin and/or in areas with very soft water.
-
Page 28: Consumption Values
Consumption values Programme Load Energy Water *** Programme consumption *** duration *** Cottons cold 9 kg 0,25 kWh 82 l Cottons 20 °C 9 kg 0,32 kWh 82 l Cottons 40 °C * 9 kg 1,15 kWh 82 l Cottons 60 °C 9 kg 1,25 kWh 82 l... -
Page 29: Appliance Settings
Appliance settings The ajustes base 3s. (Basic settings 3 sec.) buttons + (Spin +) and Terminado en/em + (Finished in +)) can be used to change the set values of the appliance settings, e.g. the volume of the button signals. Simultaneously hold down ajustes base 3s. - Page 30 Settings Set values Notes Change displayed language. = German »°½¶Ä°¶´ ³´ ¶± = English The appliance automatically switches off after (min.) °Äþ ¾μμ ËÏ the selected time (=0 kWh energy (min.) ÍÊ consumption). to switch on, press main switch (h=hour) Ë...
-
Page 31: Sensors - Your Washing Machine Is So Intelligent
Sensors – Your washing machine is so intelligent Load adjust Depending on the type of textile and load, the load adjust optimally adjusts the water consumption in each programme. Aqua-Sensor depending on model During the rinse cycle the Aqua sensor checks the degree of turbidity (turbidity is caused by dirt and detergent residue) of the rinsing water. -
Page 32: Care And Maintenance
Care and maintenance C l e a n i n g a n d m a i n t e n a n c e Warning! Danger of death from electric shock! Danger of death if live parts are touched. Switch off the appliance. - Page 33 Cleaning the detergent drawer If it contains detergent or fabric softener residue: Pull out, depress insert, take out drawer all the way. Take out insert: using your finger, press insert upwards. Clean detergent dispenser and insert with water and a brush and dry.
- Page 34 Take the drainage hose out of the holder. Remove the sealing cap, drain water into a suitable receptacle. Press on sealing cap and insert drainage hose into the holder. Note: Residual water may run out. Carefully unscrew the pump cover. Clean the interior, pump cover thread and pump housing (fan impeller in the detergent-solution pump must rotate).
- Page 35 Filter blocked in water inlet hose First, release water pressure in the supply hose: Turn off the tap! Select any programme (except Spin/Drain). Select inicio/pausa+carga (Start/Pause) . Leave Ü programme for approx. 40 seconds. Press the button. Appliance is switched off. Pull out the mains plug! Clean the filter: Disconnect the hose from the water tap.
-
Page 36: Emergency Release
Emergency release The programme continues running when the power supply is restored. If the washing is still to be removed, the door can be opened as described below: Warning! Danger of scalding! Wash liquor and washing may be hot. If touched, there is a risk of scalding. -
Page 37: Information On The Display Panel
Information on the display panel Display Cause/Remedy CLOSE – Washing may be caught. Please open and close washing DOOR machine door again and select inicio/pausa+carga (Start/ Pause) Ü – If required, shut washing machine door or remove washing and shut again. –... -
Page 38: Faults, What To Do
Faults, what to do? Faults Cause/Remedy Water is running out. – Correctly attach/replace drainage hose. – Tighten screw-fitting on the supply hose. Water not flowing in. – inicio/pausa+carga (Start/Pause) not selected? Ü Detergent not – Tap not open? washed in. –... - Page 39 Faults Cause/Remedy Display panel/ – Power failure? indicator lights do – Fuse tripped? Switch on/replace fuse. not function while – If the fault occurs repeatedly, call customer service. ~ Page 40 the appliance is running. The programme – Not a fault – unbalanced load detection system adjusts takes longer than imbalance by repeatedly distributing the washing.
-
Page 40: Customer Service
Customer service If you cannot rectify the fault yourself, Faults, what to do?~ Page 38, please contact our customer service. We will always finds a suitable solution to avoid unnecessary visits by technicians. Please give customer service the product number (E-Nr.) and the production number (FD) of the appliance. -
Page 41: Standard Accessories
Standard accessories I n s t a l l i n g t h e a p p l i a n c e Also required for connection of the water drainage hose to a siphon: 1 hose clip Ø 24–40 mm (DIY store) is also required for connection to a siphon. - Page 42 Hose and cable lengths If the hose holders are used, the possible hose lengths are ² reduced! Available from dealer/customer service: Extension for Aqua-Stop or cold water inlet hose Ø (approx. 2.50 m). Order no. WMZ2380, WZ10130, CZ11350, Z7070X0 Longer supply hose (approx. 2.20 m), for standard model. Ø...
-
Page 43: Installation
Installation Humidity in the drum is caused by the final inspection. ² Secure installation Warning! Risk of injury! – The washing machine is heavy – caution: take care when lifting it. – If the washing machine is raised by protruding components (e.g. - Page 44 Warning! Risk of injury! – The washing machine is heavy – caution: take care when lifting it. – If the washing machine is raised by protruding components (e.g. washing machine door), the components may break off and cause injuries. Do not lift the washing machine by its projecting parts.
- Page 45 Installing the appliance on a base or on a wooden joist ceiling Warning! Washing machine may be damaged!! The washing machine may wander during the spin cycle and topple/fall off the base. Always secure the washing machine feet with fixing brackets.
-
Page 46: Remove Transportation Protection Devices
Remove transportation protection devices Caution! Washing machine may be damaged! Transit bolts which have not been removed may damage e.g. the drum while the washing machine is running. Before using the appliance for the first time, remove the 4 transportation protection devices completely and keep in a safe place. - Page 47 Loosen and remove all 4 transportation lock screws. Take the power cord out of the holders. Remove sleeves. Insert covers. Lock covers firmly by pressing on the locking hook. ²...
-
Page 48: Connecting The Water
Connecting the water Warning! Danger of death from electric shock! Danger of death if live parts are touched. Do not immerse Aqua-Stop safety device in water (contains an electric valve). – To prevent leakage or water damage, follow the instructions ²... - Page 49 on the appliance: for Standard and Aqua-Secure models Carefully turn on the tap and check that the connection points are not leaking. Screw connection is under water pipe pressure. ² Water drainage hose – Do not kink or protract the the water supply hose. ²...
- Page 50 Drainage into a siphon Warning! Water damage possible! If the drainage hose slips off the siphon connection due to high water pressure when draining the washing machine, leaking water may cause damage. Connection point must be secured with hose clip, Ø...
-
Page 51: Alignment
Alignment Loosen lock nut in a clockwise direction with a wrench. Check alignment of the washing machine with a spirit level and, if required, correct. Adjust the height by rotating the foot. All four feet must be firmly on the floor. ²... -
Page 52: Electrical Connection
Electrical connection Electrical safety Warning! Danger of death from electric shock! Danger of death if live parts are touched. – Never pull out the mains plug by tugging the power cord. – Insert/pull out the mains plug with dry hands only. –... -
Page 53: Before The 1St Washing
Before the 1st washing The washing machine was inspected thoroughly before leaving the factory. To remove any water left over from testing procedures, the first washing cycle should be carried out without laundry in the machine. The washing machine must have been installed and connected ²... -
Page 54: Transportation, E.g. If Moving House
Transportation, e.g. if moving house Preparatory work Turn off the tap. Release the water pressure in the supply hose. Maintenance – Filter in the water inlet hose ~ Page 35 Drain any residual detergent solution. Maintenance – Drain pump blocked ~ Page 33 Isolate the washing machine from the power supply. -
Page 55: Index
Index Alignment, 51 Aqua-Sensor, 31 Button speedPerfect , 11, 16, 26 ecoPerfect , 11, 16, 26 ¦ Spin, 11, 15, 26 Extra rinse, 11, 16, 27 Start/Pause, 11 Finished in, 11, 15, 26 Temperature, 11, 15, 26 Less Ironing, 11, 16, 26 Pre-wash, 11, 16, 27 Rinse Hold, 11, 16, 27 Basic settings 3 sec., 11... - Page 56 Information on the display Installation, 43 panel, 37 Installing transportation Inserting protection devices, 54 the laundry, 13, 14, 15 Intended use, 4 Less Ironing, 11, 16, 26 Load sensor/Load display, 31 Load adjust, 31 Maintenance, 32 Old appliance, 7 Packaging, 7 Programme sequence, 18 Pre-wash, 11, 16, 27 Programme...
- Page 60 Please find the contact data of all countries in the enclosed customer service list. BSH Hausgeräte GmbH Carl-Wery-Straße 34 81739 München Siemens-Electrogeräte GmbH GERMANY Carl-Wery-Straße 34, 81739 München siemens-home.com siemens-home.com Manufactured by BSH Hausgeräte GmbH under Trademark License of Siemens AG *9000953285* 9000953285 (9510)
Need help?
Do you have a question about the WM14Y540ES and is the answer not in the manual?
Questions and answers