Advertisement
Quick Links
PARKSAFEAUTOMOTIVE.COM
CAMINTER15
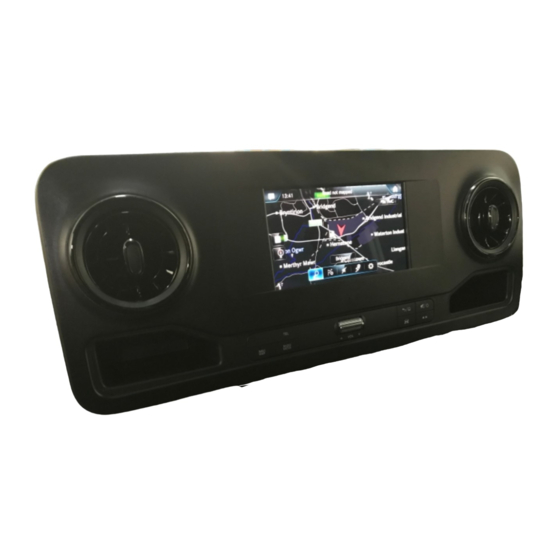
Overview
The CAMINTER15 will allow you to install rear camera & front/side
camera onto the factory 7" or 10" OEM touch screen fitted in the
Mercedes Sprinter 2018 onwards. This interface features active moving
guidelines and front/side cameras selectable using either OEM button or
preset timer.
Kit Contents
iR Remote sensor
iR Remote
Interface
Power/CAN Harnesses
LVDS
Video
Cables
Page 1
Advertisement

Summary of Contents for Parksafe Automotive CAMINTER15
- Page 1 PARKSAFEAUTOMOTIVE.COM CAMINTER15 Overview The CAMINTER15 will allow you to install rear camera & front/side camera onto the factory 7" or 10" OEM touch screen fitted in the Mercedes Sprinter 2018 onwards. This interface features active moving guidelines and front/side cameras selectable using either OEM button or preset timer.
- Page 2 PARKSAFEAUTOMOTIVE.COM Interface EXT TRIGGER POWER / CAN Not Used TO SCREEN TO HARNESS (12V+) DIP SWITCHES Not Used Not Used Not Used Dip Switch Se ngs Dip SW: OEM RVC F CAM OFF SCREEN RES SCREEN RES SEE BELOW SEE BELOW Keep DOWN Keep DOWN DOWN...
- Page 3 PARKSAFEAUTOMOTIVE.COM Installa on Diagram CAN CONNECTIONS HARNESS AT THE REAR OF HEAD UNIT Interface wires Connect to vehicle WHITE (CAN LOW) PURPLE or PURPLE / BLACK PURPLE / WHITE BLUE (CAN HIGH) iR REMOTE CONNECTIONS SUPPLIED SUPPLIED T-HARNESS HARNESS SCREEN FACTORY HARNESS SCREEN...
- Page 4 PARKSAFEAUTOMOTIVE.COM Installa on HOW TO REMOVE THE DASH USE TWO RIGHT ANGLED PICK TOOLS, SLOT THEM DOWN THROUGH THE AIR VENT. POSITION ONE PICK FACING DOWN AND OTHER PICK FACING UP. YOU WILL FEEL THEY HOLD ONTO THE CENTRE OF THE AIR VENT. HOLD THE PICKS TIGHT AND PULL SHARPLY TOWARDS YOU, AND THE VENT WILL POP OUT.(DON'T BE AFRAID IT ONLY CLIPS IN).
- Page 5 PARKSAFEAUTOMOTIVE.COM Installa on REMOVE THE T20 TORX FROM BEHIND THE AIR VENT (LEFT AND RIGHT VENTS) Page 5...
- Page 6 PARKSAFEAUTOMOTIVE.COM Installa on ONCE YOU HAVE REMOVED THE 2 X T20 SCREWS FROM BEHIND THE AIR VENTS, USE A TRIM TOOL AND PRY THE FASCIA FORWARD TO ACCESS THE SCREEN AND HEAD UNIT. THIS IS ONLY HELD ON WITH CLIPS, SO JUST PULL AND IT WILL RELEASE.
- Page 7 PARKSAFEAUTOMOTIVE.COM Installa on CONNECT THE PLUG AND PLAY POWER HARNESS AT THE REAR OF THE SCREEN. ALSO CONNECT THE LVDS (VIDEO CABLES) AT THE REAR OF THE SCREEN LVDS Video Cables Page 7...
- Page 8 PARKSAFEAUTOMOTIVE.COM Installa on IT MAY BE NECESSARY TO TRIM THE KEYWAY ON THE OEM BLUE POWER PLUG (AT THE REAR OF THE SCREEN) TO FIT IN THE SUPPLIED T-HARNESS Page 8...
-
Page 9: Can Connections
PARKSAFEAUTOMOTIVE.COM Installa on CAN CONNECTIONS THERE ARE 2 DIFFERENT TYPES OF HEAD UNIT FOR THE SPRINTER. THE CAN CONNECTIONS ARE CONNECTED AT THE SAME PLACE (REAR OF THE HEAD UNIT). HOWEVER AS YOU SEE FROM THE FOLLOWING PHOTOS THE PLUGS ARE DIFFERENT. TYPE 1 CAN CONNECTIONS Interface wires... - Page 10 PARKSAFEAUTOMOTIVE.COM Installa on CAN CONNECTIONS TYPE 2 CAN CONNECTIONS Interface wires Connect to vehicle WHITE (CAN LOW) PURPLE or PURPLE / BLACK PURPLE / WHITE BLUE (CAN HIGH) Page 10...
- Page 11 PARKSAFEAUTOMOTIVE.COM Menu Adjustments Before you start: · The IR-Eye must be connected · Make sure the car’s igni on is on and radio is on · You must be in Reverse Camera mode (place vehicle in reverse) · Press the OK BUTTON 4 mes (numbers will display per press), then press POWER.
-
Page 12: Rear Camera
Opera on REAR CAMERA Once the interface is connected properly, reverse ac va on is automa c. Placing the vehicle in reverse will display the connected camera’s image automa cally. Note: If display doesn’t switch to reverse image when shi ing into reverse or screen is distorted, check dip switch se ngs on page 2.
Need help?
Do you have a question about the CAMINTER15 and is the answer not in the manual?
Questions and answers