Table of Contents
Advertisement
Quick Links
Advertisement
Table of Contents

Subscribe to Our Youtube Channel
Related Manuals for KYE Systems Corp. Genius SP700


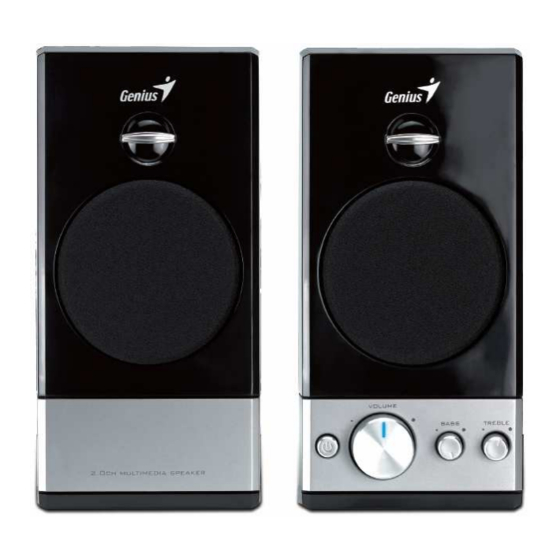
Summary of Contents for KYE Systems Corp. Genius SP700
- Page 1 6HUYLFH 0DQXDO ! ! ! ! !!!!!!!!!!!!!!!!!!!!! !!!!!!!!!!!!!!!!!!!!! !!!!!!!!!!!!!!!!!!!!!!!!!!!!!!!!!!!!!!!!!! !!!!!!!!!!!!!!!!!!!!! !!!!!!!!!!!!!!!!!!!!! !!!!!!!!!!!!!!!!!!!!! !!!!!!!!!!!!!!!!!!!!! KYE System Corp., LTD Maintenance Manual - 1 -...
-
Page 2: Table Of Contents
6HUYLFH 0DQXDO ! ! ! ! !!!!!!!!!!!!!!!!!!!!! !!!!!!!!!!!!!!!!!!!!! !!!!!!!!!!!!!!!!!!!!!!!!!!!!!!!!!!!!!!!!!! !!!!!!!!!!!!!!!!!!!!! !!!!!!!!!!!!!!!!!!!!! !!!!!!!!!!!!!!!!!!!!! !!!!!!!!!!!!!!!!!!!!! Catalog Part One: Problem solving process Composition diagram-------------------------------------------------------------------3 Problem solving flow chart------------------------------------------------------------3 Defective phenomenon and solving-------------------------------------------------4-6 Part Two: Components assembly method Main unit disassembly and assembly step--------------------------------------------7 Cabinet disassembly and assembly step----------------------------------------------7 Main board disassembly and assembly step-----------------------------------------8 LED replacement step------------------------------------------------------------------9... -
Page 3: Part One: Problem Solving Process
6HUYLFH 0DQXDO ! ! ! ! !!!!!!!!!!!!!!!!!!!!! !!!!!!!!!!!!!!!!!!!!! !!!!!!!!!!!!!!!!!!!!!!!!!!!!!!!!!!!!!!!!!! !!!!!!!!!!!!!!!!!!!!! !!!!!!!!!!!!!!!!!!!!! !!!!!!!!!!!!!!!!!!!!! !!!!!!!!!!!!!!!!!!!!! Part One: Problem solving process Composition diagram L Speaker Jack Board Main Board R Speaker Adapter Composition Diagram Problem solving flow chart The flow chart for sales service unit returned from customer Return defective unit Confirming the inferior issue(Test) -
Page 4: Defective Phenomenon And Solving
6HUYLFH 0DQXDO ! ! ! ! !!!!!!!!!!!!!!!!!!!!! !!!!!!!!!!!!!!!!!!!!! !!!!!!!!!!!!!!!!!!!!! !!!!!!!!!!!!!!!!!!!!!!!!!!!!!!!!!!!!!!!!!! !!!!!!!!!!!!!!!!!!!!! !!!!!!!!!!!!!!!!!!!!! !!!!!!!!!!!!!!!!!!!!! Defective phenomenon and solving method. 1.3.1 Main issue: a. LED light off. b. No output. c. System down. d. The volume control is random. e. Noise and distortion f. - Page 5 6HUYLFH 0DQXDO ! ! ! ! !!!!!!!!!!!!!!!!!!!!! !!!!!!!!!!!!!!!!!!!!! !!!!!!!!!!!!!!!!!!!!!!!!!!!!!!!!!!!!!!!!!! !!!!!!!!!!!!!!!!!!!!! !!!!!!!!!!!!!!!!!!!!! !!!!!!!!!!!!!!!!!!!!! !!!!!!!!!!!!!!!!!!!!! c. System down System down Problem analysis Main board Cable Amplifier Power supply Root cause Adapter The ground lead of power IC(U2) is failed DC Jack broken Switch broken Replace DC jack Replace switch...
- Page 6 6HUYLFH 0DQXDO ! ! ! ! !!!!!!!!!!!!!!!!!!!!! !!!!!!!!!!!!!!!!!!!!! !!!!!!!!!!!!!!!!!!!!!!!!!!!!!!!!!!!!!!!!!! !!!!!!!!!!!!!!!!!!!!! !!!!!!!!!!!!!!!!!!!!! !!!!!!!!!!!!!!!!!!!!! !!!!!!!!!!!!!!!!!!!!! f. No output on earphone No output (earphone) Problem analysis Audio Cable Jack board Root cause cable Earphone Jack failed Open circuit ( is failed) Replace earphone jack Replace Cable Countermeasure g.
-
Page 7: Part Two: Components Assembly Method
6HUYLFH 0DQXDO ! ! ! ! !!!!!!!!!!!!!!!!!!!!! !!!!!!!!!!!!!!!!!!!!! !!!!!!!!!!!!!!!!!!!!!!!!!!!!!!!!!!!!!!!!!! !!!!!!!!!!!!!!!!!!!!! !!!!!!!!!!!!!!!!!!!!! !!!!!!!!!!!!!!!!!!!!! !!!!!!!!!!!!!!!!!!!!! ! ! ! ! Part two: Components assembly method Main unit disassembly and assembly : 1. The main board has the function of power and Volume controlling, etc. and the LED is placed in the Volume Knob. -
Page 8: Main Board Disassembly And Assembly Step
6HUYLFH 0DQXDO ! ! ! ! !!!!!!!!!!!!!!!!!!!!! !!!!!!!!!!!!!!!!!!!!! !!!!!!!!!!!!!!!!!!!!!!!!!!!!!!!!!!!!!!!!!! !!!!!!!!!!!!!!!!!!!!! !!!!!!!!!!!!!!!!!!!!! !!!!!!!!!!!!!!!!!!!!! !!!!!!!!!!!!!!!!!!!!! Main board assembly and disassembly step Refer to the following steps: (1).Remove the VOLUME.BASS.TREBLE knob. Please refer to picture 1.2 (2). Take apart the cabinet. (refer to picture 1.3) (3) Remove the 5pcs of screw from potentiometer and take out the main board. -
Page 9: Led Replacement Step
6HUYLFH 0DQXDO ! ! ! ! !!!!!!!!!!!!!!!!!!!!! !!!!!!!!!!!!!!!!!!!!! !!!!!!!!!!!!!!!!!!!!!!!!!!!!!!!!!!!!!!!!!! !!!!!!!!!!!!!!!!!!!!! !!!!!!!!!!!!!!!!!!!!! !!!!!!!!!!!!!!!!!!!!! !!!!!!!!!!!!!!!!!!!!! Change LED step: Remove the Volume knob by using the hot melt adhesive stick, drop the machine cleaner onto the LED Light transferring pole (Refer to picture 1.5),about 30s later, pick out of the glue by using the tweezers, then take apart of the LED and welding by solder iron at the constant temperature, check the LED polarity and add the solder ,then dispense hot melt adhesive to fix the pole. -
Page 10: Diode Capacitor Ic Switch Earphone Jack Replacement Step
6HUYLFH 0DQXDO ! ! ! ! !!!!!!!!!!!!!!!!!!!!! !!!!!!!!!!!!!!!!!!!!! !!!!!!!!!!!!!!!!!!!!!!!!!!!!!!!!!!!!!!!!!! !!!!!!!!!!!!!!!!!!!!! !!!!!!!!!!!!!!!!!!!!! !!!!!!!!!!!!!!!!!!!!! !!!!!!!!!!!!!!!!!!!!! Change Diode, Capacitor, Switch and earphone Jack step: Check the NG component first, heat up the weld position by using the solder iron, remove the NG component, Place the confirming part at the right position, and solder to fix it. -
Page 11: Transducer Disassembly And Assembly Step
6HUYLFH 0DQXDO ! ! ! ! !!!!!!!!!!!!!!!!!!!!! !!!!!!!!!!!!!!!!!!!!! !!!!!!!!!!!!!!!!!!!!!!!!!!!!!!!!!!!!!!!!!! !!!!!!!!!!!!!!!!!!!!! !!!!!!!!!!!!!!!!!!!!! !!!!!!!!!!!!!!!!!!!!! !!!!!!!!!!!!!!!!!!!!! welded at “-” poison. welded at the “+” poison !!!!!!! !3/2*! picture Then place the screw(4PCS 3*5TP2) from A to D in series. Amplified IC changing step 1.Remove the screw93 8TP1)first (refer to picture 2.2),heat up the IC foot by using thesolder iron, then remove the IC.(U2) screw... -
Page 12: Clothing Grill Framework Assembly Step
6HUYLFH 0DQXDO ! ! ! ! !!!!!!!!!!!!!!!!!!!!! !!!!!!!!!!!!!!!!!!!!! !!!!!!!!!!!!!!!!!!!!!!!!!!!!!!!!!!!!!!!!!! !!!!!!!!!!!!!!!!!!!!! !!!!!!!!!!!!!!!!!!!!! !!!!!!!!!!!!!!!!!!!!! !!!!!!!!!!!!!!!!!!!!! 2.10 Clothing grille framework Aiming at one corner, fix the clothing grill framework (refer to picture marked a), then load the driver(refer to picture marked a’),another three corners should be placed at the same time.(refer to picture 2.6) !!!! !3/7*! -
Page 13: Part Three: Other Items
6HUYLFH 0DQXDO ! ! ! ! !!!!!!!!!!!!!!!!!!!!! !!!!!!!!!!!!!!!!!!!!! !!!!!!!!!!!!!!!!!!!!!!!!!!!!!!!!!!!!!!!!!! !!!!!!!!!!!!!!!!!!!!! !!!!!!!!!!!!!!!!!!!!! !!!!!!!!!!!!!!!!!!!!! !!!!!!!!!!!!!!!!!!!!! Part Three : Other items As PCBA is elegant electronic circuit board, it consists of the main board, jack board, etc., if needs send back to repair, please pay more attention to the packing methods : 1. -
Page 14: Main Unit Assembly Explode Diagram
6HUYLFH 0DQXDO ! ! ! ! !!!!!!!!!!!!!!!!!!!!! !!!!!!!!!!!!!!!!!!!!! !!!!!!!!!!!!!!!!!!!!!!!!!!!!!!!!!!!!!!!!!! !!!!!!!!!!!!!!!!!!!!! !!!!!!!!!!!!!!!!!!!!! !!!!!!!!!!!!!!!!!!!!! !!!!!!!!!!!!!!!!!!!!! Main unit assembly explode diagram - 14... -
Page 15: Satellite Assembly Explode Diagram
6HUYLFH 0DQXDO ! ! ! ! !!!!!!!!!!!!!!!!!!!!! !!!!!!!!!!!!!!!!!!!!! !!!!!!!!!!!!!!!!!!!!!!!!!!!!!!!!!!!!!!!!!! !!!!!!!!!!!!!!!!!!!!! !!!!!!!!!!!!!!!!!!!!! !!!!!!!!!!!!!!!!!!!!! !!!!!!!!!!!!!!!!!!!!! Satellite assembly explode diagram - 15... -
Page 16: 4.4 Electric Schematic
Service Manual 4.4 Electric Schematic - 16... -
Page 17: Repair Material List
6HUYLFH 0DQXDO ! ! ! ! !!!!!!!!!!!!!!!!!!!!! !!!!!!!!!!!!!!!!!!!!! !!!!!!!!!!!!!!!!!!!!!!!!!!!!!!!!!!!!!!!!!! !!!!!!!!!!!!!!!!!!!!! !!!!!!!!!!!!!!!!!!!!! !!!!!!!!!!!!!!!!!!!!! !!!!!!!!!!!!!!!!!!!!! Repair Material List SP-700 Repair Material List Part Number Spec Position 00000186 ADAPTER 02600419 AUDIO CABLE CON3 11800053 E/C220UF/25V ±20% E/C 2200U/25V 20% 11800060 04900066 G-LED3 /5-7mA LED1 02100759 LED Cable...
Need help?
Do you have a question about the Genius SP700 and is the answer not in the manual?
Questions and answers