
Related Manuals for coov N200


Summary of Contents for coov N200
- Page 1 COOV N200 功能秘籍 Function Instruction of COOV N200 以 X1,PS4 手柄按键分布图为例: Take the button distribution of X1 and PS4 handle an example: 中左 Middle left button 十字键上 Up of cross button 十字键下 Down of cross button...
- Page 2 上键 Up button 左键 Left button 右键 Right button 下键 Down button 中右 Middle right button N200 无线连接示意图: N200 wireless connection diagram:...
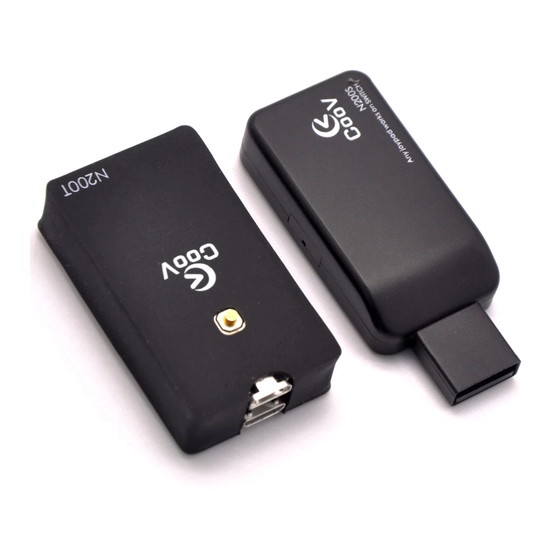
- Page 3 电源按钮 Power button COOV N200T 三视图及接口说明 Three-view drawing and interface description of COOV N200T 电源按钮 Power button 靠近按钮的接口为“接口 A” The interface close to the button is "Interface A" 远离按钮的接口为“接口 B” The interface away from the button is "Interface B" 不连接“接口 A”...
- Page 4 Wireless connection OTG 线 OTG line 无线连接 Switch Wireless Connection Switch 1. 将官方配送的魔术贴贴至手柄背面...
- Page 5 1. Stick the Velcro in the set to the back of the handle 2.将 N200T 带有魔术贴的面粘贴至手柄背面魔术贴处 2. Paste the Velcro side of the N200T to the Velcro on the back of the handle. N200T 与手柄完美融入一体 N200T and handle are integrated into one perfectly. 无线连接...
- Page 6 态闪烁白灯。 3. In the low power state, the red light flickers; in the full power state, the green light (blue light in some batches) flickers green light; the white light flickers in other states. N200 有线连接示意图: N200 wired connection diagram:...
- Page 7 连接“接口 A” Connect Switch to "Interface A" 配套专用线“接口 B” Connect the matching special line of N200 to "Interface B" 手柄数据线 Handle data wire...
- Page 8 OTG 线 OTG line 连接设备(如连接示意图所示) Connect equipment (as shown in the connection diagram) A:将 N200T 的”接口 B”通过配套专线连接至手柄,并用魔术贴贴至手柄背面。 A: Connect the "Interface B" of N200T to the handle through a matching line and stick it to the back of the handle with a magic Velcro. B:将...
- Page 9 A: N200T 升级 A: N200T upgrade 将 MICRO USB 线一端连入 N200T 的“接口 A”,另外一端连接电脑 USB 口。 将 N200T 的升级文件 firmware.bin 文件文件复制到 N200T 磁盘。 Connect one end of the MICRO USB wire to the "Interface A" of N200T, and the other end to the USB port of the computer. Copy the upgrade file of firmware.bin of the N200T to the N200T disk.
- Page 10 N200S 连接主机,将 N200T 连接手柄,再按下 N200T 背部的电源键即可启动。无线使 用场景下的软件功能与 N100 相同。 N200 has been wirelessly paired in the factory state, and the N200T battery has a certain amount of electricity. The user only needs to connect the N200S to the host, the N200T to the handle, and then press the power key on the back of the N200T to start.
- Page 11 长按 N200T 背部的电源键 1 秒开关机,同时 N200T 断开连接 5 分钟后自动关机。手柄闲 置不动 15 分钟后自动关机。 Press the power button for one second to turn on or turn off N200T. It will turn off automatically after disconnecting for 5 minutes. It will turn off automatically after leaving unused for 15 minutes.
- Page 12 How to dissolve pair: 将 N200T 连接 windows 电脑,使用文本编辑工具打开 info.txt,将其中的配对码 “Pairing:1C306FA4”修改为“Pairing:00000000”。 Connect the N200T to the windows computer, use the text editing tool to open the info.txt, and modify the pairing code "Pairing:1C306FA4" to "Pairing:00000000". 双手柄模式 Double-handle mode 1:将 N200T 和 N200S 解除配对 1: Dissolve the pair of N200T and N200S 2:X1 或...
- Page 13 N200S again 软件使用方式与 N100 一致,如下: The usage mode of the software is the same as that of N100, as follows: A:线性控制(默认开启) A:Linear control (on by default) 线性控制是用来关闭或开启手柄摇杆和扳机的线性响应,以实现更短的键程和更快的响应 速度 Linear control is used to turn off or turn on the linear response of the handle rocker and trigger to achieve a shorter bond range and faster response speed.
- Page 14 B. 将需要关闭线性功能的扳机按住不放,或拨动需要关闭线性功能的摇杆,再按一下中左 键,即可关闭对应扳机或摇杆的线性功能 B. Press the trigger that need to turn off the linear function, or dial the rocker that need to turn off the linear function, and then click the Middle left button to turn off the linear function of the corresponding trigger or rocker. C.
- Page 15 C. Press the HOME button to exit the configuration mode. 3. 开启所有键位的线性 3. Turn on the linear of all buttons A. 同时按下 HOME+下键并松开,进入线性控制功能配置模式 A. Press the HOME+ Down button at the same time and release to enter the linear control function configuration mode. B.
- Page 16 B: Button mapping 键位映射是将一个按键映射到另一个不同按键上,可实现多个按键相同功能或多个按键相 互交换的功能。 Button mapping is to map a button to another button, so as to realize the same function of several buttons or exchange functions of several buttons. 1. 设置 1. Setting A. 同时按下 HOME+右键并松开,进入键位映射功能配置模式 A. Press the HOME+ Right button at the same time and release to enter the button mapping function configuration mode.
- Page 17 For example, press the A button first and then press the B button, so that the A button has the function of B button. 2. 单个清除 2. Single elimination A. 同时按下 HOME + 右键并松开,进入键位映射功能配置模式 A. Press the HOME+ Right button at the same time and release to enter the button mapping function configuration mode.
- Page 18 A. 同时按下 HOME+右键并松开,进入键位映射功能配置模式 A. Press the HOME+ Right button at the same time and release to enter the button mapping function configuration mode. B. 按住 HOME3 秒钟,会自动清除所有已配置的键位映射,并自动退出配置模式 B. Hold down the HOME button for 3 seconds, all the configured button mappings will be eliminated automatically, and it will exit the configuration mode automatically.
- Page 19 buttons can exchange function; and so forth (在键位映射模式下,实现方法为按 A B B X X A) (In the button mapping mode, the operation is to press A, B, B, X, X, A) 5. 实例 2 5.Examples 2(exchange touchpad and SHARE) (Firmware version is not less than V3.4006) A.
- Page 20 C:连发(默认关闭) C: Burst (off by default) 连发控制是用来将选定的按键配置为连发模式,当按键处于连发模式下,该键被按下后, 就会以一定频率模拟按下-松开-按下-松开事件,连发频率可调 Burst control is used to configure the selected button to a burst mode. When the button is in a burst mode, once it is pressed, it will simulate the pressing-releasing event at a certain frequency, and the frequency is adjustable. 1.
- Page 21 C. 按一下 HOME 键,退出配置模式 C. Press the HOME button to exit the configuration mode. 2. 关闭连发 2. Turn on the burst A. 同时按下 HOME+左键并松开,进入连发功能配置模式 A. Press the HOME+ Left button at the same time and release to enter the burst function configuration mode.
- Page 22 A. Press the HOME+ Left button at the same time and release to enter the burst function configuration mode. B. 按住 HOME3 秒钟,会自动清除所有已配置的连发功能,并自动退出配置模式 B. Hold down the HOME button for 3 seconds, all the configured burst function will be eliminated automatically, and it will exit the configuration mode automatically.
- Page 23 5. 调整连发频率(自定义模式) 5. Adjust the burst frequency(Custom mode) (Firmware version not less than V4.1001) In custom mode, the user can set two parameters: press time a millisecond and release time b milliseconds. When the burst starts, the key is automatically pressed for a millisecond, then released for b milliseconds, and then pressed a millisecond for a round trip.
- Page 24 lower cross key right, the b value increases by 60; press the four lower cross key, the b value increases by 4. Total 164 F. release the middle and left and right button, the normal configuration, it will flash green light. G.
- Page 25 In the fighting games, an ultimate skill often needs to operate the handle in a certain rule. The auto combo can record the combo and set to trigger by a certain button. After the setting, the player can use the auto combo. 1.
- Page 26 exit the configuration mode automatically (or press the HOME button once more to exit). 2. 单个清除 2. Single elimination A. 同时按下 HOME+上键并松开,进入一键连招功能配置模式 A. Press the HOME+ Up button at the same time and release to enter the auto combo function configuration mode. B.
- Page 27 B. 按住 HOME 键 3 秒钟,会自动清除所有已配置的一键连招,并自动退出配置模式 B. Hold down the HOME button for 3 seconds, all the configured auto combos will be eliminated automatically, and it will exit the configuration mode automatically. 4. 支持的键位 4. Button support 除 HOME 键及摇杆外的所有按键都可用于触发。除 HOME 键外的所有按键都可记录。 All buttons except the HOME button and the rocker can be used for triggering.
- Page 28 A. 同时按下 HOME 键 + 中右键并松开,进入校准配置模式 A. Press the HOME+ Middle right button at the same time and release to enter the calibration configuration mode. B. 尝试转动两个摇杆,直到手柄停止震动 B. Try to turn the two rockers until the handle stops vibration C. 停止震动后,先松开两个摇杆,再按一下 home 键 C.
- Page 29 B. 按下 Home 键并保持 3 秒,会清除所有校准参数,并退出配置模式 B. Hold down the HOME button for 3 seconds, all the calibration parameters will be eliminated automatically, and it will exit the configuration mode automatically. 使用建议: Recommendation for use: 大部分原装手柄无需校准,如果出现摇杆漂移,建议先进行校准。 Most of the original handle does not need to be calibrated. If the rocker drifts, it is suggested to calibrate first.
- Page 30 button is pressed, the button is locked in the held down state until the button is pressed again and released. This function can achieve an infinite automatic operation of one button. 1.开启按键的无限循环功能 1. Turn on the infinite loop function of the button (请不要在有按键被锁定的状态下进入配置模式)...
- Page 31 4. Press the HOME button to exit the configuration mode. 2.关闭按键的无限循环功能 2. Turn off the infinite loop function of the button (请不要在有按键被锁定的状态下进入配置模式, 例如 A 键处于无限循环状态,请再次按下 A 键退出此状态) (Do not enter the configuration mode when a button is locked. For example, when A is in the infinite loop state, please press A again to exit this state.) 1.
- Page 32 4: Notice that this button is still in the combo mode. To exit the combo state, please refer to the relevant tutorial. 3.关闭所有按键的无限循环功能 3. Turn off the infinite loop function of all buttons (请不要在有按键被锁定的状态下进入配置模式,例如 A 键处于无限循环状态,请再次按下 A 键退出此状态) (Do not enter the configuration mode when a button is locked. For example, when A is in the infinite loop state, please press A again to exit this state.) 1.
- Page 33 4.锁定按键 4. Lock button 按一下已开启无限循环功能的按键,此后按键被锁定在无限循环状态 Press a button that has turned on the infinite loop function, and then the button is locked in the infinite loop state. 5.解锁按键 5. Unlock button 按一下已锁定的按键并松开,此后按键被解除无限循环状态 Click the locked button and release it, and then the button is relieved of the infinite loop state.
- Page 34 be configured, the infinite loop state of the related button needs to be removed. For example, the button A is in an infinite loop state. If we want to use other configuration functions, we need to press the A button again and exit the infinite loop state before we can use other configuration functions.
- Page 35 Note 2: During the function configuration, each effective operation triggers a handle vibration. 注 3:连发频率调整将以红色 LED 灯闪烁频率予以提示 Note 3: the frequency adjustment of the burst will be prompted by the flicker frequency of the red LED light. 注 4:默认通过双击 HOME 键实现对 Capture(NS 手柄)的模拟。 Note 4: The default operation is to simulate the Capture (NS handle) by double clicking the HOME button.
- Page 36 G:N200 支持第三方手柄操控 PS4/X1 游戏主机功能 G: N200 supports third party handles to manipulate the PS4/X1 game host function A:将 N200S 连上 X1/PS4 等游戏主机,再将原装主机手柄插上 N200S。(X1 主机 连接 X1 手柄, PS4 主机连接 PS4 手柄) A: Connect N200S to X1/PS4 and other game hosts, and then plug the original host handle to N200S.
- Page 37 COOV HUB K4 1.:无线连接:(如下图所示) 1. Wireless connection: (as shown in the following figure) A:将 N200S 通过 TYPE-C OTG 线或者 USB 口连接至 Switch/X1/PS4 等游戏主机...
- Page 38 B: connect the "Interface B" of N200T to the HUB K4 through MICRO USB interface. C:将键盘鼠标格斗摇杆连接至 COOV HUB K4 C: Connect the keyboard and mouse combat rocker to the COOV HUB K4 D:将一手柄连上 HUB K4(此手柄起到按键映射作用) D: Connect a handle to HUB K4 (this handle serves as a button mapping) 注:在...
- Page 39 2.:有线连接:(如下图所示) 2. Wired connection: (as shown in the following figure) A:将 N200T 的“接口 A”通过 TYPE-C OTG 线或者手柄数据线连接至 Switch/X1/PS4 等游戏主机 A: Connect the "Interface A" of N200T to the Switch/X1/PS4 or other games hosts through the TYPE-C OTG line or the data wire of the handle. B:将...
- Page 40 B: connect the "Interface B" of N200T to the HUB K4 through MICRO USB interface. C:将键盘鼠标格斗摇杆连接至 COOV HUB K4 C: Connect the keyboard and mouse combat rocker to the COOV HUB K4 D:将一手柄连上 HUB K4(此手柄起到按键映射作用) D: Connect a handle to HUB K4 (this handle serves as a button mapping) 注...
- Page 41 相互交换的功能。 Button mapping is to map a button to another button, so as to realize the same function of several buttons or exchange functions of several buttons. A、将手柄按键映射到键盘按键、鼠标按键或格斗摇杆上: A. Map the handle buttons to keyboard buttons, mouse buttons, or combat rockers: a、同时按下手柄...
- Page 42 has the function of B button. B、将手柄摇杆映射到键盘、鼠标和格斗摇杆上: B. Map the handle rocker to keyboard, mouse, or combat rocker: a、同时按下手柄 HOME+右键并松开,进入键位映射配置模式 a. Press the HOME+ Right button of the handle at the same time and release to enter the button mapping configuration mode. b、按一下需要映射的按键(键盘按键、鼠标按键或摇杆按键)...
- Page 43 C、将手柄摇杆映射到 HID 格斗摇杆上: C. Map the handle rocker to the HID combat rocker: a、同时按下手柄 HOME+右键并松开,进入键位映射配置模式 a. Press the HOME+ Right button of the handle at the same time and release to enter the button mapping configuration mode. b、先将需要映射的格斗摇杆往上下左右任一方向移动(HID 格斗摇杆) b. First move the combat rocker that needs to be mapped in any direction (HID combat rocker) c、再将目标映射的摇杆往上下左右任一方向移动(手柄摇杆)...
- Page 44 D. Map the handle rocker to the mouse movement: a、同时按下 HOME+右键并松开,进入键位映射配置模式 a. Press the HOME+ Right button of the handle at the same time and release to enter the button mapping configuration mode. b、先移动一下需要映射的鼠标 b. First move the mouse that needs to be mapped c、再动一下目标映射的摇杆(手柄上的摇杆)...
Need help?
Do you have a question about the N200 and is the answer not in the manual?
Questions and answers