Table of Contents

Related Manuals for ES AW6-V6-MBG

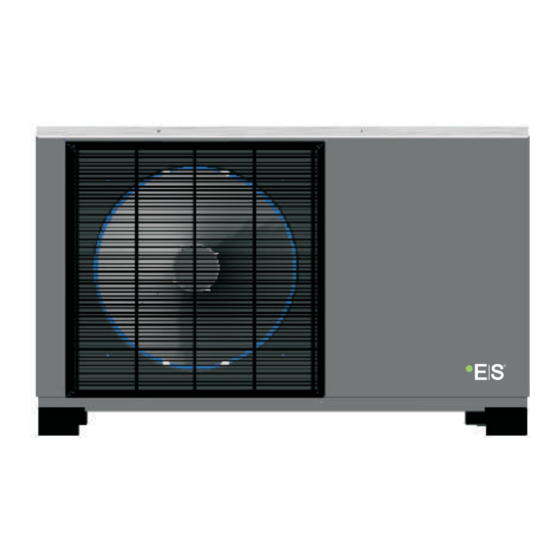
Summary of Contents for ES AW6-V6-MBG
- Page 1 AW6-V6-MBG AW9-V6-MBG AW11-V6-MBG AW13-V6-MBG DC Inverter Air to Water Heat Pump User’s manual U s e r ’ s m a n u a l Before operating this product, please read the instructions carefully and keep this manual for future use.
-
Page 3: Table Of Contents
Catalogue 1.Introduction 1.1.Preliminary Information 1.2.Safety Precautions 1.3.Functioning Principles 1.4.Product Component Diagram 1.5.Technical Specifications 2.Overview of the Units 2.1.Functional Diagrams 2.2.Outlines and Dimensions 2.3.Exploded Views 3.Assembly Configurations Assembly Configuration Selection Flowchart Assembly Drawings, Wiring, and Software 4.Installation Walkthrough 4.1.Sanitary Hot Water Applications 4.2.Heating and Cooling Circuits 4.3.Indoor Unit Installation 4.4.Outdoor Unit Installation... - Page 4 Included Accessories Below are the accessories that are included with your purchase. Please check to ensure that none are missing or damaged. If so,please contact your local distributor. Installation User’s Screws TC-Water Manual Manual Temperature Temperature Sensor Sensor (for cooling and heating) TR-Room TV(1+2)- Water...
-
Page 5: Introduction
Introduction 1.1 Preliminary Information Thank you for your purchase of our quality heat pump. This manual is intended to provide detailed instructions for the successful installation of your newly purchased heat pump product. Please ensure that this manual, along with the User’s and Service manuals, are kept in an easy-to-access location for your reference later on. -
Page 6: Safety Precautions
Introduction 1.2.Safety Precautions To ensure both your personal safety, as well as the safety of the product, note the symbols below and be sure to understand their correlation to each of the precautions depicted. Warning Caution Prohibition User Manual To avoid electrical shock, make The installation, dismantlement Be sure to read this manual before sure to disconnect the power... - Page 7 Introduction 1.2.Safety Precautions Fuse Steel Copper When the power cord gets loose Please select the correct fuse or Be aware fingers might be hurt by or damaged, always get a qualified breaker as per recommended. Steel the fin of the coil. person to fix it.
-
Page 8: Functioning Principles
Introduction 1.3.Functioning Principles Power supply Four-way vavle Compressor Water Outlet Pressure Three-way valve check valve Water pump Fan motor Water inlet Filter T-connector Refrigerant Filter Heat exchanger Indoor unit Outdoor unit Heating Cooling... -
Page 9: Product Component Diagram
Introduction 1.4.Product Components Diagram Below is a general system application of the heat pump. Any specific configurations should be a variation of this “master” system drawing. All suggested assembly variations are given in Chapter 3. -
Page 10: Technical Specifications
Introduction 1.5.Technical Specifications Type of Product DC Inverter Air to Water Heat Pump Unit AW11-V6-MBG AW13-V6-MBG Model AW6-V6-MBG AW9-V6-MBG Power Supply-Refrigerant V/Hz/Ph 220-240/50/1-R410A Max. Heating Capacity (1) 6.21 10.10 11.5 12.6 C.O.P (1) 4.05 4.03 3.82 3.89 Heating Capacity Min./Max.(1) 2.19/6.21... -
Page 11: Overview Of The Units
2. Overview of the Units 2.1.Functional Diagrams Indoor unit AWC6/9/11/13-V6-MBW Cable gland Touch screen operation panel... - Page 12 2. Overview of the Units 2.1.Functional Diagrams Outdoor unit AW6-V6-MBG AW9-V6-MBG...
- Page 13 2. Overview of the Units 2.1.Functional Diagrams Outdoor unit AW11-V6-MBG AW13-V6-MBG...
-
Page 14: Outlines And Dimensions
2. Overview of the Units 2.2.Outlines and Dimensions Outlines and dimensions Indoor —— AWC6/9/11/13-V6-MBW Unit:mm... - Page 15 2. Overview of the Units 2.2.Outlines and Dimensions Outdoor —— AW6-V6-MBG Unit:mm 76.5...
- Page 16 2. Overview of the Units 2.2.Outlines and Dimensions Outdoor —— AW9-V6-MBG Unit:mm 1053 1065...
- Page 17 2. Overview of the Units 2.2.Outlines and Dimensions Outdoor —— AW11-V6-MBG 1204 1215 Unit:mm...
- Page 18 2. Overview of the Units 2.2.Outlines and Dimensions Outdoor —— AW13-V6-MBG Unit:mm 1258...
-
Page 19: Exploded Views
2. Overview of the Units 2.3. Exploded view Indoor —— AWC6/9/11/13-V6-MBW Name Touch screen operation panel Power switch Indoor PCB Wifi module DHW TEMP. SENSOR HEATING/COOLING TEMP. SENSOR MIXING CIRCUIT 1 TEMP. SENSOR MIXING CIRCUIT 2 TEMP. SENSOR ROOM TEMP. SENSOR... - Page 20 2. Overview of the Units Outdoor —— AW6-V6-MBG 2.3. Exploded view Name Name Fan Blade Low Pressure Sensor DC Motor High Pressure Sensor PFC Conductor High Pressure Switch Ambient Temp.Sensor 4-way Reserving Valve Compressor Compressor Discharge Temp.Sensor Compressor Suction Temp.Sensor...
- Page 21 2. Overview of the Units 2.3. Exploded view Outdoor —— AW9/11-V6-MBG Name Name Evaporating Coil Temp. Sensor Low Pressure Sensor Compressor Crankcase Heater Coil for Four-way Reserving Valve Drain Pan Heater 4-way Reserving Valve Compressor Suction Temp. Sensor Outdoor PCB Board Compressor Compressor Discharge Temp.
- Page 22 2. Overview of the Units 2.3. Exploded view Outdoor —— AW13-V6-MBG Name Name Name Decorative panel Coil temperature sensor Coil and ambient temperature sensor Front panel Plate heat exchanger Air guide Bulkhead Water inlet temperature sensor Sperator Plate heat exchanger fixture Outdoor fan Suction temperature sensor Outdoor motor...
-
Page 23: Assembly Configurations
3. Assembly Configurations - Flowchart... -
Page 24: Assembly Drawings, Wiring, And Software
Assembly Configurations - Drawing 1... - Page 25 Assembly Configurations - Drawing 1 Assembly 1: Wiring Diagram To achieve successful operation at a minimum, ensure the ports below are properly connected. Software: Basic Settings 1.Set the needed working modes of the unit via the menu 2.Temperature configuration options for Heating/Cooling circuit 1 are found under H.Configuring the set water heating temperatures: H.1.Setting a heating curve: H.2.
- Page 26 Assembly Configurations - Drawing 2...
- Page 27 Assembly Configurations - Drawing 2 Assembly 2: Wiring Diagram To achieve successful operation at a minimum, ensure the ports below are properly connected. Software: Basic Settings 1.Set the needed working modes of the unit via the menu 2.Temperature configuration options for Heating/Cooling circuit 1 are found under H.Configuring the set water heating temperatures: H.1.Setting a heating curve: H.2.
- Page 28 Assembly Configurations - Drawing 2 Software: Basic Settings (continued) 4.The location of the configuration for heating-only or cooling-only system is under...
- Page 29 Assembly Configurations - Drawing 3...
- Page 30 Assembly Configurations - Drawing 3 Assembly 3: Wiring Diagram To achieve successful operation at a minimum, ensure the ports below are properly connected. For connection for mixing valve 2,please refers to the appendix A (on page 76-77) of this manual for more information.
- Page 31 Assembly Configurations - Drawing 3 Software: Basic Settings (continued) 3.(cont.) Configure the water pump to operate for heating or cooling: 4.Temperature configuration options for Heating/Cooling circuit 2 are found under Please activate entire Heating/Cooling circuit 2 setting H. Configuring the set water heating temperatures: H.1.Setting a heating curve: H.2.
- Page 32 Assembly Configurations - Drawing 4...
- Page 33 Assembly Configurations - Drawing 4 Assembly 4: Wiring Diagram To achieve successful operation at a minimum, ensure the ports below are properly connected. For connection for mixing valve 2,please refers to the appendix A ( on page 76-77 ) of this manual for more information.
- Page 34 Assembly Configurations - Drawing 4 Software: Basic Settings (continued) 3.(cont.) Configure the water pump to operate for heating or cooling: 4. The location of the configuration for heating-only or cooling-only system is under 5. Temperature configuration options for Heating/Cooling circuit 2 are found under H.
- Page 35 Assembly Configurations - Drawing 5...
- Page 36 Assembly Configurations - Drawing 5 Assembly 5: Wiring Diagram To achieve successful operation at a minimum, ensure the ports below are properly connected. For connection for mixing valve 2,please refers to the appendix A ( on page 76-77 ) of this manual for more information.
- Page 37 Assembly Configurations - Drawing 5 Software: Basic Settings (continued) 3.(cont.) Configure the water pump to operate for heating or cooling: 4. Temperature configuration options for Heating/Cooling circuit 2 are found under H. Configuring the set water heating temperatures: H.1. Setting a heating curve: H.2.
- Page 38 Assembly Configurations - Drawing 6...
- Page 39 Assembly Configurations - Drawing 6 Assembly 6: Wiring Diagram To achieve successful operation at a minimum, ensure the ports below are properly connected. Software: Basic Settings 1.Set the needed working modes of the unit via the menu 2.Temperature configuration options for Heating/Cooling circuit 1 are found under H.Configuring the set water heating temperatures: H.1.Setting a heating curve: H.2.
- Page 40 Assembly Configurations - Drawing 6 Software: Basic Settings (continued) 4. Double-check to ensure that the Domestic Hot Water option is enabled under Configure the desired setpoint for water temperature (default set to 50°C):...
- Page 41 Assembly Configurations - Drawing 7...
- Page 42 Assembly Configurations - Drawing 7 Assembly 7: Wiring Diagram To achieve successful operation at a minimum, ensure the ports below are properly connected. Software: Basic Settings 1.Set the needed working modes of the unit via the menu 2.Temperature configuration options for Heating/Cooling circuit 1 are found under H.Configuring the set water heating temperatures: H.1.Setting a heating curve: H.2.
- Page 43 Assembly Configurations - Drawing 7 Software: Basic Settings (continued) The location of the configuration for heating-only or cooling-only system is under Double-check to ensure that the Domestic Hot Water option is enabled under Configure the desired setpoint for water temperature (default set to 50°C):...
- Page 44 Assembly Configurations - Drawing 8...
- Page 45 Assembly Configurations - Drawing 8 Assembly 8: Wiring Diagram To achieve successful operation at a minimum, ensure the ports below are properly connected. For connection for mixing valve 2,please refers to the appendix A ( on page 76-77 ) of this manual for more information.
- Page 46 Assembly Configurations - Drawing 8 Software: Basic Settings (continued) 3.(cont.) Configure the water pump to operate for heating or cooling: 4. Temperature configuration options for Heating/Cooling circuit 2 are found under H. configuring the set water heating temperatures: H.1. Setting a heating curve : H.2.
- Page 47 Assembly Configurations - Drawing 9...
- Page 48 Assembly Configurations - Drawing 9 Assembly 9: Wiring Diagram To achieve successful operation at a minimum, ensure the ports below are properly connected. Software: Basic Settings 1.Set the needed working modes of the unit via the menu 2.Temperature configuration options for Heating/Cooling circuit 1 are found under H.Configuring the set water heating temperatures: H.1.Setting a heating curve: H.2.
- Page 49 Assembly Configurations - Drawing 9 Software: Basic Settings (continued) 3.(cont.) Configure the water pump to operate for heating or cooling: The location of the configuration for heating-only or cooling-only system is under 5. Temperature configuration options for Heating/Cooling circuit 2 are found under H.
- Page 50 Assembly Configurations - Drawing 10...
- Page 51 Assembly Configurations - Drawing 10 Assembly 10: Wiring Diagram To achieve successful operation at a minimum, ensure the ports below are properly connected. For connection for mixing valve 2,please refers to the appendix A ( on page 76-77 ) of this manual for more information.
- Page 52 Assembly Configurations - Drawing 10 Software: Basic Settings (continued) 3.(cont.) Configure the water pump to operate for heating or cooling: 4. Temperature configuration options for Heating/Cooling circuit 2 are found under H. configuring the set water heating temperatures: H.1. Setting a heating curve : H.2.
-
Page 53: Installation Walkthrough
4. Installation Walkthrough 4.1. Sanitary Hot Water Applications If sanitary hot water is need,a 3-way diverting valve should be included. It is recommended to set up your sanitary hot water system identically to one of the configurations shown below and on the following pages. 4.1.1.Configuration 1 T/P valve Magnesium rod... - Page 54 4. Installation Walkthrough 4.1. Sanitary Hot Water Configurations 4.1.2.Configuration 2 T/P valve Magnesium rod Water mixture Water from heat pump valve High temperature hot water export Water to heat pump City water In this configuration, hot water from the heat pump circuit runs through the coils in the tank. Sanitary water fills the tank and is heated by the coils before exiting the tank towards the shower head.
- Page 55 4. Installation Walkthrough 4.1. Sanitary Hot Water Configurations 4.1.3.Configuration 3 A water-to-water plate heat exchanger can be substituted for the coil inside water tank, as shown below: T/P valve Magnesium rod Water to water plate heat exchanger Water mixture valve High temperature hot water export Water from heat pump...
- Page 56 4. Installation Walkthrough 4.1. Sanitary Hot Water Configurations 4.1.4. Note about the Heating/Cooling Distribution System Users are heavily recommended to install a buffer tank into the chosen configuration, especially when the method of hot water distribution is below 20L/W of water volume. The buffer tank should be installed between the heat pump and the distribution system, in order to: •...
-
Page 57: Heating And Cooling Circuits
4. Installation Walkthrough 4.2. Heating and Cooling Circuits This heat pump unit is capable of controlling two completely different heating and cooling circuits, as shown in the following images. Configuring the temperatures for circuits 1 and 2 can be done via the “Heating and Cooling Circuit” menus. - Page 58 4. Installation Walkthrough 4.2. Heating and Cooling Circuits 4.2.2. Mixing Valves MV1 and MV2 If the system water temperature may be higher (or lower) than the temperatures needed for circuit 1 (or circuit 2) in a heating or cooling operation, then a mixing valve can be added to the circuit, and connected to the MV1 (or MV2) port on the indoor unit.
- Page 59 4. Installation Walkthrough 4.2. Heating and Cooling Circuits 4.2.3. Circulation Pump Control Note: P1 is circulation pump 1, P2 is pump 2 • “Buffer Tank” should be checked if one is installed between the heat pump and distribution system. • “P1/P2 for Heating/Cooling Operation” sets that circuit’s pump to work for heating or cooling. If “Buffer Tank”...
-
Page 60: Indoor Unit Installation
4. Installation Walkthrough 4.3. Indoor Unit Installation 4.3.1. Choosing an installation location 1) The indoor unit should be installed indoors, mounted on a wall, and have the water outlet aimed downwards. The indoor unit must operate in a dry, well-ventilated location. There should be no volatile, corrosive, or flammable liquids or gases nearby. - Page 61 4. Installation Walkthrough 4.3. Indoor Unit Installation 4.3.2. Installation Process Choose a very firm wall for installation. If it’s a wooden wall, use self-tapping screws instead of expansion bolts. Hang the mounting board onto the wooden wall directly, without drilling holes. Ensure the wooden wall is sufficiently firm.
-
Page 62: Outdoor Unit Installation
4. Installation Walkthrough 4.4. Outdoor Unit Installation 4.4.1. Choosing an installation location The outdoor unit can be installed in an open safe, corridor, balcony, roof, or hung onto the wall. Install in a dry, open airspace. Humidity can cause corrosions or short-circuiting to the electronics. There should be no volatile, corrosive, or flammable liquids or gases nearby. - Page 63 4. Installation Walkthrough 4.4. Outdoor Unit Installation 4.4.2. Installation Process For the installation, users can either use the dedicated mounting bracket provided by the supplier, or prepare a suitable bracket that meets the following requirements. 1) The unit must be supported by either flat concrete blocks, or a dedicated mounting bracket. The bracket should be able to support at least 5x the unit’s weight.
-
Page 64: Wiring
4. Installation Walkthrough 4.5. Wiring 4.5.1. Explanation of Terminal Block 1 For user's side Unit power supply This should be connected directly to the city power supply. For all units, ensure that a cable of sufficient gauge is used. (found on nameplate) Poewr supply to outdoor unit anti-freezing electric heater for plate heat exchanger and water pipe. - Page 65 4. Installation Walkthrough 4.5. Wiring 4.5.2. Explanation of Terminal Block 2 For user's side A:P0:Pump for heat pump circulation. B, C: Water Pump A-Pump 1: Pump for Heating & Cooling Circuit 1, B-Pump 2: Pump for Heating & Cooling Circuit 2, If there is an external water pump in heating, cooling and hot water system, it can be connected to these ports, to be under the control of heat pump,...
- Page 66 4. Installation Walkthrough 4.5. Wiring 4.5.3. Explanation of Terminal Block 3 Application Side A: Signal output to Auxiliary Heater (AH),which will be used as auxiliary heating source for both heating and DHW operation. B: Signal output to Hot Water Tank Backup Heater (HWTBH), which will be used as backup heating source for DHW operation only.
- Page 67 4. Installation Walkthrough 4.5. Wiring 4.5.4. Explanation of Terminal Block 4 C O M CS C O M Application Side A: Signal cable between indoor and outdoor unit. B,C: Cooling and Heating Mode Switchovers This unit is capable of switching between heating and cooling automatically, according to the ambient temperature, or external signal input.
- Page 68 • The power supply should be compliant to all standards located in the rating label. • The power supply, necessary cables, and sockets should fully meet the input power requirements of the unit. Installation sketch AW6-V6-MBG AW9-V6-MBG Heat pump monoblock unit AW11-V6-MBG...
- Page 69 4. Installation Walkthrough 4.5. Wiring 4.5.5. Wiring Process 1) Open the indoor unit’s front panel and remove the electrical box cover. 2) Acquire one (or two) power cable(s) of suitable length that is compliant to all local safety regulations. For AW6/09/11/13-V6-MBG Units: A.
- Page 70 4. Installation Walkthrough 4.5. Wiring 3) Connect the auxiliary heater power cable: Acquire a power cable of suitable length that is compliant to all local safety regulations. A. Insert one end of this cable through the cable gland on the bottom of the indoor unit, and connect it with the AH power supply terminals ( PE, N1, L1)
- Page 71 4. Installation Walkthrough 4.5. Wiring 4) Connect the signal cable between the indoor and outdoor unit: Retrieve the signal cable from the accessories bag. corresponding with each other Notice: When fixing the power cable with the wire clip, take care to not clamp onto the wires within the sleeving. The clip must clamp onto the outer insulation sleeve, or else it may cause damage to one of the one-core wires.
- Page 72 4. Installation Walkthrough 4.5. Wiring 5) Connect the powercable between the indoor and outdoor unit: Acquire a 3-core power cable of sufficient length that is compliant to all local safety regulations. Shown as "Outdoor unit " on wiring diagram Notice: When fixing the power cable with the wire clip, take care to not clamp onto the wires within the sleeving.
- Page 73 4. Installation Walkthrough 4.5. Wiring 6) Connect the sensors and communication cables to the indoor unit. Sensor cable connection Indoor PCB ●Retrieve all sensors and communication cables from the accessories bag. ● Connect all sensors to the communication cables, and insert the male end into the indoor unit Communication cable through the cable glands.
-
Page 74: Water Pipework
4. Installation Walkthrough 4.6. Water Pipework After installation of the unit is complete, connect the water inlet to outlet pipe according to local regulations, and confirm that there is flow. Have the piping pressure tested and cleaned before use. 4.6.1. Filtration A mesh filter should be installed between the water inlet of the unit and the water tank in order to keep collect any impurities and preserve water quality. -
Page 75: Test Run
4. Installation Walkthrough 4.7. Test run After installation finished, please fulfill the water system with water and purge out air in the system before start-up. 4.7.1. Before start-up The list of verifications below must be performed before the unit starts up, to ensure best possible conditions for smooth long-term operation. - Page 76 Appendix A: Wiring Indoor PCB Power Siwtch Power Siwtch Indoor PCB Cn217 Port 24V DC Power 0~10V DC Connection of Supply for mixing Control Signal for Water Mixing valve mixing valve 1 Valve 1 Indoor PCB Power Siwtch Power Siwtch Indoor PCB Cn217 Port 24V DC Power...
- Page 77 Appendix A: Wiring Indoor PCB 2-way motorized N from power Connection of valve supply (or parallel 2-way to any N connector motorized on terminal block) valve...
- Page 78 Appendix B: Wiring Indoor——AWC6/9/11/13-V6-MBW TAKE CARE! The specifications are subject to change without prior notice. For actual specifications of the unit, please refer to the specification stickers on the unit.
- Page 79 Appendix B: Wiring Oudoor——AW6-V6-MBG TAKE CARE! The specifications are subject to change without prior notice. For actual specifications of the unit, please refer to the specification stickers on the unit.
- Page 80 Appendix B: Wiring Outdoor —— AW9/11/13-V6-MBG TAKE CARE! The specifications are subject to change without prior notice. For actual specifications of the unit, please refer to the specification stickers on the unit.
- Page 82 Thank you for purchase of our quality product. Please refer to the contact information Please read this manual thoroghly before use , and below for technical support and enquiries: follow the instructions carefully in operating the unit in order to prevent damages to either the device or persons. mail: Product specifications are subject to change with improvements , without prior notice.
Need help?
Do you have a question about the AW6-V6-MBG and is the answer not in the manual?
Questions and answers