Advertisement
Quick Links
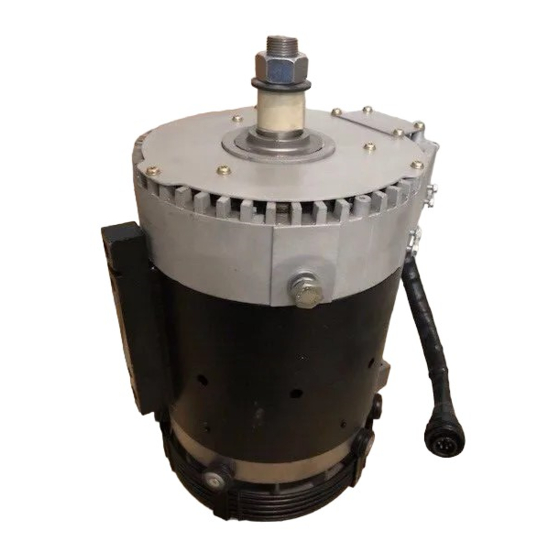
C.E. Niehoff & Co.
R
CONTENTS
Section 1:Wiring .................................................................2
Section 2: Basic Troubleshooting .....................................3
Section 3: Advanced Troubleshooting .............................4
Battery Charging Conditions
The following conditions may be observed during cold-
start voltage tests until temperatures of electrical system
components stabilize. The time it takes to reach optimum
voltage and amps will vary with engine speed, load, and
ambient temperature.
Maintenance/Low Maintenance Lead-Acid Battery:
Traditional lead acid batteries require lowest charge volt-
age of all vehicle battery chemistries. Battery cells must
be maintained by periodically topping off with distilled
water as required.
Maintenance-free Lead-Acid Battery:
Maintenance-free batteries are similar to Maintenance/
Low Maintenance batteries, but may require slightly higher
charge voltage.
Deep-cycle/Marine Maintenance-free Battery:
Charge acceptance of these batteries may display charac-
teristics similar to maintenance-free batteries and may
charge faster due to generally lower capacity relative to
size.
AGM (Absorbed Glass Mat) Maintenance-free Battery:
These dry-cell batteries respond better than standard
maintenance-free batteries. If battery state of charge
(SOC) drops to 75% or less, batteries should be
recharged to 95% or higher separately from engine charg-
ing system to avoid damaging charging system
components and to provide best overall performance.
Charge acceptance of these batteries may display charac-
teristics similar to maintenance batteries, but may require
higher charge voltage and will draw significant current (<100
amps) when under 50% SOC.
Lithium Battery:
Lithium batteries have unique charging characteristics that
differ from lead acid. These batteries require charging
systems configured specifically for lithium battery chemis-
tries. Contact CEN for more information on lithium battery
charging systems and components.
Testing Guidelines
Professional service technicians rely on the following
guidelines when testing electrical components.
TG3F
Voltage testing:
•
Set meter to proper scale and type (AC or DC).
•
Be sure to zero the meter scale or identify the meter
burden by touching meter leads together. Meter burden
must be subtracted from final reading obtained.
•
Be sure the meter leads touch source area only.
Prevent short circuit damage to test leads or source by
not allowing meter leads to touch other pins or exposed
wires in test area.
•
Be sure to use CEN tools designed especially for trou-
bleshooting CEN alternators when available.
Resistance (ohm) testing:
•
Set meter to proper scale.
•
Be sure to zero the meter scale or identify the meter
burden by touching meter leads together. Meter burden
must be subtracted from final reading obtained.
•
Be sure meter leads touch source area only. Allowing
fingers or body parts to touch meter leads or source
during reading may alter reading.
•
Be sure reading is taken when source is at 70ºF. Read-
ings taken at higher temperatures will increase the
reading. Conversely, readings taken at lower tempera-
tures will decrease the reading.
•
Be sure to test directly at the source. Testing through
extended harnesses or cable extensions may increase
the reading.
•
"OL" as referenced in this document refers to open cir-
cuit: "infinite" resistance, typically in very high kilo- or
megaohm range depending on meter and settings.
Diode testing:
•
Diodes allow current to flow in one direction only. Typi-
cal voltage drop in forward bias can range from 0.1-
0.85V. Meter should read OL in reverse bias. Check
meter user manual for meter-specific testing guidelines.
Voltage drop testing:
•
Measure voltage between B+ on alternator or power
source and B- (ground) on alternator or source. Record
reading. Move to batteries or other power source and
measure again between B+ and B- terminals on battery
or other power source. The difference between the two
readings represents voltage lost within circuit due to,
but not limited to, inadequate cable gauge or faulty con-
nections.
•
Voltage drop measurements must be taken with all elec-
trical loads or source operating.
Dynamic/Live testing (Connecting power and ground to
component to test operation/function out of circuit):
•
Connect jumper leads directly and securely to power
source contacts of component being tested.
•
Make any connection to power and ground at power
supply or battery source terminals. Do not make con-
nection at component source terminals, as that may
create an arc and damage component source terminals.
C701/C701A Alternator
Troubleshooting Guide
Page 1
Advertisement

Summary of Contents for Cen C701
- Page 1 The following conditions may be observed during cold- • Be sure to use CEN tools designed especially for trou- start voltage tests until temperatures of electrical system bleshooting CEN alternators when available. components stabilize. The time it takes to reach optimum...
- Page 2 Section A: Wiring Diagram CEN C701/C701A Alternators D+ Terminal Description and Operation C701/C701A 28 V, 300 A alternators are internally recti- IGN Terminal fied. All windings and current-transmitting components are non-moving, so there are no brushes or slip rings to wear out.
- Page 3 • Digital Multimeter (DMM) test results in the troubleshooting • Ammeter (digital, inductive) charts. • CEN Regulator Bypass Adapter A10-129 Basic Troubleshooting • Jumper wire Inspect charging system components for damage Check connections at B– cable, B+ cable, and regulator harness.
- Page 4 Section 3: Advanced Troubleshooting Section C: Advanced Troubleshooting A2-213 Regulator Troubleshooting DeSCrIptIOn AnD OperAtIOn Shut down vehicle and restart engine. If alternator func- tions normally after restart, a “no output condition” was A2-213 regulator is either attached directly to the out- normal response of voltage regulator to “high voltage”...
- Page 5 Section 3: Advanced Troubleshooting (cont.) Section C: Advanced Troubleshooting (CONT’D) Quick Diagnostic Chart 1 – No Alternator Output – With engine running, does battery voltage exist at alternator B+ terminal and regulator IGN terminal? Repair vehicle harness circuit to IGN terminal on regulator or B+ terminal on alternator.
- Page 6 Section 3: Advanced Troubleshooting (cont.) Section C: Advanced Troubleshooting (CONT’D) Chart 2 – No Air-Conditioning/Alternator Warning Light On With engine running, verify operation of charging system. Is regulator setpoint voltage present? Go to Chart 3, page 7. Connect DMM red lead to D+ (or P) terminal on regulator. Connect black lead to alternator B–...
- Page 7 Alternator is defective. Unplug alternator-to-regulator harness. Plug CEN Regulator Bypass Adapter A10-129 into harness plug. Make sure black lead does not touch ground. Clip red lead to B+ terminal on alternator. (If Adapter is not available, connect jumper wire from pin B on harness to alternator B+ terminal.) Does spark occur at alternator B+ terminal? ...
- Page 8 Section 3: Advanced Troubleshooting (cont.) Section C: Advanced Troubleshooting (CONT’D) Chart 4 – Continuation of Chart 2 or 3 as Noted Set DMM to diode test. Connect black lead of DMM to B+ terminal on alternator. Connect red lead to socket D on harness plug. DMM should read voltage drop. Reverse leads. DMM should read OL.