
Subscribe to Our Youtube Channel
Summary of Contents for ORA ITO Gorenje BCM547ORAW
- Page 1 DETAILED INSTRUCTIONS FOR USE OF A COMBINED MICROWAVE OVEN www.gorenje.com www.gorenje.com...
- Page 2 We thank you for your trust and the purchase of our appliance. This detailed instruction manual is supplied to make the use of this product easier. The instructions should allow you to learn about your new appliance as quickly as possible. Make sure you have received an undamaged appliance.
-
Page 3: Table Of Contents
CONTENTS INTRODUCTION IMPORTANT SAFETY INSTRUCTIONS Before connecting the appliance COMBINED MICROWAVE OVEN 12 Control unit 14 Technical specifications PREPARING THE APPLIANCE FOR THE FIRST USE 15 BEFORE USING THE APPLIANCE FOR THE FIRST TIME COOKING STEPS 16 STEPS OF THE COOKING PROCESS (1–6) 16 Step 1: SWITCHING ON AND SETTINGS 17 Step 2: CHOOSING THE COOKING SYSTEM 19 Step 3: CHOOSING THE SETTINGS... -
Page 4: Important Safety Instructions
IMPORTANT SAFETY INSTRUCTIONS CAREFULLY READ THE INSTRUCTIONS AND SAVE THEM FOR FUTURE REFERENCE. This appliance can be used by children aged from 8 years and above and persons with reduced physical, sensory or mental capabilities or lack of experience and knowledge if they have been given supervision or instruction concerning use of the appliance in a safe way and understand the hazards involved. - Page 5 Do not use harsh abrasive cleaners or sharp metal scrapers to clean the oven door glass/ the glass of hinged lids of the hob (as appropriate), since they can scratch the surface, which may result in shattering of the glass. Do not use steam cleaners or high pressure cleaners to clean the appliance as this may result in an electric shock.
- Page 6 Safe use of the microwave oven WARNING: When the appliance is operated in the combination mode, children should only use the oven under adult supervision due to the temperatures generated. WARNING: If the door or door seals are damaged, the oven must not be operated until it has been repaired by a competent person.
- Page 7 The contents of feeding bottles and baby food jars shall be stirred or shaken and the temperature checked before consumption, in order to avoid burns. Eggs in their shell and whole hard-boiled eggs should not be heated in microwave ovens since they may explode, even after microwave heating has ended.
-
Page 8: Before Connecting The Appliance
Heed the minimum distance between the Always read and observe the instructions upper edge of the oven and the nearest for heating in a microwave oven, specified object above it. on the food packaging. The microwave oven is intended for heating Be careful when heating alcohol-containing food and beverages. -
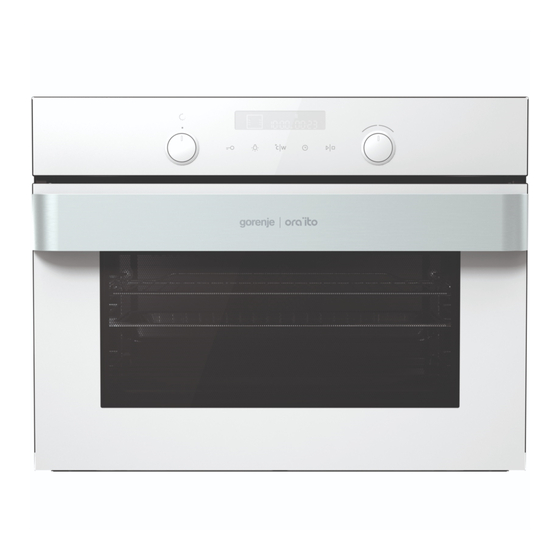
Page 9: Combined Microwave Oven
COMBINED MICROWAVE OVEN (DESCRIPTION OF THE OVEN AND EQUIPMENT – DEPENDING ON THE MODEL) The figure represents one of the built-in appliance models. Since the appliances for which these instructions were drawn up may have different equipment, some functions or equipment may be described in the manual that may not be present in your appliances. - Page 10 WIRE GUIDES Wire guides allow preparation of the food on four levels (please note that the levels/ guides are counted from the bottom up). Guides 3 and 4 are intended for grilling, and guide 1 is used with microwave systems when food is prepared in a glass baking dish.
- Page 11 The SHALLOW BAKING SHEET is used for baking pastry and cakes. The DEEP BAKING TRAY is used for roasting meat and baking moist pastry. It can also be used as a drip tray. Never place the deep baking tray in the first guide during the cooking process, except when grilling food or using the roasting spit and you are only using the deep tray as a drip...
-
Page 12: Control Unit
CONTROL UNIT (DEPENDING ON THE MODEL) COOKING CHILD LOCK OVEN TEMPERATURE/ SYSTEM LIGHTING ON/ POWER KEY SELECTOR KNOB OFF KEY (depending on the model) NOTE: Symbols of cooking systems may be located on the knob or on the front panel (depending on the appliance model). - Page 13 ELECTRONIC START/STOP SETTINGS KNOB COOKING PROGRAM (-/+) INFORMATION TIMER Use this key to AND CLOCK DISPLAY start or stop the Use this knob to set program. Cooking duration the time, temperature and microwave End of cooking power. Alarm Clock NOTE: The keys will respond better if you touch them with a larger area of your fingertip.
-
Page 14: Technical Specifications
TECHNICAL SPECIFICATIONS (DEPENDING ON THE MODEL) xxxxxx 220-240V ~ 3.0 kW TYPE: XXXXXX 220V-240V, 50/60Hz Freq. : 2,45 GHz ART. Nr: SER. Nr: XXXXXX The rating plate indicating the basic information about the appliance is located at the edge of the oven and it is visible when the oven door is opened. -
Page 15: Before Using The Appliance For The First Time
BEFORE USING THE APPLIANCE FOR THE FIRST TIME Upon receiving the appliance, remove all parts, including any transport equipment, from the oven. Clean all accessories and utensils with warm water and regular detergent. Do not use any abrasive cleaners. When the oven heats up for the first time, the characteristic smell of a new appliance will be emitted. -
Page 16: Steps Of The Cooking Process
STEPS OF THE COOKING PROCESS (1–6) STEP 1: SWITCHING ON AND SETTINGS After connecting your appliance or after an extended power outage, 12:00 will flash on the display and the symbol will light up. Set the time of day. SETTING THE CLOCK Rotate the SETTINGS KNOB (-/+) and first set the minutes;... -
Page 17: Step 2: Choosing The Cooking System
STEP 2: CHOOSING THE COOKING SYSTEM Rotate the knob (left and right) to select 0 COOKING SYSTEM (see program table). The selected icon will appear on the display. Settings can also be changed during operation. SYSTEM DESCRIPTION SUGGESTED SUGGESTED TEMPERATURE POWER (W) (°C) COOKING SYSTEMS... - Page 18 SYSTEM DESCRIPTION SUGGESTED SUGGESTED TEMPERATURE POWER (W) (°C) PLATE WARMER Use this function to reheat your dinnerware (plates, cups) before serving food in it to keep the food warm longer. ECO COOKING In this mode, power consumption during the cooking process is optimized. This mode is used for roasting meat and baking pastry.
-
Page 19: Step 3: Choosing The Settings
STEP 3: CHOOSING THE SETTINGS Each cooking system features basic or default settings which can be adjusted. Adjust the settings by pressing the relevant key (before pressing the START/STOP key). Some settings are not available with some programs; an acoustic signal will remind you of such cases. - Page 20 POWER LEVEL 1000 W • Quickly reheating beverages, water and dishes containing a large volume of liquid. • Cooking dishes with high water content (soups, sauces etc.). 750 W • Cooking fresh or frozen vegetables. 600 W • Melting chocolate. •...
- Page 21 TIMER FUNCTIONS First rotate the COOKING SYSTEM SELECTOR KNOB; then, set the temperature. Touch the TIMER key several times to select the symbol. The icon for the selected timer function will light up and the adjustable cooking start/end time will flash on the display. Other icons are dimly lit. Press START to start the cooking process.
- Page 22 Setting the minute minder The minute minder can be used independently of the oven operation. The longest possible setting is 24 hours. During the last minute, the minute minder is displayed in seconds. After the set time expires, the oven will automatically stop operating (end of cooking). An acoustic signal will be heard which you may turn off by touching any key.
-
Page 23: Step 4: Sselecting Additional Functions
STEP 4: SSELECTING ADDITIONAL FUNCTIONS Activate/deactivate the functions by pressing the desired key or a combination of keys. Some functions are not available with some systems; an acoustic signal will indicate of such cases. CHILD LOCK Activate it by touching the CHILD LOCK key. The "key" icon will light up on the display. - Page 24 5sek ACOUSTIC SIGNAL Loudness of the acoustic signal can be set when no timer function is activated (only the time of day is displayed). Press the TEMPERATURE/POWER key and hold it for 5 seconds. Two fully lit bars will appear on the display. Rotate the SETTINGS KNOB (-/+) to choose one of the three volume levels (one, two, or three bars).
-
Page 25: Step 5: Starting The Cooking Process
STEP 5: STARTING THE COOKING PROCESS Start the cooking process by pressing the START/STOP key and holding it for a while. STEP 6: SWITCHING OFF THE OVEN Turn the COOKING SYSTEM SELECTOR KNOB to position "0". After the end of the cooking process and after the oven has been switched off, declining temperature is displayed down to 50 °C. -
Page 26: Descriptions Of Systems (Cooking Modes) And Cooking Tables
DESCRIPTIONS OF SYSTEMS (COOKING MODES) AND COOKING TABLES If your desired food cannot be found in the cooking table, find information for similar food. The information displayed applies to cooking in a single level. An interval of suggested temperature is indicated. Start with a lower temperature setting and increase it if you find the food is not browned sufficiently. - Page 27 COOKING SYSTEMS RAPID PREHEATING Use this function to heat the oven to the desired temperature as quickly as possible. This mode is not appropriate for cooking. Turn the COOKING SYSTEM SELECTOR KNOB to rapid preheating. PRESET TEMPERATURE will be displayed. This temperature setting can be adjusted.
- Page 28 UPPER AND BOTTOM HEATER The heaters in the bottom and in the ceiling of the oven cavity will radiate heat evenly into the oven interior. Roasting meat: Use enamel coated, tempered glass, clay, or cast iron pan or tray. Stainless steel trays are not suitable as they strongly reflect the heat.
- Page 29 Baking pastry Only use one level and dark baking sheets or trays. In light-coloured baking sheets or trays, the browning of the pastry will be poorer, as such equipment will reflect the heat. Always place the baking trays on the grid. If you are using the supplied baking sheet, remove the grid.
- Page 30 Is the cake done? • Pierce the cake at the top with a wooden toothpick or skewer. If there are no traces on the pick or the skewer when pulled out, the cake is done. Did the cake collapse? • Check the recipe. •...
- Page 31 GRILL When grilling food, the upper heater and the grill heater fitted on the ceiling of the oven cavity will operate. Preheat the infrared (grill) heater for five minutes. Supervise the cooking process at all times. The meat may burn quickly due to high temperature.
- Page 32 Type of food Weight Guide level Temperature Cooking time (from the (°C) (min) bottom) MEAT Beefsteak, rare 180g/piece 220-240 14-16 Beefsteak, well done 180g/piece 220-240 18-21 Pork neck fillet 180g/piece 220-240 19-23 Cutlets/chops 180g/piece 220-240 20-24 Veal escalope 180g/piece 220-240 19-22 Grill sausages 100g/piece...
- Page 33 GRILL WITH FAN In this operating mode, the grill heater and the fan operate simultaneously. Suitable for grilling meat, fish, and vegetables. (See descriptions and tips for GRILL.) Type of food Weight Guide level Temperature Cooking time (from the (°C) (min) bottom) MEAT...
- Page 34 HOT AIR AND BOTTOM HEATER The bottom heater, the round heater, and the hot air fan will operate. Suitable for baking pizzas, apple pies, and fruitcakes. 2 (See descriptions and tips for UPPER and BOTTOM HEATER.) Type of food Guide level Temperature Cooking time (from the...
- Page 35 HOT AIR Round heater and the fan will operate. The fan installed in the back wall of the oven cavity makes sure the hot air constantly circulates around the roast or pastry. Roasting meat: Use enamel coated, tempered glass, clay, or cast iron pan or tray. Stainless steel trays are not suitable as they strongly reflect the heat.
- Page 36 Baking pastry Preheating is recommended. Biscuits and cookies can be baked in shallow baking sheets on several levels simultaneously (2nd and 3rd). Note that baking time can differ even with if the baking sheets used are the same. The biscuits in the upper baking sheet may be ready sooner than those in the lower one. Always place the baking trays on the grid.
- Page 37 PLATE WARMER Use this function to reheat your dinnerware (plates and cups) before serving food in it to keep the food warm longer.
- Page 38 ECO COOKING Round heater and the fan will operate. The fan installed in the back wall of the oven cavity makes sure the hot air constantly circulates around the roast or pastry. Type of food Guide level Temperature Cooking time (from the (°C) (min)
- Page 39 AUTOMATIC SYSTEMS DEFROSTING The system also includes automatic programs for defrosting the food with microwaves. Food suitable for defrosting includes cakes with heavy cream or butter-based cream, cakes and pastry, bread and rolls, and deep-frozen fruit. Turn the COOKING SYSTEM SELECTOR KNOB to defrosting.
- Page 40 COMBINED SYSTEMS HOT AIR AND MICROWAVES In this cooking mode, the food is cooked with a combination of microwaves and grill. Power levels: 90, 180, 360, 600 W Place the glass baking dish into the 1st guide. Type of food Weight (g) Power (W) Temperature...
- Page 41 GRILL WITH FAN + MICROWAVES This system uses a combination of microwaves and grill with fan for a shorter cooking time. Power levels: 90, 180, 360, 600 W Place the glass baking dish into the 1st guide. Type of food Weight (g) Moč...
- Page 42 MICROWAVE SYSTEMS MICROWAVES Microwaves are used for cooking and defrosting. Power levels: 90, 180, 360, 600, 750, 1000 W. Place the glass baking dish into the 1st guide. Defrosting Type of food Weight (g) Moč Čas odtajanja (min) MEAT Ground meat ** 20-35 Cubed meat ** 20-35...
- Page 43 Reheating Type of food Weight (g) Power (W) Reheating/ cooking time (minutes) FOOD Escalopes/steaks 300 g Fish 200 g Mixed vegetables * 500 g Side dishes * 500 g Sauces * 500 g Soups/stews * 5 dl Pizza 500 g Chicken medallions 500 g Open sandwiches...
- Page 44 Cooking When cooking meat and vegetables, we recommend using a glass casserole with a lid. Place the glass dish on the glass baking dish placed on the 1 guide. Type of food Weight (g) Power (W) Cooking time (minutes) FOOD Chicken thighs ** 1000 20-30...
- Page 45 Type of food Weight (g) Power (W) Cooking time (minutes) Brussels sprout 1000 10-15 Button mushrooms / 1000 10-15 Champignons Asparagus 5-10 Peas *** 15-20 Cabbage 1000 10-15 SIDE DISHES Rice **** 1000 10-15 Pasta **** 1000 10-15 Whole grain pasta 1000 10-15 ****...
-
Page 46: Maintenance & Cleaning
MAINTENANCE & CLEANING (DEPENDING ON THE MODEL) Be sure to unplug the appliance from the power supply and wait for the appliance to cool down. Children should not clean the appliance or perform maintenance tasks without proper supervision. Aluminium finish Clean the aluminium finish with non-abrasive liquid cleaners intended for such surfaces. -
Page 47: Conventional Oven Cleaning
CONVENTIONAL OVEN CLEANING You may use the standard cleaning procedure to clean stubborn dirt in the oven (using cleaners or an oven spray). After such cleaning, rinse the cleaner residues thoroughly. Clean the oven and the accessories after each use to prevent the dirt from burning into the surface. -
Page 48: Using The Aqua Clean Function To Clean The Oven
USING THE AQUA CLEAN FUNCTION TO CLEAN THE OVEN Turn the COOKING SYSTEM SELECTOR KNOB to Aqua Clean. An icon will be displayed along with the PRESET TEMPERATURE and the time of 30 minutes. The duration cannot be changed. Pour 0.6 l of water into a glass or shallow baking dish and insert it into the lower guide. -
Page 49: Removing And Cleaning The Wire Guides
REMOVING AND CLEANING THE WIRE GUIDES Only use conventional cleaners to clean the guides. Undo the screw. Use a screwdriver. Remove the guides from the holes in the back wall. Take care not to lose the spacers fitted on the wire guides. Replace the spacers after cleaning;... -
Page 50: Replacing The Bulb
REPLACING THE BULB The bulb is a consumable and therefore not covered by warranty. Before changing the bulb, remove the trays, the grid, and the guides. The oven is fitted with a halogen lamp. This product contains a light source of energy efficiency class (G). Use a Phillips (cross) screwdriver. -
Page 51: Troubleshooting Table
TROUBLESHOOTING TABLE Problem/error Cause There is no response of Disconnect the appliance from the power mains for a few the sensors; the display is minutes (undo the fuse or switch off the main switch); frozen. then, reconnect the appliance and switch it on. The main fuse in your home Call a service technician. -
Page 52: Disposal
DISPOSAL Packaging is made of environmentally friendly materials that can be recycled, disposed of, or destroyed without any hazard to the environment. To this end, packaging materials are labelled appropriately. The symbol on the product or its packaging indicates that the product should not be treated as normal household waste. - Page 56 COMBI MW_IL_ORAITO2 en (11-21)
Need help?
Do you have a question about the Gorenje BCM547ORAW and is the answer not in the manual?
Questions and answers