
Related Manuals for DittNyeBad WG-U691

Summary of Contents for DittNyeBad WG-U691
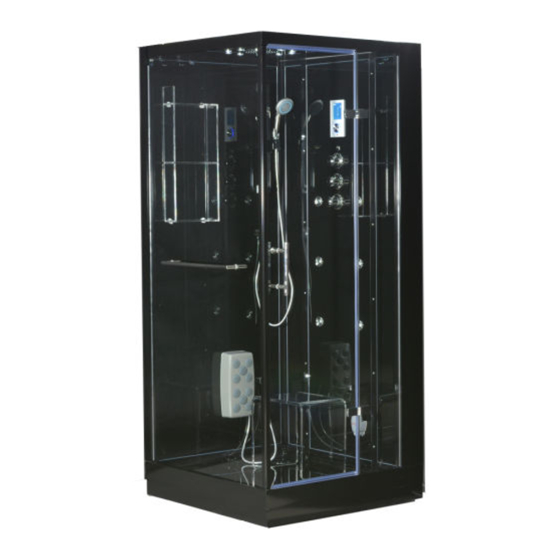
- Page 1 Steam Room Manual WG-U691 L Model Size Light Steam Loudsp faucet Top Hand generator eaker shower shower LxWxH mm √ √ √ √ √ √ √ 950x950x2230 WG-U691...
- Page 2 Name Name Name Ceiling light Door handle Hand shower Cover Steam outlet Shower pole Door hinge Seat Towel rail Computer panel Tray Shower hose Thermo mixer(faucet) Top shower Foot massage Back jet Shampoo shelf Hose of foot massage...
- Page 3 Dear user, Thank you for purchasing our leisure sanitary ware. To enable you to use this product safely and effectively, please read this Manual carefully before use. I. Warning for using the steam room 1. Please read this manual carefully before using, and guarantee the reliable grounding. 2.
-
Page 4: Water Supply
17. It is forbidden to use this product in case of thundering. Cut off the master supply of the product and take out the power plug 18. Stop the service of the product with trouble on the electric circuit immediately, for it may cause the fire by short-circuit or electric shock by trouble. -
Page 5: Installation Steps
4. Earth wire: the earth wire of the steam room shall be connected reliably to the grounding unit of the building, as well as the earth wire of the power socket. V. Drain connection 1. Move the steam room assembled completely and connected with water and electricity supplies back to the installation position selected. - Page 6 Set up two back wall, connecting by 4x10mm screw,5 pcs Install the aluminum ,4x10mm screw,5 pcs Install another aluminium,4x10mm screw,5 pcs...
- Page 7 To make the corner more fixed,fastern by 4x10mm screw,2 pcs each side At the bottom, fastern by 4x10mm screws 4x25mm screw U shape seal Cut U shape seal a litter shorter than the glass,put it on the top and bottom the glass,then put the glass into the track 1 pcs 4x20mm screw to fix the big glass...
- Page 8 Put on the cover , fasten screw and nut, 4 pcs fasten another screw 4*16mm, 4 pcs Install the hinge in door glass, then hang door glass into the hinge,finally fasten the hinge...
- Page 9 Install the shelf,one person stand inside the steam, another person stand behind the wall glass Set up the base The back of shelf Fasten the screw from bottom Install the rest accessories such as foot massage, towel rail, door handle etc.
- Page 10 Install door side seal, 1 side of glass door Install the fixed glass seal outside,if the seal is too hard in winter, you can drop this seal into hot water to make it soft. Glass in this side You can use a wood to help installing the seal.
- Page 11 Connect the hoses to C. Check the symbols on A or B (depending on your shower model) on your thermo mixers front plate to find the correct position for the hoses on the back side of the mixer. Connect the wire to control box, fan to fan, light to light, loudspeaker to loudspeaker.
-
Page 12: Operation
VII. Operation 1. Each time before use, check if the power switch is turned on, and the master valve for cold/hot water supplies is open. 2. Check if the special leakage-protection plug of the steam room is inserted correctly. To switch on the power each time, check if the leakage protection switch of the plug works well in this way: press RESET with the power indicator on. -
Page 14: Remote Control
Remote control Computer panel operation A. Notes: 1.this panel is equipped with capacitive touch buttons,make sure to advod direct contacting with shower head while selecting installation loaction of the panel.Otherwise it will lead to malfunction or trigger the panel lock. 2.all function keys are located at the most convenient locations. - Page 15 Touch on the panel or press on the remote control to turn on the system.The back light of shuttle switch and LCD screen will light up;the screen will show currenct temperature.The system will automatically set a countdown of one hour and turn on the overhead light.
- Page 16 ②. The default steam temperature is 45 ℃ and the default duration is 45min. ③ Setting of steam bath temperature: After turning on the steam machine, move the cursor , press the shuttle switch or press on remote control to enter the temperature setting mode.
- Page 17 (Kindly reminder: in order not to be scalded, pls turn the suitable temperature when turn on the hot/cold water) 3. Exhaust fan function Move the cursor to and press the shuttle switch or press on the remote control to turn on or turn off the exhaust fan. Icon will light up after startup.
- Page 18 In radio mode, touch to start automatic upward, downward search; or press on the remote control to enter channel search mode and press the remote control for one second, which will start automatic upward, downward search until a valid station is obtained. After unlocking the panel and exiting from function settings, touch .
- Page 19 goes on. After turning on Bluetooth player, press on the panel to switch to the next song, press on the panel to switch to the previous song. When using remote control to switch songs, you first need to press on the remote control to song switch mode, then press to switch to the next song and for the previous song.
- Page 20 temperature setting, press again to enter the mode of steaming duration setting, then press again to enter volume adjustment mode. The fourth press would return to the steam temperature setting. As the system enters the volume adjustment mode, would begin to flash on the LCD screen.
-
Page 21: Troubleshooting
(1) Turn handle in the four way function themo mixer (as shown in the figure) to select the different shower patterns and related functions like top shower, hand shower,back jet, foot massage (2) Turn on the water supply. turn it left and right to adjust the water volume. (3)Test the water temperature by finger, and then rotate the handle to adjust the temperature of water until feel comfortable then choose your desired shower pattern. -
Page 22: Clean And Maintenance
IX. Clean and Maintenance . General neutral liquid detergent and soft cloth can be used for the daily cleaning of the steam room. Do not use the detergent containing the acetone or ammonia spirit. If there is any sticky dirt on the tub surface caused by sealing, wipe it off gently with a piece of soft cloth soaked with some gasoline.
Need help?
Do you have a question about the WG-U691 and is the answer not in the manual?
Questions and answers