Table of Contents
Advertisement
Dear customer
Thank you for purchasing this product.
For optimum perfor mance and safety, please read these
instructions carefully.
Before connecting, operating or adjusting this product, please read
the instructions completely. Please keep this manual for future
reference.
PP
En Cf
Operating Instructions
Model No.
If you have any questions contact
In the U.S.A. and Puerto Rico:1-800-211-PANA(7262)
In Canada:1-800-561-5505
For Canada only
The warranty can be found
on pages 40 and 41.
For U.S.A. and Puerto Rico only
The warranty can be found
on pages 42 and 43.
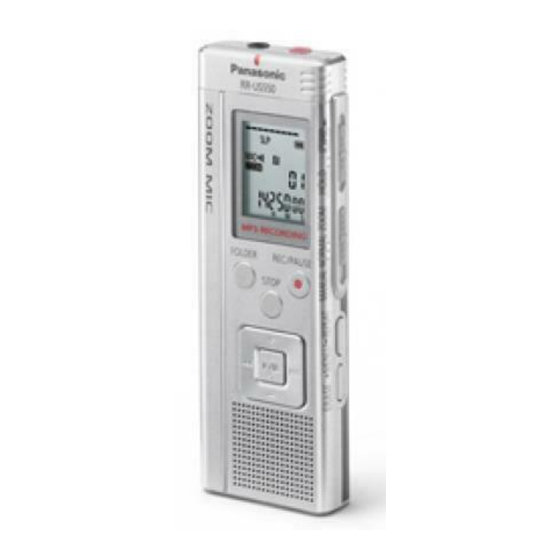
IC Recorder
RR-US550
RQT9422-Y
H1208TY0
Advertisement
Table of Contents

Related Manuals for Panasonic RR-US550


Summary of Contents for Panasonic RR-US550
-
Page 1: Operating Instructions
Before connecting, operating or adjusting this product, please read the instructions completely. Please keep this manual for future reference. En Cf Operating Instructions RR-US550 Model No. If you have any questions contact In the U.S.A. and Puerto Rico:1-800-211-PANA(7262) In Canada:1-800-561-5505... -
Page 2: Features
Features Recording Meeting Lesson Lecture Playing back to listen • Recorded file • MP3 music file with speaker Connecting this unit to a computer Using a computer • Copy/Organize (Delete) recorded files/ Play back to listen From a computer • Transfer MP3 music files Supplied accessories Please check and identify the supplied accessories. -
Page 3: Table Of Contents
Table of contents Preparation Features ... 2 Supplied accessories ... 2 Part names ... 4 Inserting the batteries ... 5 Turning ON/OFF the Power ... 6 Hold function ... 6 Setting the time ... 7 Basic Operations Recording settings ... 8 Switching recording position ... -
Page 4: Part Names
Part names Main unit Display Remaining memory/Recording level XPLPSLP : Microphone sensitivity File number : Slight return playback Recording (Playback) elapsed time/Possible remaining recording time/Remaining playback time/Current time etc. Clock/Recording (Playback) time/ Recording date Recording indicator (red) LCD display FOLDER STOP + (Volume) u (Fast backward) -
Page 5: Inserting The Batteries
Inserting the batteries 2 AAA LR03 batteries (not included) Make sure the batteries face the right direction. Use alkaline batteries. The remaining battery display shown below is displayed while recording or playing. If the batteries run out, “ ” blinks. Replace the batteries as soon as possible. -
Page 6: Turning On/Off The Power
Turning ON/OFF the Power OPERATION/HOLD Switch HOLD Turning the power ON • Slide OPERATION/HOLD switch to then the power turns on and the display lights on. Turning the power OFF • Slide and hold OPERATION/HOLD switch to side for 2 seconds. Also, when you do not operate the unit for more than approx. -
Page 7: Setting The Time
Setting the time When the power is turned on, “ purchase). (In power-on condition, the display changes to “ The clock is used for preserving recording date. Please set the time first. Recording is possible even if the clock is not set. However, the Recording date, Recording start time will be displayed as “ When “... -
Page 8: Recording Settings
Recording settings This unit has 3 recording setting items related to recording quality. Using different combinations of recording settings, you can adjust audio quality according to recording situations. Recording Setting contents and setting item display Recording High-quality mode ( ➜ page 15) Long recording Microphone High... -
Page 9: Recording
Recording • Turn the power on ( ➜ page 6). STOP • Press to stop the unit. Slide recording position switch to select a position. Switch modes according to situations ( ➜ page 8). Select a folder for recording. The folder is switched each time you press Select among “... -
Page 10: Playing
Playing • Press • Select a folder ( ➜ right). • Select a file ( ➜ right). Press q / g (Playback starts). FOLDER STOP Adjusting the volume Turn up the volume: Press +. Turn down the volume: Press –. Volume range is 0 to 20. -
Page 11: Listening To The Audio Using Earphones
Listening to the audio using earphones Connect earphones (not included). (Sounds are monaural.) Confi rming the Plug type: ø 3.5 mm (1/8") mini plug remaining time Press and hold FOLDER 1 second or longer during playback. The remaining time of the file being played is displayed for approx. -
Page 12: Deleting Recorded Fi Les
Deleting recorded files • Select a folder ( ➜ page 10). Press STOP the unit is stopped. ERASE Press u , i to select the file. Deleting one file Deleting all files in one folder Deleting all files in folder A through D Deleting all files in all folders Formatting this unit... -
Page 13: Locking Recorded Fi Les (File Protection)
Locking recorded files (File protection) Locked files cannot be deleted on this unit (except when formatting). Use this function to protect files. • Select a folder ( ➜ page 10). STOP • Press to stop the unit. MENU/ REPEAT • Press MENU/ REPEAT •... -
Page 14: Changing Recording Settings (Microphone Sensitivity)
Changing recording settings (Microphone sensitivity) • Set the Recording position switch to [MANUAL] ( ➜ page 8). STOP • Press MENU/ REPEAT • Press “ Press +, – to select “ Press u , i to select microphone sensitivity and press q / g to enter. -
Page 15: Changing Recording Settings (Zoom Microphone/Recording Mode (Xp/Lp/Slp))
Changing recording settings (Zoom microphone/Recording mode (XP/LP/SLP)) Changing Zoom microphone setting When the zoom is set to “ ”, the surrounding sound volume is lowered, and the sound in front is clearly recorded. STOP • Set the Recording position switch to [MANUAL] ( ➜ page 8). MENU/ REPEAT •... -
Page 16: Preventing Unnecessary Recording (Vas)
Preventing unnecessary recording (VAS)/Confirming possible (remaining) recording time VAS (Voice Activated System) function Recording stops automatically when silence continues for about 3 seconds. If the unit detects sound, the recording resumes. Recording indicator • Press MENU/ REPEAT • FOLDER Press STOP “... -
Page 17: Setting The Playback Speed Control Function
Setting the playback speed control function Playback speed can be adjusted at 5 different speeds. Press MENU/ REPEAT • “ ” (blinking) and “ (Only “ SPEED Press i to select “ MENU/ REPEAT • STOP Press u , i to select playback speed. When pressing i , the playback speed becomes faster and “... -
Page 18: Reducing Noise (Eq Setting)
Reducing noise (EQ setting)/Slight return playback Reducing noise (EQ setting) This function makes it easier to hear sounds during playback. You cannot make this setting when “ ” is selected. MENU/ REPEAT • Press STOP “ ” (blinking) and “ displayed. -
Page 19: Repeat Play/Successive Play
Repeat play/Successive play, A-B Repeat play Repeat play/Successive play Each time you press and hold for 1 second or longer while stopped, the playback style is switched as follows. ALL → ALL MENU/ REPEAT • “ALL” display The selected file until the last file in the selected folder are played successively. -
Page 20: Security Functions
Security functions If you set a password, password authentication is necessary when playing back this unit or connecting to a computer. When the unit is lost or stolen, the recorded data stored in this unit cannot be played or the computer does not recognize this unit as long as the password does not match. - Page 21 Authenticating the password Perform step in page 20. (Enter the password.) g When the password matches The security lock is temporarily released and the audio file can be played. (“ temporarily canceling.) In the condition , the security lock is set again. •...
-
Page 22: Recording Using An External Microphone
Recording using an external microphone/Recording from other devices Recording using an external microphone Insert securely. Plug type: ø 3.5 mm (1/8") mini plug Record the audio ( ➜ page 9). If the recording level is too low or high, adjust the microphone sensitivity ( ➜... -
Page 23: Recording To Other Devices
Recording to other devices • Cancel the operation beep while copying ( ➜ right). Audio Cable with resistor (not included) Monaural Stereo mini plug mini plug Monaural Monaural mini plug mini plug Insert securely Plug type: ø 3.5 mm (1/8") mini plug On this unit, play the file you want to copy ( ➜... -
Page 24: Connecting This Unit To A Computer
Connecting this unit to a computer You can copy files recorded on this unit to the computer. • Start the computer beforehand. • Press to stop the unit. STOP 1. Insert the USB cable into this unit. 2. Insert the USB cable into the computer. This unit Insert the USB cable straight in... -
Page 25: Opening The Folder Of This Unit Using A Computer
Opening the folder of this unit using a computer The illustrations show Windows XP (OS). The display may differ depending on the OS. • Connect this unit to a Computer beforehand ( ➜ page 24). 1. Click [Start] → [My Computer]. This unit is displayed as a removable disk. -
Page 26: Importing The Recorded Fi Les In This Unit To A Computer/Organizing Fi Les
Importing the recorded files in this unit to a computer/Organizing files • Open the removable disk (this unit) displayed on the computer screen and open the audio folder (A to D) beforehand ( ➜ page 25). Importing recorded files to a computer 1. -
Page 27: Returning The Fi Les Imported To The Computer To This Unit
Returning the files imported to the computer to this unit • Open the audio folder (A to D) of this unit beforehand ( ➜ page 25). Returning recorded files to this unit from the computer 1. Select the recorded file imported to the computer ( ➜... -
Page 28: Listening To Music On This Unit (Transferring Mp3 Music Fi Les To This Unit)
Listening to music on this unit (Transferring MP3 music files to this unit) You can enjoy music by transferring MP3 music files stored in the computer to this unit. Transferring MP3 music files to this unit from the computer • Open MUSIC folder ( ) of this unit beforehand ( ➜... -
Page 29: Listening To Music On This Unit (Playing Mp3 Music Fi Les On This Unit)
Listening to music on this unit (Playing MP3 music files on this unit) • Remove the USB cable ( ➜ page 24). • Turn the power on ( ➜ page 6). STOP • Press to stop the unit. FOLDER Press FOLDER folder). -
Page 30: Creating Mp3 Music Fi Les
Creating MP3 music files This unit is not equipped with the function or computer software to create MP3 file from music CD. You can create MP3 music files using separately sold computer software, etc. Windows XP or Windows Vista users can create MP3 music files using Windows Media Player 11. Following is the example of operating instructions when using Windows XP and Windows Media Player 11. -
Page 31: System Requirements
✽ This model is not compatible with TRC/ADPCM format IC recorders made by Panasonic. Also, files recorded on this unit cannot be played on those IC recorders and/or cannot be read using Voice Editing software supplied with those IC recorders. -
Page 32: Q & A (Frequently Asked Questions)
• Cannot play because the recording format is different. • The Voice Editing cannot be used for this product because the recording format differs from the format used for other Panasonic IC recorders. The recording format used for this product is MP3 format. -
Page 33: Troubleshooting Guide
Troubleshooting guide Before requesting service, make the following checks. If you are in doubt about some of the check points, or if the remedies indicated in the chart do not solve the problem, refer to “Customer Services Directory (United States and Puerto Rico)”... - Page 34 Troubleshooting guide Symptom Display “ ” appears. “ ” appears. Record The memory is used completely earlier than expected. (“ ” is displayed earlier than expected.) Recording stops halfway. Howling occurs when listening to the recording in progress with earphones. Recording ended halfway.
- Page 35 Symptom Playing Playback speed is too fast or slow. • You changed the playback speed ( ➜ page 17). The order of playing changed after reloading files that were once imported to the computer to this unit. There is no sound from the earphones or it is difficult to hear or noisy.
-
Page 36: Care And Use
Care and use To reduce risk of radio interference caused by headphone-, earphone- or microphone cables, only use adequate accessories with a cable length of less than 3 m (9.8 ft.). g Unit • Avoid using or placing this unit near sources of heat. •... -
Page 37: Maintenance
g Listening caution You should use extreme caution or temporarily discontinue use in potentially hazardous situations. Even if your headphones or earphones are the open-air type designed to let you hear outside sounds, don’t turn up the volume so high that you can’t hear what’s around you. Sound can be deceiving. -
Page 38: Product Service
In the U.S.A. and Puerto Rico, refer to “Customer Services Directory (United States and Puerto Rico)” on page 43. In Canada, contact the Panasonic Canada Inc. Customer Care Centre at 1-800-561-5505, or visit the website (www.panasonic.ca), or an authorized Servicentre closest to you. -
Page 39: Specifi Cations
Battery life (may be less depending on the operating conditions.) Battery (AAA LR03) Alkaline ∗2 battery ∗2 Using Panasonic Alkaline battery. ∗3 When zoom microphone is off. ∗4 When audio is output from speaker (Volume: 13, EQ: off, playback speed control : x 1) Standard recordable time Recording mode Max. -
Page 40: Limited Warranty (Only For Canada)
Limited Warranty (ONLY FOR CANADA) Panasonic Canada Inc. warrants this product to be free from defects in material and workmanship and agrees to replace the product for a period as stated below from the date of original purchase. Panasonic Portable / Clock Radio (without Tape, CD, MD) - Page 41 SERIAL NUMBER Telephone #: (905) 624-5505 1-800 #: 1-800-561-5505 Fax #: (905) 238-2360 Email link: “customer support” on www.panasonic.ca User memo: DATE OF PURCHASE DEALER NAME DEALER ADDRESS TELEPHONE NUMBER Product Identification Marking is located on the bottom of unit.
-
Page 42: Limited Warranty (Only For U.s.a. And Puerto Rico)
Limited Warranty Coverage (For USA and Puerto Rico Only) If your product listed below does not work properly because of a defect in materials or workmanship, Panasonic Consumer Electronics Company (referred to as “the warrantor”) will, for the length of the period indicated on the chart below, which starts with the date of original purchase (“warranty... - Page 43 For hearing or speech impaired TTY users, TTY: 1-877-833-8855 Accessory Purchases (United States and Puerto Rico) Purchase Parts, Accessories and Instruction Books online for all Panasonic Products by visiting our Web Site at: http://www.pstc. panasonic.com or, send your request by E-mail to: npcparts@us.panasonic.com...
- Page 44 Panasonic Consumer Electronics Company, Division of Panasonic Corporation of North America One Panasonic Way, Secaucus, New Jersey 07094 Panasonic Canada Inc. 5770 Ambler Drive, Mississauga, Ontario L4W 2T3 ©...
Need help?
Do you have a question about the RR-US550 and is the answer not in the manual?
Questions and answers