
Subscribe to Our Youtube Channel
Summary of Contents for Elite Elite Primer Pro High Head Series
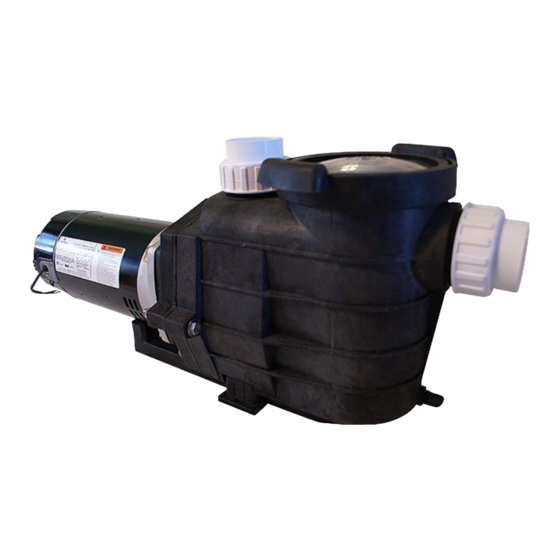
- Page 1 Elite Primer Pro High Head Series External Pond Pump ( 6000EPH75, 7500EPH75, 8200EPH82, 9200EPH82, 11000EPH90, 13000EPH110) Installation and User’s Guide...
- Page 2 IMPORTANT SAFETY INSTRUCTIONS, READ AND FOLLOW ALL INSTRUCTIONS. SAVE THESE INSTRUCTIONS **NEVER RUN PUMP DRY!! NEVER EXCEED 25psi INTERNAL CASE PRESSURE!! ***THIS PUMP IS ONLY TO BE USED AS AN EXTERNAL “OUT-OF-POND” PUMP. NEVER ALLOW PUMP TO BECOME SUBMERGED!! WIRING WARNING : RISK OF ELECTRICAL SHOCK OR ELECTROCUTION.
-
Page 3: Pump Strainer Basket
PUMP STRAINER BASKET This unit, sometimes referred to as the “Hair and Lint Pot”, is the unit in front of the volute. Inside the chamber is the basket which must be kept clean of leaves and debris at all times. View basket through the “See Through Lid”... - Page 4 10. Turn the power “ON” at the house circuit breaker. Reset the water garden time clock to the correct time. 11. Open the manual air relief valve on top of the filter. 12. Stand clear of the filter. Start the pump. 13.
-
Page 5: Pump Disassembly
NOTE: DO NOT wrap motor with plastic or other air tight materials. The motor may be covered during a storm, for winter storage, etc., but NEVER when operating or expecting operation. WARNING : RISK OF ELECTRICAL SHOCK OR ELECTROCUTION. This water garden pump must be installed by a licensed or certified electrician or a qualified water garden serviceman in accordance with the National Electrical Code and all applicable local codes and ordinances. -
Page 6: Pump Reassembly / Seal Replacement
PUMP REASSEMBLY / SEAL REPLACEMENT CAUTION : The polished and lapped faces of the seal could be damaged if not handled with care. 1. When installing the replacement ceramic/carbon seal, use silicone sealant on the metal portion, before pressing into the seal plate. 2. - Page 7 RESTARTING INSTRUCTIONS & PRIMING THE PUMP CAUTION : DO NOT run the pump dry. If the pump is run dry, the mechanical seal will be damaged and the pump will start leaking. If this occurs, the damaged seal must be replaced. ALWAYS maintain proper water level in your water garden. If the water level falls below the skimmer opening, the pump will draw air through the skimmer, losing the prime and causing the pump to run dry, resulting in a damaged seal.
-
Page 8: Troubleshooting
4. Open the manual air relief valve on top of the filter, and stand clear of the filter. 5. Turn on the switch or time clock. 6. When water comes out of the manual air relief valve, close the valve. The system should now be free of air and circulating water to and from the water garden. - Page 9 c. Slide the motor and seal plate away from the volute. d. Remove the diffuser. e. Clean debris from impeller. If debris cannot be removed, complete the following steps: i. Remove left hand threaded bolt and gasket. ii. Remove, clean and reinstall impeller. iii.
Need help?
Do you have a question about the Elite Primer Pro High Head Series and is the answer not in the manual?
Questions and answers