
Related Manuals for Ice-O-Matic GEMD270A2

Summary of Contents for Ice-O-Matic GEMD270A2
- Page 1 GEMD270A2 PEARL-ICE ICE/WATER DISPENSER MODELS- GEMD270A2 Installation and Service Manual Ice-O-Matic Part Number 11100 E. 45 Ave. 9081407-01 Revision Denver, Colorado 80239 03/23/21 1-866-PURE-ICE...
-
Page 2: Ice-O-Matic
SERVICE PARTS MANUAL 22 INCH WIDE ICE SERIES CUBERS MODEL-ICE0320, ICE0520 Includes 50Hz. Units ICE-O-Matic 11100 East 45th Ave Denver, Colorado 80239 Part Number 9081297-01 PD04/02 Rev1/05... -
Page 3: Table Of Contents
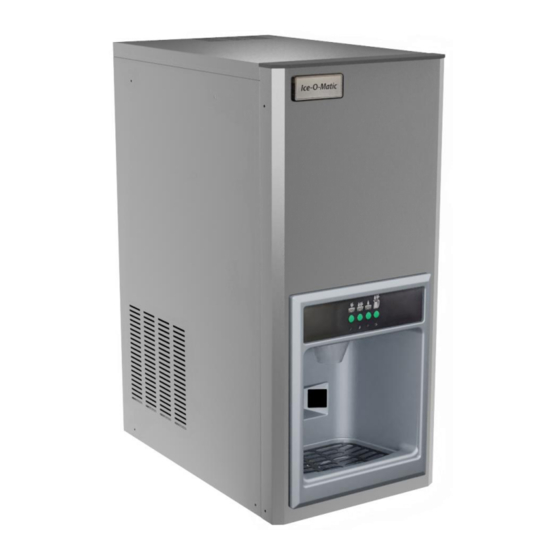
Ice-O-Matic GEMD270A counter top Pearl outlined in this manual. Iceâ dispenser. Ice-O-Matic 11100 East 45th Ave. - Page 4 GEMD270A: Ice Maker Dispenser, TouchFree, 200 lb ice making capacity, Pearl Ice â, 12 lb storage To keep your Ice-O-Matic Pearl Ice â Dispenser at peak performance levels, periodic maintenance checks must be carried out as indicated in this manual.
- Page 5 GEMD270A CABINET DIAGRAMS Page 3...
- Page 6 GEMD270A GENERAL INFORMATION AND INSTALLATION UNPACKING AND INSPECTION LOCATION AND LEVELING 1. Call your authorized Ice-O-Matic Distributor or WARNING: This Ice Dispenser is designed for Dealer for proper installation. indoor installation only. If the machine is operated 2. Visually inspect the exterior of the packing and for extended periods at temperatures exceeding skid.
- Page 7 All Ice-O-Matic ice machines require a solid earth wire. This Ice-O-Matic ice machine is supplied from the factory completely pre-wired and only needs to be plugged into a nearby 115 volt outlet.
- Page 8 GEMD270A WATER SUPPLY AND DRAIN CONNECTIONS GENERAL WATER DRAIN The recommended drain tube is a copper, rigid When choosing the water supply for the ice flaker, consideration should be given to: plastic or reinforced flexible tubing (supplied) with .75" (19mm) I.D. which runs to an open trapped a) Length of run and vented drain.
- Page 9 Check the model and serial number against the serial plate and mail the registration card to Ice-O-Matic. 11. Has the owner been given the name and the phone number of the authorized Ice-O-Matic Service Agency serving them? Page 7...
-
Page 10: Operating Instructions
GEMD270A OPERATING INSTRUCTIONS START UP C. 2 or 3 minutes after the compressor start up, observe that flaker ice begins dropping off the ice After having correctly installed the ice maker and spout to fall into the storage bin. completed the plumbing and electrical connec- tions, perform the following “Start-up”... - Page 11 GEMD270A OPERATING INSTRUCTIONS After this, open the water supply line shutoff valve to fill up again the float reservoir, the 5th YELLOW LED goes off while the 2nd RED LED starts blinking. After 3 minutes the unit resumes its total operation with the immediate start-up of the gear motor and, 2 seconds later, of the compressor.
- Page 12 GEMD270A PRINCIPLE OF OPERATION ice storage bin gets filled-up to the level of the WATER CIRCUIT control “eyes” located on the sides of the ice The water enters in the machine through spout. As the ice level raises to interrupt the light the water inlet fitting (which incorporates a beam running between the two infrared lamps, strainer and it is located at the rear side of the...
- Page 13 GEMD270A PRINCIPLE OF OPERATION MECHANICAL SYSTEM When the opposite situation occures, i.e. the condenser temperature gets below the pre-fixed The mechanical systemr consists basically of a gear motor assembly which drives, through a ratched coupling, a worn shaft or auger EVAPORATOR placed on its vertical axis within the freezing cylinder.
- Page 14 GEMD270A PRINCIPLE OF OPERATION REFRIGERANT CHARGE (R 134 A): 370 gr REFRIGERANT METERING DEVICE: capillary tube NOTE. Before charging the refrigerant system always check the type of refrigerant and OPERATING PRESSURES ° quantity as specified on the individual ice (With 21 C/70°F ambient machine dataplate.
-
Page 15: Component Description
GEMD270A COMPONENT DESCRIPTION C. CONDENSER TEMPERATURE SENSOR A. EVAPORATOR TEMPERATURE - WHITE TWO POLES CONNECTOR SENSOR - BLACK 2 POLES CONNECTOR -MANUAL RESET (see **NOTE) - MANUAL RESET (see **NOTE) The condenser temperature sensor probe, located within the condenser fins detects the The evaporator sensor probe is inserted into its condenser temperature variations and signals tube well, which is welded on the evaporator... - Page 16 GEMD270A COMPONENT DESCRIPTION E. ICE BIN LEVEL LIGHT CONTROL - BLACK H. P.C. BOARD (Data processor) FOUR POLES CONNECTOR - The P.C. BOARD, fitted in its plastic box located AUTOMATIC RESET in the right side of the unit, consists of two separated printed circuits one at high and the other at low The electronic ice bin level control, located into voltage, protected by three fuses, integrated with...
-
Page 17: Component Description
GEMD270A Page 15 COMPONENT DESCRIPTION 4th GREEN LED ON: • Push and hold the PC Board push button • Switch ON the machine keepiung pushed the - Unit under electrical power PC Board push button till all LEDs are ON 5th YELLOW LED ON: •... -
Page 18: Component Description
GEMD270A COMPONENT DESCRIPTION FLOAT RESERVOIR to limit the noise level. All the three gears are encased in case bearings and are covered by The float reservoir consists of a plastic water pan lubricant grease (MOBILPLEX IP 44). on which is fitted a float valve with its setting Two seal rings, one fitted on the rotor shaft and screw. - Page 19 GEMD270A SETTING THE DISPENSING SELECTOR a) First, select the Dispensing Mode by pushing Setting the dispensing time the proper membrane button. It’s possible to modify the dispensing time to 5, 10, b) Place a glass or a carafe in front of the two 3 or 1.5 seconds.
-
Page 20: Service Diagnosis
GEMD270A SERVICE DIAGNOSIS SYMPTOM POSSIBLE CAUSE SUGGESTED CORRECTION Unit will not run Blown fuse in P.C. Board Replace fuse & check for cause of blown fuse No LED lights Master switch in OFF position Turn switch to ON position Inoperative P.C. - Page 21 GEMD270A SERVICE DIAGNOSIS SYMPTOM POSSIBLE CAUSE SUGGESTED CORRECTION Wet ice Ambient temperature too high Move unit to cooler location High water level in the freezer Lower to approx. 20mm below ice spout Faulty compressor Replace Machine runs but makes no ice Water not entering in the freezer Air lock in feed line to freezer.
- Page 22 GEMD270A MAINTENANCE AND CLEANING INSTRUCTION and the receiver on the upper side of the storage A. GENERAL bin to cut off the light beam for at least 6 seconds. The times and the procedures for maintenance This should cause the 6th RED LED on the front of and cleaning are given as guides and are not to be the PC board to turn off and, 6 seconds later the construed as absolute or invariable.
- Page 23 GEMD270A CLEANING INSTRUCTIONS OF WATER SYSTEM 1. Switch OFF the power supply to the creating some resistance in being elevated and GEMD270A. extruded; this situation can be heard by the creaking noise made by the ice. 2. Remove the top panel and the top cover of the If this should occur it is recommended that you storage bin with the dispensing drive motor.
- Page 24 GEMD270A REMOVAL AND REPLACEMENT Bearings, Auger, Water Seal 4. Remove the gear reducer from the unit. Reverse all individual sections to reassemble Note: Metric tools are required for this procedure. that section except for the top bearing and Disconnect electrical power. water seal.
- Page 25 GEMD270A TOP BEARING REPLACEMENT Replacement of the top bearing 5 The GEMD270A top bearing is a unique design. It is two bearings in one: a flat thrust bearing and a roller bearing. The bearing will separate if not installed 5/16” bolt properly.
- Page 26 GEMD270A BEARING REPLACEMENT - CONTINUED 6. Remove coupling, bolt, washers and nuts. 7. The roller bearing is fully seated when it is 13/16” from the top edge of the breaker. 8. Thoroughly lubricate the thrust bearing and place it on top of the roller bearing. The inner race of the roller bearing must project through the center of the flat thrust bearing.
- Page 27 GEMD270A WATER SEAL Stationary Half 1. Insert new water seal into bottom of evaporator. 2. Insert new bearing under the water seal, push or tap both in until the bottom of the bearing is flush 3. Assemble adapter to evaporator. Tightening the mounting bolts will correctly position the bottom bearing and bottom seal.
Need help?
Do you have a question about the GEMD270A2 and is the answer not in the manual?
Questions and answers
TOP OF UNIT MINIMUN CLEARANCE REQUIRMENT.
The minimum clearance requirement for the top of the Ice-O-Matic GEMD270A2 unit is 6 inches for proper air circulation.
This answer is automatically generated