
Summary of Contents for De Heus BOXER AGRI HV106
- Page 1 WOOD CHIPPER HV106 USER MANUAL P. de Heus en Zonen Greup B.V. Stougjesdijk 153 3271 KB Mijnsheerenland The Netherlands Tel: +31 (0) 18 66 12 333 E-mail: info@boxeragri.nl...
- Page 2 EN | ENGLISH TRANSLATION OF THE ORIGINAL MANUAL WOOD CHIPPER | User manual May 2021...
-
Page 3: Table Of Contents
CONTENT INTRODUCTION .......................... 4 SAFETY ............................5 Safety symbol ............................5 Safety instructions..........................6 Safety guidelines ..........................7 Safety decals............................8 2.4.1 Safety decal place ......................... 8 Preparation............................11 Safe maintenance..........................11 2.6.1 Maintenance intervals ......................12 Operational safety..........................13 Hydraulic safety.......................... -
Page 4: Introduction
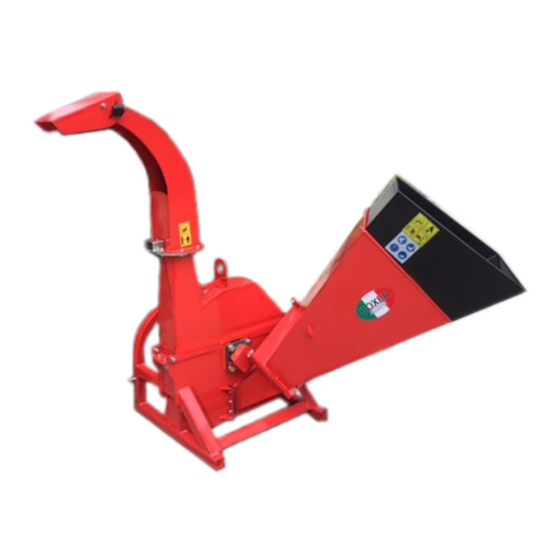
INTRODUCTION Congratulations with your choice of a 3-point wood chipper to carry out your work. This machine has been designed and manufactured to meet the requirements of the demanding wood and landscape industries. A safe, efficient and problem-free operation of your wood chipper requires that you and everybody who uses or maintains the wood chipper reads and understands the safety, operation, maintenance and troubleshooting information in this operating manual. -
Page 5: Safety
SAFETY Safety symbol This safety symbol means: CAUTION! ATTENTION IMPORTANT FOR YOUR SAFETY! The safety symbol highlights important safety messages on the Boxer wood chipper and in the manual. If you see this symbol, take the possibility of physical injury or death into account. -
Page 6: Safety Instructions
Safety instructions You are responsible for the safe operation and maintenance of your 3-point wood chipper. You must make sure you and everybody who uses, maintain or work with the wood chipper are aware of the procedures for use and maintenance and the related safety information in this manual. -
Page 7: Safety Guidelines
Safety guidelines Strictly follow all safety instructions. Safety is everybody's responsibility. By following the recommended procedures, a safe working environment is offered to all users and bystanders. To prevent physical injury or death, you and those who work with you must follow the following precautions. To provide a more complete picture, specific photos or figures in this manual may show a part regarding which the guard or protective cover has been removed. -
Page 8: Safety Decals
Safety decals • Make sure all safety decals are clean and legible. • Replace all damaged or missing decals. • Replaced parts with safety decals must display the relevant safety decals. • Item numbers can be found on the safety decals specified in chapter 3 on the right at the bottom. Use these item numbers when you order replacement parts. - Page 9 REMEMBER – If the safety alert is damaged, removed or illegible or parts have been replaced without safety alerts, new decals must be affixed. New safety decals can be obtained from your authorized dealer. Page 9/37 WOOD CHIPPER | User manual May 2021...
- Page 10 Page 10/37 WOOD CHIPPER | User manual May 2021...
-
Page 11: Preparation
Preparation Never commission the machine before you have read and fully understood this manual, the manual of the tractor and all safety messages and decals on the tractor and the machine. Personal protective equipment including a safety helmet, safety goggles, safety shoes and gloves are recommended when mounting, installing, operating, adjusting maintaining, repairing, disassembling cleaning or moving the machine. -
Page 12: Maintenance Intervals
10. A fire-extinguisher and first aid kit must be within arm’s reach when performing maintenance and servicing the machine. 11. Tighten all bolts regularly. Also check regularly whether all electrical and fuel connections are fastened correctly. 12. When completing the maintenance or service work, make sure all safety protections and parts are installed before commissioning the machine. -
Page 13: Operational Safety
Operational safety It is important that you read and observe the safety decals on the wood chipper. Clean or replace safety decals that are difficult to read or understand in view of your safety and that of others. You, the user, are responsible for the safe use of this machine. -
Page 14: Hydraulic Safety
Hydraulic safety Make sure all parts of the hydraulic system are in good condition and clean. Before you put the system under pressure, make sure all parts are fastened correctly and all lines, hoses and couplers are undamaged. Do not try to repair lines, fittings or hoses provisionally using tape, clamps or binding agents. The hydraulic system works under extremely high pressure. -
Page 15: Installation
INSTALLATION The machine is delivered in transport configuration from the factory. Always use tools, equipment and forklift trucks with suitable dimensions and power for the installation. Always make sure there are two persons present to lift, move and assemble the machine. When the machine is delivered, follow these instructions during the preparation: Make sure there are no people, animals and especially... - Page 16 Remove the steel frame with an angle grinder. Remove the steel frame Use a forklift truck to hoist and lift the main component. Lift the main component 10. Remove the pallet and place the machine on the floor. Parts without a pallet and packaging 11.
- Page 17 12. Lift the feed hopper using a forklift truck and position it straight in front of the hopper for the main component. Remove the screws from the hopper main component Install the hopper 13. Fasten the feed hopper on both sides using the previously loosened screws.
- Page 18 14. Loosen the three screws on the rotor housing (1x left, 2x right). Loosen the screws 15. Position the protective cover on the rotor housing by using a forklift truck. Position the protective cover 16. Fasten the protective cover using the previously loosened screws (3x).
- Page 19 17. Use both bottom screws of the 3-point linkage. Use the bottom screws 18. Fasten the power take-off on the engine shaft of the wood chipper by loosening the locking pin, pushing the bracket over the shaft and pushing the bracket until the locking pin falls in place.
- Page 20 20. To install the discharge hopper, first loosen all eight screws on the rear side of the hopper and remove the spacers. Remove the spacers 21. Position the discharge hopper on the rotor housing. Position the discharge hopper Page 20/37 WOOD CHIPPER | User manual May 2021...
- Page 21 22. Fasten the spacers under the mounting plate. First hold the narrow spacers and, next, position them under the wider one and screw them all to each other. Position the spacers 23. Install the lever in alignment with the discharge hopper. Assemble the lever 24.
- Page 22 25. Fasten the chain to the hooks on the side of the bottom part of the discharge hopper. You can regulate the discharge range by fastening the chain looser or more tightly. Fastening the chain Page 22/37 WOOD CHIPPER | User manual May 2021...
-
Page 23: Operational Safety
OPERATIONAL SAFETY Operational safety • A safe, efficient and problem-free operation of your wood chipper requires that you and everybody who uses or maintains the wood chipper reads and understands the safety, operation, maintenance and troubleshooting information in this operating manual. •... -
Page 24: For The New User Or Owner
For the new user or owner The wood chippers are designed to chip scrap wood, small trees, bushes, branches and other wood waste. The broken-off material is good enough to be composted or to be reused in various ways. The owner or user is responsible for reading this manual and the training of all other operators before they start working with the machine. -
Page 25: Length Of The Power Take-Off
Length of the power take-off The drive shaft for the power take-off is supplied together with the machine. As a consequence of the various three-point linkages that are currently available, the drive shaft may be too long for most machines or too short for other machines. It is extremely important that the drive shaft can slide in and out freely and does not touch the ground in the work range. -
Page 26: Machine Commissioning
Machine commissioning Operational safety • A safe, efficient and problem-free operation of your wood chipper requires that you and everybody who uses or maintains the wood chipper reads and understands the safety, operation, maintenance and troubleshooting information in this operating manual. •... - Page 27 10. Start the machine: Start the tractor engine. Set the throttle to the lowest stationary speed. Allow the power take-off control to run slowly while the engine idles. Slowly increase the engine speed to nominal. In relation to the manual feed model, you start feeding material into the hopper. In relation to the hydraulic feed model: Position the hydraulic lever of the tractor in the locked position.
- Page 28 Stationary blade: Every machine is equipped with a stationary blade that acts as a stop for the moving rotor blades. Stationary blade WARNING The machine is displayed without a cover or rotor cover for illustration purposes only. Do not use the machine without a cover or guard or with an open cover or guard.
- Page 29 Branch breaker Every machine is equipped with a branch breaker that breaks branches or other long material in pieces while being fed through the rotor compartment. Open the rotor housing and check the condition of the branch breaker each week. Also check the branch breaker for material that is stuck when the rotor housing has been opened.
- Page 30 Removing obstructions Although the machine has been designed to process various materials without issue, obstructions can sometimes occur. If this happens, you need to follow the following procedure: Make sure bystanders are not close-by and this especially refers to children. Turn the hydraulic feed hopper upside down so that the obstructing material is released.
- Page 31 WARNING The machine is displayed without a cover or rotor cover for illustration purposes only. Do not use the machine without a cover or guard or with an open cover or guard. Cleaning Clean the machine often to prevent the accumulation of dust, chips and dirt on the frame.
-
Page 32: Transport
Transport Transport safety • Comply with all national and local legislation in relation to the safety and transport of machines on public roads. • Check whether all lights, reflectors and other lighting facilities are installed and in good working order. •... -
Page 33: Specifications
SPECIFICATIONS HV106 Wood chipper capacity 10 cm Number of rotor blades Feed system Manual Discharge hopper rotation 360° Discharge hopper height 1.80 m Weight 196 kg Required power 18-50 hp Torque CHECK THE TORQUE The tables below show the correct torques for various bolts and fastening screws. Tighten all bolts in accordance with the torque specified in the table unless stated otherwise. - Page 34 METRIC TORQUES Torque * Bolt diameter “A” 10.9 (N·m) (lb-ft) (N·m) (lb-ft) 1050 1495 1103 2100 1550 2600 1917 3675 2710 The aforementioned torques apply to non-lubricated or non-oiled screw threads and heads unless stated otherwise. Bolts of fastening screws may therefore not be lubricated or oiled unless stated otherwise in this manual. If locking elements are used, the torque must be increased by 5%.
-
Page 35: Torque For Hydraulic Fittings
Torque for hydraulic fittings Tightening flange pipe fittings* Check the flange and flange seat for damage that may cause leaks. Align the pipe with the fitting before tightening it. Lubricate the connection and fasten the union nut manually until it is in its correct position. Use two wrenches to prevent the pipe(s) from turning. -
Page 36: Troubleshooting
TROUBLESHOOTING Problem Possible cause Solution Obstructed discharge Fasten it. The rotor is not turning. Obstructed rotor Sharpen or replace the blades. Broken off shear pin Replace the shear pin. Blades are blunt. Sharpen the blades. Blade under the incorrect Sharpen the blades using the specified angle. Slow insertion angle: erroneous angle. -
Page 37: Ce Declaration Of Conformity
CE DECLARATION OF CONFORMITY Boxer Agriculture Equipment B.V A member of de Heus group Stougjesdijk 153 – 3271KB Mijnsheerenland – Holland Tel: +31 186 612 333 e-mail : info@boxeragri.nl EG Conformiteitsverklaring Volgens machinerichtlijn 2006/42/CE Konformitätserklärung Entsprechend der Richtlinie 2006/42/CE EEC Declaration of Conformity Conforming to the Directive 2006/42/CE Déclaration CE de Conformité...
Need help?
Do you have a question about the BOXER AGRI HV106 and is the answer not in the manual?
Questions and answers