
Related Manuals for D2G DGAFR43

Summary of Contents for D2G DGAFR43
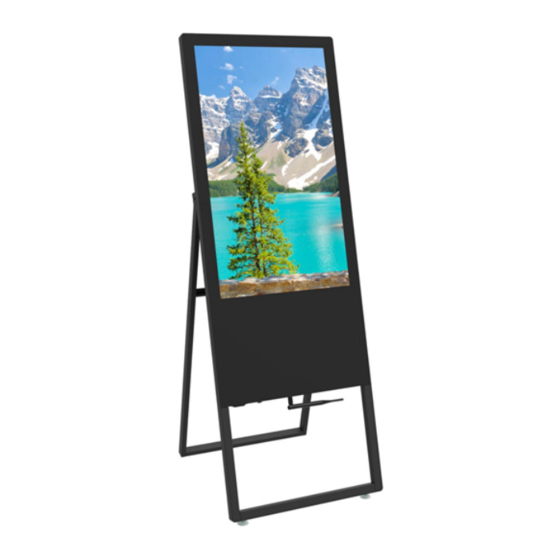
- Page 1 User Manual D2G Item No: DGAFR43 DGAFR43S Material Description:Indoor A-Frame Digital Sign Scan QR code to visit the product page:...
-
Page 2: Table Of Contents
Contents Features ............................3 Safety Warnings and Precautions ....................3 Installation and Connection ......................7 Packing List ..........................7 Interfaces ..........................7 Steps of Installation ........................8 Remote Control ..........................9 Description of Basic Operation .....................10 Power on/Standby ........................10 About Home Screen.........................10 Description of Wallpaper Switch .................... -
Page 3: Features
Operating Instructions for Digital Signage Note: Before using the product, please read the instructions carefully! Do not attempt to disassemble this product. If the product does not work properly, please contact your local dealer or the company. Features 1. Embedded with Android 5.1 smart operating system and unique UI design, bringing you a more convenient operation and better visual experience. - Page 4 Keep the instructions properly for reference. Warning: May cause personal injury or death Caution: May cause damage or property loss The operation is prohibited The operation must be executed In the following cases Power outage or instable voltage. Turn off the Digital Signage immediately, pull out the plug from the power outlet, and ask the ...
- Page 5 Do not let dust or metal deposits adhere to the plugs and outlets. Do not damage the power cords: 1.Do not modify the power cords; 2.Do not place heavy objects on the power cords; 3.Keep the power cords away from heat source; 4.Do not pull the cord to remove the plug.
- Page 6 Caution Do not let children climb onto the Digital Signage. Keep the small parts away from children to prevent them from swallowing. If the Digital Signage won’t be used for a long time, please turn it off and pull out the power plug. ...
-
Page 7: Installation And Connection
Installation and Connection Packing List Name Name 1 Power Cord 1 Digital Signage 1 Remote Control 1 Cleaning Kit (with 2 keys) 1 Operation Manual Note: Contact local dealer if you have questions about the operation, debugging and connection of the unit; if the unit doesn’t work normally, please cut off the power immediately and consult the dealer. -
Page 8: Steps Of Installation
Steps of Installation 1. Open the top cover as shown in Fig. 2; 2. Remove the unit shown in Fig 3 and place it on the ground (avoid scratches)(Fig 4); 3. Open the bottom bracket to make the machine stand up, as shown in Fig 5. (Fig. -
Page 9: Remote Control
Remote Control Installing batteries for the remote control: Remove the battery cover, and insert two AAA batteries (1.5V). Ensure that the battery polarity matches the “+”/“-” marks in the battery compartment of the remote control. Precautions for using the remote control: Aim the remote control at the receiver window. -
Page 10: Description Of Basic Operation
Description of Basic Operation Power on/Standby Insert the power plug into the outlet. If the Digital Signage has the switch button “I”, turn it on; if you press the switch button “O”, the Digital Signage enters standby state. In power on state, enter “System Assistant” and press the “ ” button on the remote control, and the Digital Signage enters standby state. -
Page 11: File Manager
Description of Basic Operation File Manager 1. Tap the Main Apps button in the Home page to enter the “APPS” menu interface (Fig. 2); 2. Tap the “Explorer” icon in the “APPS” menu interface (Fig. 2) and enter “Explorer” menu (Fig. 3); 3. - Page 12 Fig. 1 Fig. 2 Fig. 3 Description of Settings Interface (shown on the right) Description of Settings Interface (shown on the right) Icon Function WIFI switch Data usage Bluetooth Sound & notification Battery saver HDMI Display Storage Apps Screenshot Setting Location Accounts Backup &...
-
Page 13: Status Of Menu Bar
Status of Menu bar 1. Step1: Click the setting 2. Step2: At the setting menu click the display menu 3. Step3: At the display setting menu unselect the display navigation check box Fig. 1 Fig. 2 Fig. 3... -
Page 14: Slide Show App Introduction
Slide Show APP Introduction How to upload media files : Step1: Open the Android launcher screen and click the explorer app Step2: Go to the USB storage menu click the USB storage button... - Page 15 Step3: At the USB storage menu select the media files which you want to copy to the media folder click the edit button, the pop menu will show then click the Copy button Step4: Click HOME button and go to the NAND FLASH menu you will see the media folder, open it...
- Page 16 Step5: At the media folder click the edit button at the top of the screen the pop menu will show and click the Paste command button the files will start copy to the media folder Step6: Exit the Explorer app and go to the launcher screen run the Slide Show app to display the media files...
- Page 17 Step 7: Select the time you would like each picture to be on the screen for by dragging the bar to the desired time. Select how you would like the images to display. Select the desired transition effect between pictures.
- Page 18 Step 8:Select Play and your slide show will begin playing...
- Page 19 How to Delete the media files: Step1: Open the Android launcher screen and click the explorer app Step2: Click home button and go to the NAND FLASH menu you will see the media folder open it...
- Page 20 Step3: At the media folder select the media files which you want to delete and click the edit button at the top of the screen the pop menu will show and click the Delete command button the files will be deleted...
-
Page 21: Technical Specifications
Technical Specifications Model Parameters Panel LCD size 43" LCD supplier Panel model LD430EUE-FHB1 Light source LED backlight Resolution 1920*1080 (pixels) Brightness (typ.)/(min) 450cd/m2 (typ.) Contrast (typ.) 1000:1 (typ.) Response (ms) 12ms (typ.) Pixel pitch 0.4902(H) mm * 0.4902(V) mm Refresh rate 60Hz Viewing angle 178°... - Page 22 Ethernet 1 (RJ45) HDMI Headset USB2.0 Structure Net weight 25.27kg Gross weight 33.5kg Unit dimensions (W*D*H) 587*65*1522mm Package dimensions (W*D*H) ~762*212*1703mm Shell material Aluminum profile/sheet metal Shell color Silver/black Language English...
-
Page 23: Troubleshooting
Troubleshooting the Digital Signs – DGAFR43 DGAFR43S Issue Probable Cause Solutions Unit not plugged into wall outlet No picture or sound Check that the unit is plugged into wall Power cord not properly outlet. connected to the terminal on the Confirm that the power cord is connected to back of the unit. -
Page 24: Cleaning And Maintenance
Batteries are dead. working positive and negative orientation. Standing too close or too far from Insert new batteries. the unit. Stand within 1 foot of the front of the unit and point the remote directly at the unit. ... -
Page 25: Names And Contents Of Toxic And Hazardous Substances Or Elements In The Product
Names and Contents of Toxic and Hazardous Substances or Elements in the Product Names and Contents of Toxic and Hazardous Substances or Elements in the Product Part name Toxic and hazardous substances or elements PBDE Display Shell × × Circuit board assembly * Wires Metal parts Packaging materials*...
Need help?
Do you have a question about the DGAFR43 and is the answer not in the manual?
Questions and answers