Table of Contents
Advertisement
Quick Links
Advertisement
Table of Contents

Related Manuals for Nemo FSH400

Summary of Contents for Nemo FSH400
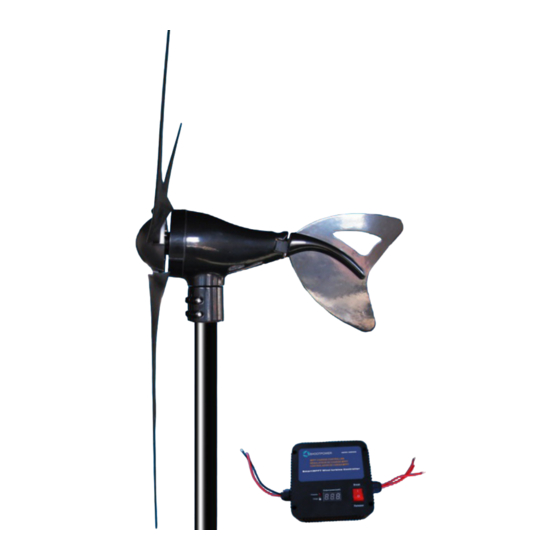
- Page 1 FSH400 Instruction Manual Wind Generator Serial number:...
- Page 2 1. Introduction: This manual contains installation and safety information for the 400 Watt Wind Turbine. The information in this manual is believed to be accurate and reliable; however, The Distributor assumes no responsibility for inaccuracies or omissions. The company reserves the right to make changes to this product specification, or its manual, without prior notice.
-
Page 3: Table Of Contents
TABLE OF CONTENTS 3. WIRING AND INSTALLATION PROCEDURES 3.1 System wiring diagrams 4.LOCATION SELECTION 5. TOWER 6.1 SINGLE WIND GENERATOR 6.2CONTROLLER WIRING 6.3 INSTALLATION OPERATION 6.4 ATTACHING TO POLE 6.5 STEP-BY-STEP INSTRUCTION 7. WARRANTY POLICY 7.1 ELEVATION 8. SPECIFICATIONS... - Page 4 1. PRECAUTIONS The Wind Turbine has been designed with your safety in mind. However, there are inherent dangers involved with any electrical and/or mechanical equipment. Safety must be your primary concern as you plan the location, installation and operation of the turbine. At all times be aware of electrical, mechanical and rotor blade hazards.
- Page 5 Check support structures, blades, and electrical systems regularly. The rotor blades are very strong; however, if they come in contact with a solid object, they can break. When performing periodic inspections, or if you must approach the path of the blades, disconnect the power leads from the battery and tie the wind turbine output leads together to stop /slow down the blades from rotating.
-
Page 6: Wiring And Installation Procedures
SHOOTPOWER 3. WIRING AND INSTALLATION PROCEDURES Your Wind Turbine is shipped partially assembled. Please completely read all procedures before beginning installation. NOTE: Do not install the blade/hub until the turbine is mounted on the tower 4mm hex key wrench (included) 5mm hex key wrench (included) 8mm hex key wrench (included) Power cables (not included):... -
Page 7: Location Selection
4. LOCATION SELECTION To ensure good performance from the Wind Generator, it is important that care is taken in the site of the machine. Buildings, trees and rocky outcrops etc. disrupt the smooth flow of wind creating a “Wind Shear” with the wind velocity nearer the ground being slower than that higher up. -
Page 8: Tower
The Wind Generator should be mounted on a tower a minimum of 25' (8 meters) above any surrounding objects within a 500' (150m) radius. If this is not possible, then place it as high as you can. If this is a roof top installation, it is important there are no objects around the structure that may block the wind. -
Page 9: Single Wind Generator
6.1. Single wind generator See Diagram below for further wiring information Wind T urbine G enerator The controller Indicator Lamp Operation Status Lamp LED reading Cause Mode not reach charging Rotor not reaching 500rpm 0. 0. No light Normal mode charging speed wind speed Normally... -
Page 10: Controller Wiring
6.2 CONTROLLER WIRING Do not connect positive to negative and negative to positive, or else will damage the controller! Red is for positive. Black is for negative. Note: 3 red wires from turbine can be placed in any order to controller AC input terminals Break Output Power(watt) Protection... -
Page 11: Installation Operation
For more information about some very economical tower kits for the wind generator, please refer or purchase them from your dealer or distributor. 6.3 INSTALLATION OPERATION Choose a calm day and have someone available to help during the installation process. NOTE: THE BLADE EDGES ARE SHARP. -
Page 12: Step-By-Step Instruction
6.5 Step-by-step instructions outline of the Marine grade 400 Watt wind turbine. 1).Ensure the voltage systems of the wind generator and the battery bank are the same. Prepare the appropriate wires. 2).Run the wire through the pipe and drag the wires near to the batteries (Do not connect to the battery), strip the insulation back from each set of wires. - Page 13 6).Place one of the blades on the hub socket and insert one of the M6-15 socket head cap screws. Place a plastic disk on the end of the screw, then place self-locking nut (M6) and tighten it with the 5mm hex key to 8-10 foot lbs.
- Page 14 9) Place the nose cone over the center line of the blades assembly and snap the nose cone into place. Carefully check it is secure by firmly pulling on and be sure all three edges are catch. Don't worry if the nose cone missing, it will not affect the performance of the wind generator.
-
Page 15: Warranty Policy
10)Carefully raise the tower and secure base and/or guy cables. Caution: Ensure That The Tower Is Vertical So That The Wind Generator Can Yaw (turn Into The Wind) Properly. CONGRATULATIONS! You have completed the installation process now. 7. Warranty policy proof of purchase is required(Receipt) 7.1 ELEVATION An important fact to keep in mind is elevation. -
Page 16: Specifications
8. SPECIFICATIONS FSH400 Marine grade 400 Watt Wind turbine 839290007068 DC12V or DC24V...
Need help?
Do you have a question about the FSH400 and is the answer not in the manual?
Questions and answers