Table of Contents
Advertisement
Quick Links
Advertisement
Table of Contents

Summary of Contents for Kamasa-TOOLS K 12101
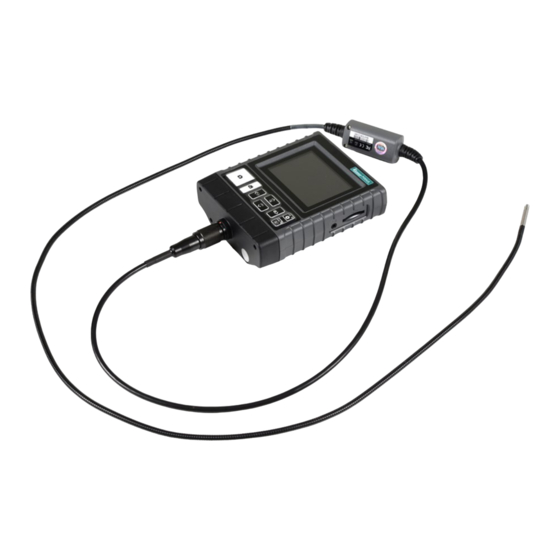
- Page 1 Videoscope K 12101...
-
Page 2: Safety And Precaution
INRODUCTION This videoscope with it’s compact design and 3.5 inch screen is a perfect help in any workshop when inspecting areas that normally are hidden for the eye. Read through this manual to learn about the features of this vide- oscope and how to maximize it’s benefits in your daily work. -
Page 3: Product Specification
PRODUCT SPECIFICATION Main system System dimension 140×116×42 mm System weight 300g (w/o battery) Display 3.5” TFT LCD QVGA Display resolution 320×240 pixels Power AA×4 (Alkaline or Ni-HM) Battery life 4 hours Recording medium SD CARD (Support to 32G) Video out format NTSC &... -
Page 4: Getting Started
GETTING STARTED Step 1: Remove the battery cover. Step 2: Place battery correctly, put the battery cover back. Step 3: Tighten the screw. Step 4: Connect probe to the system and tighten it up clockwise. The color markings shall coincide. - Page 5 2010/09/22 12:35:45 Step 5: Insert SD memory card correctly, the screen will then show memory card capacity while the system is turned on. Step 6: Press power button for 3 seconds to turn on the system. Step 7: The camera in the probe can be directed forward or 90°...
-
Page 6: Multifunction Keys
MULTIFUNCTION KEYS Preview Browse Menu Increase brightness Right Decrease brightness Left Enter “Menu” mode Delete Execute confirm instruction Zoom-in Mirror Down Down Enter “Browse” mode Return to “Preview” mode Return to “Preview” mode Snapshot Play video / Pause Record video System time 2010/09/22 12:35:45 Battery indicator... -
Page 7: System Mode
SYSTEM MODE This system provides 3 easy-to-operate modes: Preview: This mode is activated when the system turn on. Browse: The user may view recorded pictures and videos and conduct basic file management. Menu: Use this mode to change system settings. Note: Under the “Menu”... -
Page 8: System Menu
SYSTEM MENU Step1: Press to enter the Menu mode. Step2: Press to choose the item you need. Step3: Press to enter. Instructions which can be executed on the menu are listed as below: Delete All Files SETTINGS After initiating this command, select "yes" or "no" by 2010/09/22 12:35:45 pressing buttons. - Page 9 OPERATION INSTRUCTIONS Zoom-in & Mirror Zoom-in: Press to enlarge the image, press again to enlarge more, and press it again to the default image setting. Default image Enlarged 3× Enlarged 5× Mirror: Press to mirror the image. Press it again to rotate the image. Default image Mirror Upside down...
- Page 12 Kamasa Tools is a registered trademark of KG Knutsson AB, 191 81 Sollentuna, Sweden CE declaration for this product is available as a file on www.kamasatools.com K 12101 www.kamasatools.com...
Need help?
Do you have a question about the K 12101 and is the answer not in the manual?
Questions and answers