
Related Manuals for LG L245WPQ


Summary of Contents for LG L245WPQ
- Page 1 Test Report No.: GETEC-E3-06-050 FCC Class B Certification APPENDIX H : USER’S MANUAL EUT Type: 24” LCD Monitor FCC ID: BEJL245WPQ...
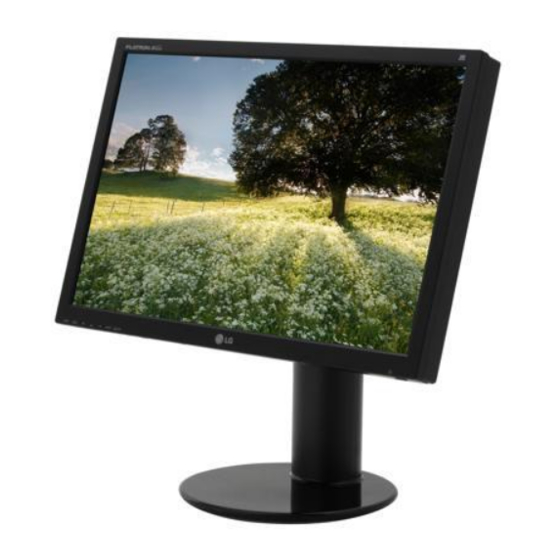
- Page 2 User’s Guide L245WP L245WPM ake sure to read the Important Precautions before using the product. Keep the User's Guide(CD) in an accessible place for furture reference. ee the label attached on the product and give the information to your dealer when you ask for service.
-
Page 3: Important Precautions
Important Precautions This unit has been engineered and manufactured to ensure your personal safety, however improper use may result in potential eletrical shock or fire hazards. In order to allow the proper operation of all safeguards incorporated in this display, observe the following basic rules for its installation, use, and servicing. - Page 4 Important Precautions On Installation Do not allow anything to rest upon or roll over the power cord, and do not place the display where the power cord is subject to damage. Do not use this display near water such as near a bathtub, washbowl, kitchen sink, laundry tub, in a wet basement, or near a swimming pool.
-
Page 5: Connecting The Display
Connecting the Display Before setting up the monitor, ensure that the power to the monitor, the computer system, and other attached devices is turned off. Connecting the stand base or Removing the stand base Place the monitor with its front facing downward on a cushion or soft cloth. Rotate the Stand Body as shown in figure , after removing the fixed Styrofoam. - Page 6 Connecting the Display Attach the monitor to the Stand Base by turning the screw to the right. Lift and turn the monitor to face towards the front after the connection is made to the female part of the cable you're attaching. Take the screw out by turning to the left to separate the monitor and Stand Base.
-
Page 7: Positioning Your Display
Connecting the Display Before setting up the monitor, ensure that the power to the monitor, the computer system, and other attached devices is turned off. Positioning your display Adjust the position of the panel in various ways for maximum comfort. Tilt Range : -5˚~20˚... -
Page 8: Using The Pivot Function
Connecting the Display Using the Pivot function Lift the monitor to its highest height to utilize the Pivot function. . Landscape & Portrait : You can rotate the panel 90 clockwise. Please be cautious and avoid contact between the monitor head and the Stand Base when rotating the screen to access the Pivot function. -
Page 9: Connecting The Speaker
Connecting the speakers - The feature is only for speaker models - L245WPM Connecting the speaker Rotate the panel at an angle of 90 degrees as shown in the picture, after lifting the monitor to its highest height. COMPONENT DC-OUT HDMI/DVI * Make sure the panel does not touch the floor when rotating. -
Page 10: Name And Function Of The Parts
Name and function of the Parts Rear View COMPONENT DC-OUT HDMI/DVI AC-IN AC-IN Connector : Connect the Power Cord DC-OUT Jack HDMI/DVI Signal Connector COMPONENT Input Terminal D-SUB Analogue Signal Connector Kensington Security Slot USB UP stream Port(1EA) USB DOWN stream Port(2EA) Audio out Jack( Headset/Earphone/connecting terminal of the Speaker) : You can use the AUDIO-OUT Jack by connecting earphones or a headset... -
Page 11: Connecting To External Devices
Connecting to External Devices When Connecting to your PC Place the monitor in a convenient, well-ventilated location near your computer. To adjust height of your monitor, unlock the stand lock on top of the stand. Connect the signal cable. When attached, tighten the thumbscrews to secure the connection. -
Page 12: When Connecting With A Component Cable
Connecting to External Devices When Watching DVD/Video/HDTV When connecting with a Component cable Connect the Component cables properly. Connect the terminals to the sockets of the same color. Connect the power cord. Monitor COMPONENT DC-OUT HDMI/DVI Component Cable DVD/VIDEO/HDTV Press the INPUT button at the front side of the monitor. INPUT OK/AUTO When connecting with a Component cable. - Page 13 Connecting to External Devices When Watching DVD When connecting with a HDMI/DVI cable Connect the HDMI/DVI cables properly. L245WPM L245WP Audio cable COMPONENT HDMI/DVI COMPONENT HDMI/DVI AUDIO IN Speaker HDMI/DVI cable HDMI/DVI cable Speaker Audio cable Press the INPUT button at the front side of the monitor. INPUT OK/AUTO When connecting with a HDMI/DVI cable.
-
Page 14: Connecting The Usb(Universal Serial Bus) Cable
Connecting to External Devices Connecting the USB(Universal Serial Bus) Cable "USB (Universal Serial Bus)" is an innovation in connecting your different desktop peripherals conveniently to your computer. By using the USB, you will be able to connect your mouse, keyboard, and other peripherals to your display instead of having to connect them to your computer. -
Page 15: Using The Speakers
Using the speakers - The feature is only for speaker models - L245WPM Side Jack Headphone/Earphone Input Automatically mutes the speaker volume when the headphones are plugged in. Rear Audio Input Connect to the *Line Out terminal of the PC’s sound card, the external instrument component or the monitor’s AUDIO-OUT terminal, which is only available when using HDMI. -
Page 16: To Arrange The Cables
Connecting to External Devices To arrange the cables After connecting the cables neatly, arrange the cables to the Cable Holder as shown in the following figure. AUDIO-OUT COMPONENT DC-OUT HDMI/DVI * The speaker is only for speaker models - L245WPM Cable Holder *The length of the cable which connects the monitor’s AUDIO-OUT and the speaker’s AUDIO-IN can be too long. -
Page 17: Control Panel Functions
Control Panel Functions Front Panel Controls Select the input signal. INPUT Button INPUT OK/AUTO INPUT : 15-pin D-SUB analogue signal Component : DTV SET-TOP BOX,Video,DVD HDMI/DVI : HDMI/DVI digital signal HDMI Component Use this button to enter or exit the On Screen Display. MENU Button Controls locked/Controls unlocked This function allows you to lock the current control settings,... - Page 18 Control Panel Functions Use this button to select an icon or adjust the setting in the OSD screen. Button Button • Use this button to directly control brightness and contrast of the PC signal (RGB, HDMI/DVI). Sub screen Button (Picture In Picture) Button •...
-
Page 19: On Screen Display (Osd) Control Adjustment
On Screen Display (OSD) Control Adjustment Screen Adjustment Making adjustments to the image size, position and operating parameters of the display is quick and easy with the On Screen Display Control system. A short example is given below to familiarize you with the use of the controls. The following section is an outline of the available adjustments and selections you can make using the OSD. -
Page 20: On Screen Display(Osd) Selection And Adjustment
On Screen Display(OSD) Selection and Adjustment OSD (On Screen Display) menu Icon Function Description Adjusting Screen Colour. PICTURE Selecting the options. SPECIAL Screen Adjustment. SCREEN Adjusting PIP/DW Mode (Multiple Screen) Functions. PIP/DW PIP/DW OSD(On Screen Display) Note The OSD function enables you to adjust the screen status conveniently since it provides graphical presentation. -
Page 21: Adjusting Screen Colour
On Screen Display(OSD) Selection and Adjustment Adjusting Screen Colour EZ Video DHMI, Component input The PSM function automatically adjusts the screen image quality depending on the AV/TV usage environment. • Dynamic : Select this option to display with a sharp image. •... - Page 22 On Screen Display(OSD) Selection and Adjustment Adjusting Screen Colour PC only EZ Video • 6500K/9300K/sRGB Selecting a factory setting colour set. User 6500K: Slightly reddish white. 9300K: Slightly bluish white. sRGB : Set the screen color to fit the SRGB standard color •...
-
Page 23: Selecting The Options
On Screen Display(OSD) Selection and Adjustment Selecting the options Input Child Lock Language Power Indicator Transparency Reset DDC-CI Input If you press the button once, the Input following Input Signal Window will Child Lock appear. Select the signal type Language you want using the button. - Page 24 On Screen Display(OSD) Selection and Adjustment Screen Adjustment SCREEN Auto-configure Clock Phase Position To select the image size of the screen. <HDMI,Component input only> <RGB input only> SCREEN SCREEN Full Full Original Auto-configure Auto-configure Clock Clock Phase Phase Position Position Full Original Full...
- Page 25 On Screen Display(OSD) Selection and Adjustment Adjusting PIP/DW Mode (Multiple Screen) Functions (To adjust the sub screen) On/Off PIP Input Position On/Off After selecting PIP in the PIP/DW On/Off menu, the following menu items can be adjusted. After selecting DW in the PIP/DW On/Off menu, the following menu items can be adjusted.
-
Page 26: Troubleshooting
Troubleshooting Check the following before calling for service. No image appears No image appears Is the power cord of the • Check and see if the power cord is connected properly to the power outlet. display connected? Is the power indicator •... -
Page 27: Display Image Is Incorrect
Troubleshooting Display image is incorrect Display Position is • Press the OK/AUTO button to automatically adjust your display image to the ideal setting. incorrect. If the results are unsatisfactory, adjust the image position using the H position and V position icon in the on screen display. -
Page 28: Have You Installed The Display Driver
Troubleshooting Have you installed the display driver? Have you installed the • Be sure to install the display driver from the display driver CD (or diskette) that comes with your display driver? display. Or, you can also download the driver from our web site: http://www.lge.com. -
Page 29: Specifications
Specifications L245WP Display 24 inches (61.3 cm) Flat Panel Active matrix-TFT LCD Anti-Glare coating 24 inches viewable 0.270 mm pixel pitch Horizontal Freq. Analog : 30 - 82 kHz (Automatic) Sync Input Digital : 30 - 82 kHz (Automatic) Vertical Freq. 56 - 75 Hz (Automatic) Input Form Separate TTL, Positive/Negative... - Page 30 Specifications L245WP Standard USB 2.0, Self-Power Data Rate Max 480 Mbps Pover Consumption Max 2.5W x 2 NOTE Information in this document is subject to change without notice.
- Page 31 Specifications L245WPM Display 24 inches (61.3 cm) Flat Panel Active matrix-TFT LCD Anti-Glare coating 24 inches viewable 0.270 mm pixel pitch Horizontal Freq. Analog : 30 - 82 kHz (Automatic) Sync Input Digital : 30 - 82 kHz (Automatic) Vertical Freq. 56 - 75 Hz (Automatic) Input Form Separate TTL, Positive/Negative...
- Page 32 Specifications L245WPM Standard USB 2.0, Self-Power Data Rate Max 480 Mbps Pover Consumption Max 2.5W x 2 Audio RMS Audio Output 2W+2W(R+L) Input Sensitivity 0.7Wrms Speaker Impendance 16Ω NOTE Information in this document is subject to change without notice.
-
Page 33: Preset Modes (Resolution)
Specifications Preset Modes (Resolution) PC INPUT Horizontal Vertical Horizontal Vertical Display Modes Display Modes Freq. (kHz) Freq. (Hz) Freq. (kHz) Freq. (Hz) (Resolution) (Resolution) 31.47 70.09 640 x 480 1280 x 768 61.80 65.96 31.47 640 x 480 59.94 1280 x 1024 63.98 60.02 37.50... -
Page 34: Signal Connector Pin Assignment
Specifications Signal Connector Pin Assignment DVI-D Connector Signal(DVI-D) Signal(DVI-D) T. M. D. S. Data2- Hot Plug Detect T. M. D. S. Data2+ T. M. D. S. Data0- T. M. D. S. Data0+ T. M. D. S. Data2/4 Shield T. M. D. S. Data4- T. - Page 35 How to Install the VESA Standard wall mounting This monitor meets VESA-compliant mounting interface pad specifications. After moving the product to face downward, make sure to place it on a soft cloth or a cushion to avoid surface damage. COMPONENT DC-OUT HDMI/DVI Separate the head and the stand with the...
- Page 36 Digitally yours...
-
Page 37: Regulatory Information
Regulatory information Regulatory information... -
Page 38: Fcc Compliance Statement
Regulatory Information cont. respecte toutes les exigences du Règlement sur le FCC Compliance Statement matériel brouilleur du Canada. This equipment has been tested and found to comply NOTICE within the limits of a Class B digital device pursuant to Part The regulations are applied only to the products with the 15 of the FCC Rules. - Page 39 Regulatory Information cont. computer and/or display, after a certain period of inactivity, Why do we have environmentally labelled computers? In many countries, environmental labelling has become an shall reduce its power consumption to a lower level, in one established method for encouraging the adaptation of or more stages.
- Page 40 Regulatory Information cont. relevant bio-accumulative TCO’95 requirement permits Monitor Disposal the inclusion of lead, as no replacement has yet been WARNING developed. If you need to dispose of a monitor, ask a qualified service representative for the proper procedure. Improper disposal could Cadmium is present in rechargeable batteries and in the result in personal injury from implosion.
- Page 41 Regulatory Information cont. Approval requirements cover a wide range of issues: ecology, ergonomics, emission of electrical and TCO’99 requires that plastic components weighing more magnetical fields, energy consumption and electrical than 25 grams shall not contain flame retardants with safety. organically bound bromine or chlorine.
- Page 42 The product must be prepared for recycling and the If you want to find out more information about our recycling manufacturer must have a certified environmental program, please contact your local LG vendor or a management system such as EMAS or ISO 14 001 corporate representative of LG.
- Page 43 La LGE. ha annunciato nel 1994 la cosiddetta 'LG http://www.lge.com/experience/social_commitment/enviro Declaration for a Cleaner Environment' (Dichiarazione di ment.jsp LG a favore di un ambiente più pulito), un ideale che da allora funge da principio ispiratore della gestione aziendale. La dichiarazione rappresenta il fondamento che Français consente di intraprendere attività...
- Page 44 LGE. presentó la 'Declaración para un entorno más limpio Declaração é a base que nos tem permitido realizar de LG' en 1994 y este ideal ha servido para guiar nuestros atividades favoráveis ao ambiente com consideração principios empresariales desde entonces. La Declaración atenta aos aspectos econômicos, ambientais e sociais.
- Page 45 ¬ 1994 „Ó‰Û ÍÓÔÓ‡ˆËˇ LGE ÓÔÛ·ÎËÍÓ‚‡Î‡ het milieu 'ƒÂÍ·‡ˆË˛ LG ÔÓ Óı‡Ì ÓÍÛʇ˛˘ÂÈ Ò‰˚', LGE. publiceerde in 1994 de 'LG Declaration for a Cleaner ÍÓÚÓ‡ˇ Ò ÚÂı ÔÓ ÒÎÛÊËÚ ÓÒÌÓ‚Ì˚Ï ÔË̈ËÔÓÏ Environment' (de LG-verklaring met betrekking tot een ÛÔ‡‚ÎÂÌˡ. Õ‡ ÓÒÌÓ‚Â ˝ÚÓÈ ‰ÂÍ·‡ˆËË Ï˚ ÒÏÓ„ÎË...
- Page 46 LG 공급업체나 LG 기업 대표부에 문의하시기 바랍니다. ‰ÂÈÒÚ‚Û˛Ú ÒËÒÚÂÏ˚ ÛÚËÎËÁ‡ˆËË ÓÚıÓ‰Ó‚ Ë ‚ÓÁ‚‡Ú‡ ËÒÔÓθÁÓ‚‡ÌÌÓÈ ÔÓ‰Û͈ËË. ÃÌÓ„Ë ÍÓÏÔÓÌÂÌÚ˚ LG 전자는 기업 개선 정책의 하나로 지구 환경 문제를 ·Û‰ÛÚ ‚ÚÓ˘ÌÓ ËÒÔÓθÁÓ‚‡Ì˚ Ë ÛÚËÎËÁËÓ‚‡Ì˚, ‚ ÚÓ 채택함으로써 보다 나은 환경을 만들어 나가기 위한...
Need help?
Do you have a question about the L245WPQ and is the answer not in the manual?
Questions and answers