Advertisement
Quick Links
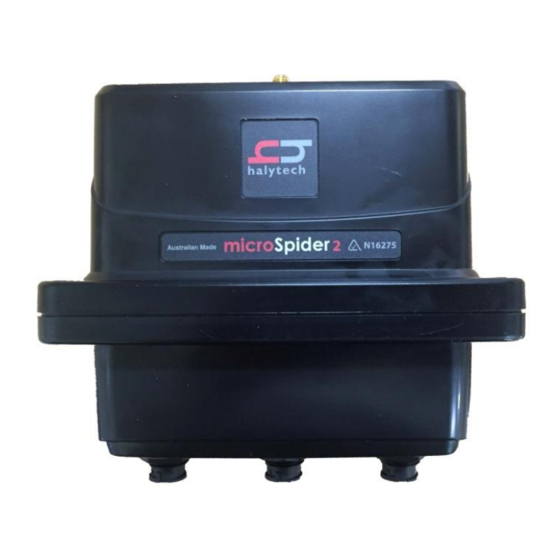
microSpider2 Environmental
This guide is not a replacement for the User Manual. Please refer to the complete
microSpider2 manual available from our website:
Once on the website, go to Products Data Loggers microSpider, and at the
bottom of the page select the 'Downloads' tab. From there you will be able to download
the manual to suit your microSpider2 software version.
Parts List (included in the box)
1 x microSpider2 bottom assembly (electronics and metal protector bar)
1 x microSpider2 top assembly (batteries and antenna)
Set of 4 screws & nuts
1 x greased rubber O-ring
1 x IO connector (8-pin)
2 x connector sealing caps
1 x Quick Start Guide (this document)
NOTE: A new microSpider2 is shipped without a SIM card and with the main battery
disconnected from the circuit.
Tools/Parts Required for Installation (purchased separately)
3mm Hex head screw driver
External aerial (External Aerial units only)
LanLink Comms cable (required for initial setup only)
Extra IO connector
Quick Start Guide
www.halytech.com.au
Advertisement

Related Manuals for Halytech microSpider2 Environmental

Summary of Contents for Halytech microSpider2 Environmental
- Page 1 Environmental Quick Start Guide This guide is not a replacement for the User Manual. Please refer to the complete microSpider2 manual available from our website: www.halytech.com.au Once on the website, go to Products Data Loggers microSpider, and at the bottom of the page select the ‘Downloads’...
-
Page 2: Installing A Sim Card
You need a SIM card to receive automatic e-mail and/or FTP reports from your microSpider2 over the phone network. Halytech can provide fully functioning SIM cards for you. Alternatively, you can source your own SIM card by contacting your preferred mobile phone carrier and requesting a SIM card provisioned with a plan enabling internet access. - Page 3 To install a SIM card into the microSpider2 fitted with a SILVER SIM card holder: Remove the metal bar protecting the circuit board by gently lifting it out of the grooves. If connected, disconnect the battery from the circuit board by squeezing the locking latch and gently pulling the connector upwards.
- Page 4 Connecting the Antenna and Power Take the pre-greased O-ring out of the plastic bag and feed the antenna and power cables through it. (Fitting the O-ring into the case will be discussed in the next section.) Connect the antenna by pressing the flying lead connector squarely onto the gold circuit board antenna connector until it "clicks-in".
-
Page 5: Case Assembly
Case Assembly NOTE: A video clip showing the case assembly is available at www.halytech.com.au/images/downloads/microspider/o-ring.wmv Re-Insert the metal bar protecting the circuit board into the case grooves. Make sure that antenna cable passes the bar on the same side as the battery lead Insert the O-ring into the groove of the top (battery) half of the case –... -
Page 6: Connecting Inputs And Outputs
Connecting Inputs and Outputs I/O CONN 1 I/O CONN 2 BACK (SOLDER) END VIEW Pin numbers are as shown above, when looking at the back (solder end) of the connector with the notch facing upwards. Both connectors have identical pinouts. - Page 7 I/O CONNECTOR 1 FUNCTION COMMENT SWITCH 1 / COUNTER 1 / Active is short to GROUND QUADRATURE 1A 0 – 2.4V or 4-20 mA range ANALOGUE 1 GROUND SWITCH 2 / COUNTER 2 / Active is short to GROUND QUADRATURE 1B 0 –...
-
Page 8: Using The Connectors
Using the Connectors Some usage scenarios of the microSpider2 I/O connectors are outlined below: Connect inputs as per manual: Switch, event, counter and quadrature inputs - connected directly to appropriate input and GROUND. 4-20mA – Connect directly between an available analogue input and GROUND. - Page 9 Connecting the microSpider2 to your PC You must use the special LANlink Communications cable. Turn your computer on and disconnect it from your network. Plug the round connector end of the cable into the communications connector of the microSpider2. (When viewed from the front, the communication connector is on the left.) Red washer identifying...
- Page 10 Configuring your microSpider2 Continuing on from the previous section, follow these steps to begin configuring your microSpider2: Go to the “Change Setup” page Set the location name (E.g. to your site name) Set the date and time Set the username and password for security Configure and name the microSpider2 inputs as required Calibrate the analogue inputs Set the scaler and offset for any counter or event inputs...
- Page 11 THIS PAGE INTENTIONALLY BLANK...
- Page 12 Environmental Quick Start Guide Revised 23/02/2016 © Halytech 2016 Tel: (02) 8814 5235 Email: sales@halytech.com.au PO Box 6983 Baulkham Hills Business Centre NSW 2153 ABN 51 094 853 068...