Table of Contents
Advertisement
Quick Links
This equipment is designed to be installed and serviced by security and lock industry professionals.
Please refer to the table of contents and list of illustrations on page 3.
Access system programming: This access system possesses serial communications capability and can be managed as part of an
overall access control system with Hub Manager Professional
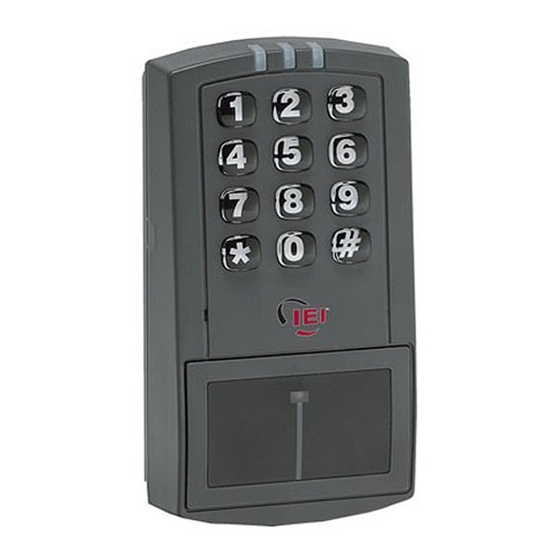
Optional Keypad Programming: The prox.pad Plus IR unit can be programmed manually using the keypad on each unit and
without the use of a personal computer (PC) and software. This manual contains the optional keypad programming instructions.
Keypad programming can be helpful to get a door or doors up and running prior to having the availability of the host computer. In all
cases, the personal computer programming options supersede the keypad programming options.
Page 1 of 32
prox.pad Plus
Installer Guide
Service Company, Put Contact Information Here:
Company Name: __________________________________________
Service Number: __________________________________________
Any changes or modifications not expressly
approved by the party responsible for compliance
could void the user's authority to operate the
IR Access System
TM
TM
software. See the inside cover for system requirements.
15.21 Information to User
equipment.
Document # 6105681, Rev 1.1, D2a
Advertisement
Table of Contents

Summary of Contents for IEI Technology prox.pad Plus
- Page 1 See the inside cover for system requirements. Optional Keypad Programming: The prox.pad Plus IR unit can be programmed manually using the keypad on each unit and without the use of a personal computer (PC) and software. This manual contains the optional keypad programming instructions.
- Page 2 Plus IR Access System Installer Guide Access system programming - System Requirements Hub Manager Professional access control software version 7.2 or higher (part number HUBSWR includes software ● installation instructions) LS Link PDA Software or DTD (Data Transfer Device) ●...
-
Page 3: Table Of Contents
Plus IR Access System Installer Guide Table of Contents Description.....................................4 prox.pad Plus IR Specifications.............................6 prox.pad Plus IR Default Settings............................7 Daylight Saving Time................................7 prox.pad Plus IR LED Indicators/Sounder Operations......................8 prox.pad Plus IR Component Overview..........................9 prox.pad Plus IR Control Board Overview...........................10 Communication Board Overview............................11... -
Page 4: Description
LS Link PDA software. In addition, you can program the unit via the keypad. The prox.pad Plus IR unit is unique in that no separate controller is needed and there is no need to run cables from a reader to a control. - Page 5 Professional PC Software (version 7.2 or higher required) PDA using LS Link PDA Software DTD (Data Transfer Device prox.pad Plus IR Replacement Battery: Panasonic BR1225, Renata CR1225 or Varta CR1225; Refer to caution below. lots of 25 only ProxKey KeyFobs (IEI Part Number: 0297301)
-
Page 6: Prox.pad Plus Ir Specifications
Plus IR Access System Installer Guide prox.pad Plus IR Specifications Table 2: prox.pad Plus IR Specifications Electrical Power Supply/Current Requirements 12-24 VDC, linear filtered and regulated power supply; 150mA Wiring Remote Antenna Cable (if installing in a [ALPHA 1294C (22AWG) 4-conductor, stranded and shielded]... -
Page 7: Prox.pad Plus Ir Default Settings
Plus IR Access System Installer Guide prox.pad Plus IR Default Settings The table below lists the default settings for the prox.pad Plus IR unit as shipped from the factory. Subsequent sections in this chapter explain how to change these default settings or program additional functions. -
Page 8: Prox.pad Plus Ir Led Indicators/Sounder Operations
Plus IR Access System Installer Guide prox.pad Plus IR LED Indicators/Sounder Operations The table below describes the various LED and Sounder indications used in the prox.pad Plus IR. Table 4: prox.pad Plus IR LED Indicators/Sounder Operations LED/Sounder Visual/Audible Condition... -
Page 9: Prox.pad Plus Ir Component Overview
Plus IR Component Overview The following diagram illustrates all the various components of the prox.pad Plus IR. Please not the location of the IR (Infrared) communication port on the lower right corner of the communication board in the rear housing. -
Page 10: Prox.pad Plus Ir Control Board Overview
Plus IR Access System Installer Guide prox.pad Plus IR Control Board Overview The diagram below illustrates the connectors on the prox.pad Plus IR main circuit board. The power connections are made on the communication board discussed in the next section. -
Page 11: Communication Board Overview
Plus IR Access System Installer Guide Communication Board Overview The following diagram shows the various connectors and wire connections on the communication board. The communication board is packaged separately from the control unit to allow you access to the backplate mounting holes and wire knockouts. You must secure communication board to the backplate using the five supplied mounting screws. -
Page 12: Performing A Wall Mounted Installation
(drywall, masonry, wood, etc.) exterior to the room to be accessed. A single-gang electrical box (or back box) can be used. Typically, the prox.pad Plus IR unit is wall mounted outside the access area on the unsecured side of the door. -
Page 13: Preventing Possible Water Problems
Plus IR Access System Installer Guide Preventing Possible Water Problems To avoid damage to electronics caused by water when used on exterior applications, follow these instructions carefully. 1. Do NOT seal the cover and base together. Keypads are designed to direct any water that enters the two constituent pieces, base and cover, towards the bottom and out a drain or weep hole. -
Page 14: Performing A Glass Mounted Installation
Figure 5 below shows the four IEI-supplied pressure-sensitive adhesive pads and the two side cut-outs used for this installation. In this configuration, the prox.pad Plus IR unit is affixed with the four self-adhesive pads to the glass or the glass window adjacent to the door being accessed, on the interior side of the glass. -
Page 15: Performing A Secure Installation
Plus IR Access System Installer Guide Performing a Secure Installation In this configuration, the prox.pad Plus IR prox antenna housing is removed from the keypad/controller and located a maximum of 10 feet away. The controller/keypad is located inside the secure area. -
Page 16: Figure 7: Performing A Secure Installation
Plus IR Access System Installer Guide For the remote antenna wire, use ALPHA 1294C (22AWG) 4-wire, stranded and shielded cable. The cable shield drain wire must be grounded at the reader end to P1, pin 4 connection (DC Power Supply Ground). -
Page 17: Installing A Tamper Switch
2. Clip the screw mounting tabs from both the magnet and reed switch using pliers or a wire cutter. 3. With the prox.pad Plus IR base removed, stick the magnet to the Keypad board in location A, using the adhesive tape. -
Page 18: Removing/Inserting Circuit Boards
Plus IR Access System Installer Guide Removing/Inserting Circuit Boards If you must remove or insert the main circuit board from/into the prox.pad Plus IR controller/keypad, follow the steps below. 1. Disconnect the back housing of the prox.pad Plus IR unit from the front keypad/controller. -
Page 19: Connecting The Communication Board To The Main Control Board
Connecting the Communication Board to the Main Control Board The prox.pad Plus IR is composed of two circuit boards, the control board and the communication board, which is mounted in the rear keypad housing. The communication board contains the infrared communications circuitry used for communicating to a PDA device, as well as the power supply. -
Page 20: Wiring The Main Relay To Fail Secure Lock
Electric Door Strike. Power for the prox.pad Plus IR unit must be from a 12-24 volt DC linear, filtered and regulated power supply. It is typical for the chosen power supply to power BOTH the prox.pad Plus IR unit and the selected locking device. When using one power supply for both the prox.pad Plus IR unit and locking device, be sure to include both devices in your current requirements calculations. -
Page 21: Wiring The Main Relay To Fail Safe Lock
Maglock. Power for the prox.pad Plus IR unit must be from a 12-24 volt DC linear, filtered and regulated power supply. It is typical for the chosen power supply to power BOTH the prox.pad Plus IR unit and the selected locking device. When using one power supply for both the prox.pad Plus IR unit and locking device, be sure to include both devices in your current requirements calculations. -
Page 22: Wiring The Aux Relay For Alarm Shunt
Plus IR Access System Installer Guide Wiring the Aux Relay For Alarm Shunt The diagram below shows how to wire the Aux relay for use as alarm shunt. By default, the Aux Relay is set for Alarm Shunt so no programming is required for this feature. -
Page 23: Wiring The Aux Relay For Propped Or Forced Door
Plus IR Access System Installer Guide Wiring the Aux Relay For Propped or Forced Door The diagram below shows how to wire the Aux Relay for propped door or forced door. Before you use the Aux Relay for propped door or forced door you must assign it using command 10. -
Page 24: Wiring The Door Contact Input
With Auto Re-Lock, a long door open time can be programmed. After entering a valid code, presenting valid card or triggering REX, Auto Re-Lock automatically overrides the main relay timer as soon as the prox.pad Plus IR unit senses that the door is open and immediately de-energizes the lock relay. -
Page 25: Wiring An External Rex Switch (Request To Exit)
Wiring an External REX Switch (Request to Exit) The prox.pad Plus IR unit can be wired to monitor a remote switching device, which is intended to be installed on the secure side of a door. The Request to Exit (REX) switch is a momentary input closure that engages the main relay for the same length of time for which the main relay is programmed. -
Page 26: Programming
Entering Program Mode The first step in programming the prox.pad Plus IR is to place it into program mode by using the master code, which is defaulted to 1234. To place the unit in program mode, press: 99 # Master Code *. -
Page 27: Prox.pad Plus Ir User Types
Plus IR Access System Installer Guide prox.pad Plus IR User Types The following chart describes all the user types available in the prox.pad Plus IR. User Type Name User Type Number Description Toggle User Toggle users are used to latch the Main Relay in the unlocked position for an indefinite period of time. -
Page 28: Programming Options Chart
Plus IR Access System Installer Guide Programming Options Chart The following chart contains a list of programming commands available in the prox.pad Plus IR. When programming users, the term user location refers to the place in the units memory that the user is stored. - Page 29 Plus IR Access System Installer Guide Action Desired Press Details Change Platform Parameters 32 # parameter # value # ** See Chart Below Parameter Value 0 – Error Lockout Threshold 1 – 50 Attempts (Default = 3) 1 – Error Lockout Duration 1 –...
- Page 30 Plus IR Access System Installer Guide Action Desired Press Details User Types: 0 – Toggle 1 – Standard 3 – Lockout Program User - Card Only 50 # user type # user location # ** 4 – Extended By Presenting Card <present card>...
- Page 31 Plus IR Access System Installer Guide Action Desired Press Details 58 # start user # start user # Delete Block of Consecutive Users number of users * number of users Delete Single User user location # ** Erase Transaction Log 76 # 00000 # 00000 # ** Document # 6105681, Rev 1.1, D2a...
- Page 32 Plus IR Access System Installer Guide International Electronics, Inc. 427 Turnpike St. Canton, MA 02021 U.S.A. Phone: 800-343-9502, 781-821-5566 Fax: 781-821-4443 Website: www.ieib.com Page 32 of 32 Document # 6105681, Rev 1.1, D2a...
Need help?
Do you have a question about the prox.pad Plus and is the answer not in the manual?
Questions and answers