Table of Contents
Advertisement
Quick Links
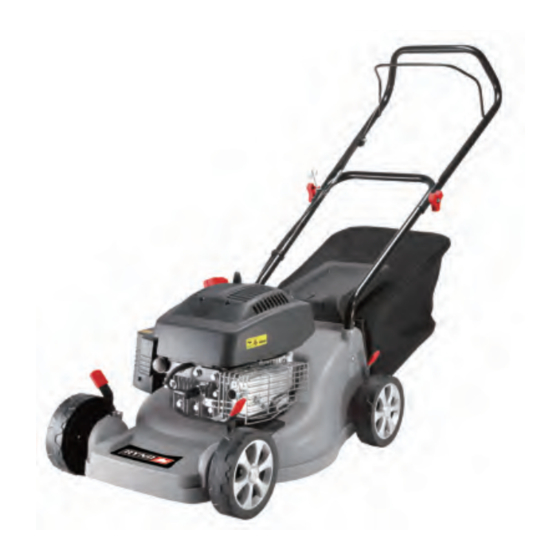
149CC PETROL HAND
PUSH LAWNMOWER
XSS40A
!
CAUTION
These instructions contain important information that will help you get the
best from your lawnmower, ensuring it is assembled correctly and safely.
If you need help or have damaged or missing parts, call the Customer
Helpline on 0844 856 0793
Do you need help with this product?
Instead of returning your product please call our
technical helpline on 0844 856 0793
Warning: Read this instruction manual
carefully before using the product.
Advertisement
Table of Contents

Subscribe to Our Youtube Channel
Related Manuals for RYNO XSS40A


Summary of Contents for RYNO XSS40A
- Page 1 149CC PETROL HAND PUSH LAWNMOWER XSS40A CAUTION These instructions contain important information that will help you get the best from your lawnmower, ensuring it is assembled correctly and safely. If you need help or have damaged or missing parts, call the Customer...
-
Page 2: Table Of Contents
INDEX 149cc Petrol Hand Push Safety information Lawnmower In the box Assembly XSS40A Preparing to operate the lawnmower Operate How to replace the blade Technical data Maintenance Guarantee CE-Description Helpline: 0844 856 0793 Helpline: 0844 856 0793 Email: support@coreservice.co.uk Email: support@coreservice.co.uk Website: www.coreservice.co.uk... -
Page 3: Safety Information
SAFETY INFORMATION SAFETY INFORMATION The following warning symbols appear throughout this assembly manual and indicate the Warning Symbols appropriate safety measures you should take when assembly and operating the lawnmower. The following warning symbols appear throughout this manual and indicate the appropriate safetymeasures you should take when operating and maintaining the lawnmower. - Page 4 SAFETY INFORMATION SAFETY INFORMATION General Safety Instruction d) Always be sure of your footing on slopes; e) Walk, never run; WARNING! f) Mow across the face of slopes, never up and down; Important - Please read these instructions fully before starting assembly g) Exercise extreme caution when changing direction on slopes;...
-
Page 5: In The Box
IN THE BOX ASSEMBLY Parts List Preparing to assemble the lawnmower Parts Tools A Main mower deck (with upper handle attached) WARNING! Always take care when removing the packaging to prevent damage to you or to the lawnmower. B Lower handle C Self-tapping screws2pcs Before assembling the lawnmower, check all the parts indicated in the IMPORTANT! -
Page 6: Assembly
ASSEMBLY PREPARING TO OPERATE THE LAWNMOWER 2a Lift the upper handle, align it with the lower handle, making sure the cables are not Step 1 - Filling with Engine Oil twisted, and fasten the two handles together by using the bolts and handle tension knobs included in box. -
Page 7: Operate
PREPARING TO OPERATE THE LAWNMOWER OPERATE Step 2 - Filling with Engine Fuel Step 1 - Setting the Cutting Height CAUTION! Always use clean, fresh unleaded petrol. Purchase fuel in quantities that can be used within 30 days. Never mix oil with petrol. CAUTION! Do not fill into the base of neck to allow for fuel expansion. - Page 8 OPERATE OPERATE Step 3 – Mowing WARNING! Always observe the strictest safety procedures when using the lawnmower. Carefully read the safety instructions of this manual before using the lawnmower. Start the engine and allow it run .See ”Step-2 Starting the engine” To stop the engine, release the stop / start bar.
-
Page 9: How To Replace The Blade
HOW TO REPLACE THE BLADE TECHNICAL DATA Technical Data Replacing the Blade Engine type Single cylinder 4-stroke Engine displacement 149.3cc Engine max.power 2.1kW / 3600 rpm Engine speed 2900rpm Cutting width 40cm Grass bag capacity 45L IgnitionT.C.I Fuel tank capacity 0.8L Oil tank capacity 0.6L Sound pressure level 85 dB(A) Sound power level 96 dB(A) -
Page 10: Maintenance
MAINTENANCE MAINTENANCE Storing the Lawnmower Maintenance Maintenance Schedule Step 1 - Storing the Lawnmower for Short Periods Maintenance Performing routine maintenance correctly on your lawnmower will ensure you get years of trouble free use. Please keep this manual safe for future reference. The lawnmower can be stored for short periods of time (less than 15 days) without It is recommended that the following maintenance schedule is adhered to. - Page 11 MAINTENANCE MAINTENANCE Step 1 - Cleaning (continued) Step 3 - Cleaning or Replacing Air Filter 1a The lawn mower should be thoroughly cleaned after every use, especially the underneath and the blade mount. To do so, tip the lawn mower onto its left side (the opposite side to the oil filling socket). Dirt and grass is easiest to remove immediately after you have finished mowing the grass.
-
Page 12: Guarantee
GUARANTEE CE-DESCRIPTION Thank you for purchasing a RYNO garden tool. In the unlikely event that your product develops a fault, please contact our team of technical experts at Core Service, the aftersales department, on 0844 856 0793 who will aim to resolve any faults over the phone for you.
Need help?
Do you have a question about the XSS40A and is the answer not in the manual?
Questions and answers