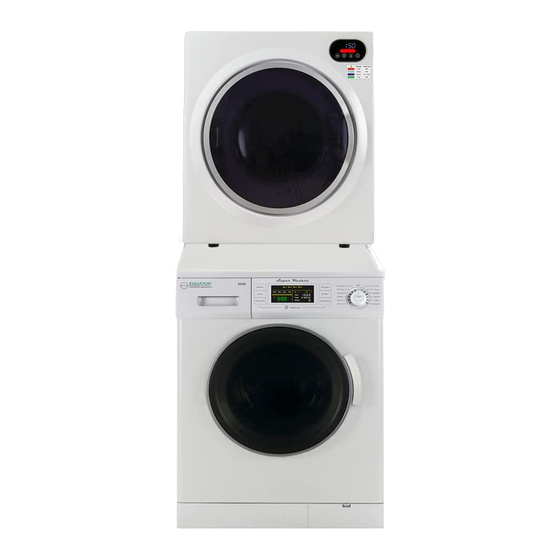
Summary of Contents for Consolidated Brands 848
- Page 1 Ultra Compact Dryer Model - 848 OWNER’S MANUAL Read the instructions carefully and keep for future reference...
-
Page 3: Warranty
Exclusions In no event shall Consolidated Brands be liable for incidental or consequential damages or for damages resulting from external causes such as abuse, misuse, incorrect voltage or acts of God. - Page 4 General Since it is a responsibility of the consumer-owner to establish the warranty period by verifying the original purchase date, Consolidated Brands recommends that a receipt, delivery slip or some other appropriate payment record be kept for that purpose. This warranty gives you specific legal rights, and you may also have other rights which vary from State to State.
- Page 7 BUILT-IN, RECESSED, CLOSET AND ALCOVE INSTALLATION The Dryer may be installed in a built-in, recessed area, closet or alcove. The installation spacing is in inches and is the minimum acceptable. Other installation must use the minimum dimensions indicated. ...
-
Page 8: Cutout Dimensions
Cutout Dimensions Cutout Height – 28.5 inches Cutout Width – 27.5 inches Cutout Depth – 27.5 inches Placement Place the dryer in dry ventilated area.It should be positioned away from the heat and direct sunlight. The dryer comes with feet that need to be attached to ensure stability. -
Page 9: Wall Mounting Instructions
Wall Mounting Instructions Determine and mark the dryer position on the wall. This dryer is not suitable to be placed directly on top of a washing machine. A minimum 2 in (50 mm) is needed between the top of dryer and the ceiling for ease of installation. - Page 10 6. Turn the exhaust connector clockwise, until it inserts into the connector’s groove. 7. Using 4x12 mm screws (provided), fix the 2 spacers as per Fig. 4. 8. With assistance, mount the dryer on wall hooks. See Fig. 5.
- Page 11 The applinces shall not be exhausted into a chimney, wall, ceiling, attic, crawl space, or a concealed space of a building. Only flexible or rigid metal duct shall be used for exhausting. In Canada, only those foil-type flexible ducts, if any, specifically identified for use with the appliance by the manufacturer shall be used.
-
Page 12: Parts And Features
PARTS AND FEATURES... -
Page 13: Control Panel Functions
Control Panel Functions Time Display - Shows Program times and time remaining (minutes) Light Bar - Shows colors for different programs Start/Pause Time Program Power Color Program Display Time Dry: Hight Heat Light Blue Sensor Dry: Hight Heat Dark Blue Sensor Dry: Air + High Heat Green Time Dry: Half Heat... - Page 14 b) Light Blue: The dry cycle runs at high heat and the default time is 200 minutes. This program works with a sensor and will adjust the time automatically and will stop when the clothes are dry. The time cannot be changed in this program. c) Dark Blue: This program is the “ECO”...
-
Page 15: Maintenance
Maintenance Please unplug the power cord prior to any cleaning. The Lint Filter must be in place whenever drying. It must be cleaned before each use. The Filter assembly is located at the back of the drum. 1. Removing the Filters Remove by pulling outwards, with fingers inserted into the four holes around the Exhaust Vent shroud. - Page 16 3. Re-installing the Filters After cleaning, assemble in the sequence of Exhaust filter - Lint Filter - Exhaust Vent Shroud. Align the recesses in the center with the projection in the center of the drum. Ensure that it is firmly inserted (as shown in Figure 3). Cleaning the Air Intake Filter The Filter should be cleaned occasionally.
- Page 17 Cleaning the interior & exterior of the Dryer Do not wash directly with water. Do not use thinner, gasoline or alcohol. Do not use any type of spray cleaner when cleaning the interior. If dryer drum becomes stained, clean the drum with a damp cloth.
-
Page 18: Troubleshooting
Troubleshooting Review the following before calling for service. Problem Possible Cause What to do Control Is the power cord inserted Insert the power cord firmly. Panel does firmly? not work Drum does Is the door closed? Close the door. not turn Is the power cord inserted? Insert the power cord firmly. - Page 19 Dryer replaceable parts can be ordered online: Part Part Part Name Position Number 85047 Feet (set of 4) 85050 Inlet Filter (Air Intake Filter) – Paper 85051 Inlet Filter Cover (Air Intake Shroud) – Plastic 85057 Exhaust Vent Shroud – Plastic 85058 Lint Filter –...


Need help?
Do you have a question about the 848 and is the answer not in the manual?
Questions and answers