Advertisement
Quick Links
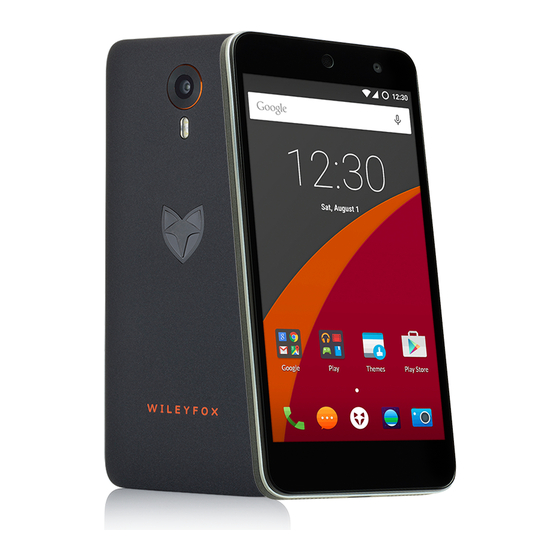
Inserting your SIM & memory cards
The first thing you need to do is insert the SIM card and, if you're using one, a memory card.
The Wileyfox Swift uses a MicroSIM card and accepts a MicroSD memory card.
1.
Remove the back cover by prising it away from the phone - you can fit your thumbnail into the
space between the cover and USB port and just pull it back.
2.
Take the battery out if it's in place.
3.
Slide the SIM into the left-hand slot (cut-corner first, with the gold contacts facing down).
4.
If you're adding a microSD card, slide it in narrow-end first, with the gold contacts facing down.
5.
Replace the back cover by pressing it down around the edges until it clicks.
Advertisement

Related Manuals for Wileyfox Swift

Summary of Contents for Wileyfox Swift
- Page 1 The first thing you need to do is insert the SIM card and, if you’re using one, a memory card. The Wileyfox Swift uses a MicroSIM card and accepts a MicroSD memory card. Remove the back cover by prising it away from the phone - you can fit your thumbnail into the space between the cover and USB port and just pull it back.
- Page 2 The second SIM card slot is used if you have a separate SIM for mobile data, or need to be able to receive calls and texts from a second number. 3. Completing the Wileyfox Setup Wizard The first time you turn the phone on you need to complete the ‘Setup Wizard’, which takes you through the things you need to do to get the phone working the way you want.
- Page 4 Hold the Power button until you feel a vibration and the phone turns on. Choose your language and tap Next. Select your Wi-Fi network from the list, or tap Skip. We recommend connecting to Wi-Fi when setting up your phone, because if you don’t, all of the large updates that’re installed will be downloaded using your mobile data.
- Page 6 The word ‘Connected’ will appear under the network name. Tap Next to continue. Turn on mobile data by tapping the switch. This allows you to get online when you’re away from home. If you have a Google account, enter your account details and tap Next. If you don't, create one by tapping Create a new account.
- Page 7 Read the Terms of Service and Privacy Policy if you want to, then tap Accept.
-
Page 9: Connecting To The Internet
Menu (square): displays all the open apps. 4. Connecting to the Internet To use apps, social media, and download films and music, the Swift needs to connect to the internet. During the setup, we showed you how to connect to your home Wi-Fi. - Page 11 Swipe down from the top of the screen, then tap the Settings icon (it’s in the top right of the screen and looks like a cog). Tap the Networks tab at the top of the screen. Check that the Wi-Fi switch is blue. If it's grey, tap the switch to turn it on.
- Page 12 APN Guides will help you manually set it up. 5. Setting up new email accounts You can send and receive emails from most providers on the Swift. These steps take you through adding a new email account to the phone.
- Page 14 Swipe down from the top of the screen and open the Settings menu. Scroll down and select Accounts. Below the list of active email accounts, tap Add account. If you’re setting up a work or education email account, select Microsoft Exchange. For personal accounts, select IMAP (the ‘Pop’...
- Page 16 Enter your email address, press Next, then enter your password and press Next. Choose how often the phone checks for email. Checking more frequently uses more battery and mobile data - every hour is a good compromise. Choose a name for your account, then type your name (it'll be shown on emails sent from your phone).
- Page 17 Your phone can now send and receive emails from your added account. If it didn’t work, you might need to add the email server settings manually. For more information, check our guide to email server settings. 6. Setting up a lock screen We always recommend keeping your phone safe with a lock screen.
- Page 19 From the Home screen, tap on the Apps icon. Open the Settings menu. Tap the Display tab at the top followed by Lock screen. Press Select screen lock.
- Page 21 Choose the unlock method you want to use. To unlock the phone: Swipe: swipe the lock screen. This means your phone can be unlocked by anyone, so we recommend using one of the other options. Knock Code: tap a pattern on the screen (it'll unlock the phone even when the screen's off).
- Page 22 Enter the code you want to use, then tap Continue. Confirm it, and press Continue again. If you’re using a Knock Code or pattern, you’ll be asked to add a PIN in case you forget it.
Need help?
Do you have a question about the Swift and is the answer not in the manual?
Questions and answers