Table of Contents
Advertisement
Quick Links
Advertisement
Table of Contents

Related Manuals for Novanta Jadak HS-1RS


Summary of Contents for Novanta Jadak HS-1RS
- Page 1 HS-1RS User Guide Page i HS-1RS User Guide...
- Page 2 This product or document is protected by copyright and distributed under licenses restricting its use, copying, distribution, and recompilation. No part of this product or document may be reproduced in any form by any means without prior written authorization of Novanta Corporation and its licensors, if any.
-
Page 3: Table Of Contents
Contents 1 - Introduction ....................... 11 Hardware Overview ........................12 JADAK ® HS-1RS Imager Identification ..................12 Reading Techniques ........................ 12 2 - Interface Settings ....................14 Connecting the HS-1RS with USB Port ................... 14 Interface Options ........................15 USB COM Port Emulation ....................... 15 USB HID Keyboard Emulation .................... - Page 4 Good Read Delay ........................21 Re-read Delay ......................... 22 4 – Utilities ......................23 Utilities Overview ........................23 Report the list of available Programming Commands .............. 23 Revision ........................... 23 Show Software Revision ......................23 Show Revision Time ........................ 23 5 - Data Editing .......................
- Page 5 LF RFID HID Prox tag ......................30 LF RFID ISO HDX/TIRIS tag ....................30 LF RFID COTAG tag ....................... 30 LF RFID IOProx tag ......................... 30 LF RFID Indala tag ........................31 LF RFID NexWatch tag ......................31 LF RFID AWID tag ........................31 LF RFID G-Prox tag .........................
- Page 6 HF RFID HID Topaz tag ......................37 RFID Re-read Delay ........................ 38 RFID Reverse UID ........................38 RFID Prefix ..........................38 RFID Prefixes On/Off ....................... 39 RFID Prefix Block String ......................39 RFID Suffix ..........................39 RFID Suffix On/Off ........................39 RFID Suffix Block String ......................
- Page 7 Linear Symbologies Codabar ....................50 Codabar Defaults ........................50 Codabar On/Off ........................50 Codabar Minimum and Maximum Length ................50 Code 11 ........................... 51 Code 11 Defaults ........................51 Code 11 On/Off ........................51 Code 11 Minimum and Maximum Length ................51 Code 11 Check Digit ........................
- Page 8 Code 93 Minimum and Maximum Length ................56 Composite Code ........................57 GS 1 Composite Code ......................57 Composite Code Minimum and Maximum Length ..............57 EAN-8/JAN 8 ........................... 58 EAN-8/JAN 8 Defaults ......................58 EAN-8/JAN 8 On/Off ........................ 58 EAN-13/JAN 13 ........................
- Page 9 MSI On/Off ..........................62 MSI Minimum and Maximum Length ..................63 MSI Check Digits ........................63 UPC-A ............................. 64 UPC-A Defaults ........................64 UPC-A On/Off .......................... 64 UPC-A Check Digit ........................64 UPC-E(0) ..........................64 UPC-E(0) Defaults ........................64 UPC-E On/Off .......................... 65 UPC-E(0) Check Digit ......................
- Page 10 2D Matrix Symbologies Maxi Code ..................68 Maxi Code Defaults ......................... 68 Maxi Code On/Off ........................68 QR Code..........................68 QR Code Defaults ........................68 QR Code On/Off ........................68 9 - Product Specifications ..................69 USB .............................. 70 10 - Maintenance ....................71 Repairs ............................
-
Page 11: Introduction
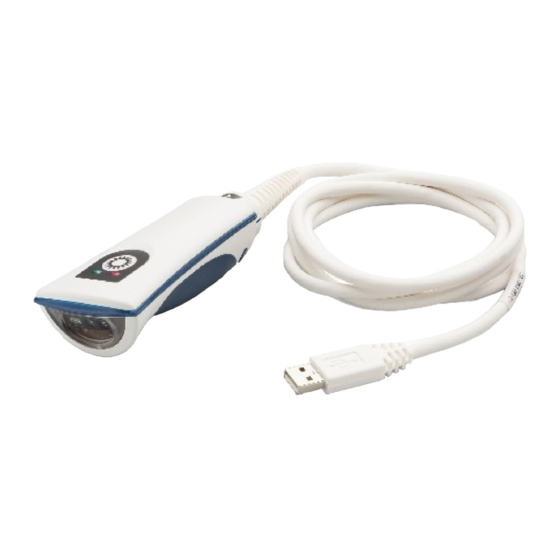
1 - Introduction The JADAK HS-1RS is a handheld barcode and Radio Frequency Identification (RFID) reader that utilizes area imaging technology to read popular linear (1D), stacked linear, and matrix (2D) barcodes, combined with reading and writing High Frequency (13.56 MHz) as well as Low Frequency (125 KHz or 134.2 KHz) RFID tags in close distance (10 to 40mm). -
Page 12: Hardware Overview
Hardware Overview JADAK ® HS-1RS Imager Identification On the bottom of your scanner, you will see a label as shown below: Configuration String Serial Number Configuration String: The configuration string is a 10-digit string with the first 9 digits being a factory configuration number and the last digit being the revision of the product. - Page 13 Linear bar code 2D Matrix symbol The aiming beam is smaller when the imager is closer to the code and larger when it is farther from the code. Symbologies with smaller bars or elements (lower mil size) should be read closer to the unit. Symbologies with larger bars or elements (higher mil size) should be read farther from the unit.
-
Page 14: Interface Settings
2 - Interface Settings Connecting the HS-1RS with USB Port Note: These instructions are for use with the USB (JADAK CBL-0080 Rev C) cable. 1. If you are using USB Serial Communication Port Emulation interface, you must first load the driver for that interface onto your computer. -
Page 15: Interface Options
Interface Options USB COM Port Emulation HOSTCFG command is used to select data output interface while the scanner is in composite mode. Scan the following code to program the HS-1RS to emulate a regular RS-232-based COM port. Note: The HS-1RS must be power cycled after programming this interface! USB COM Emulation USB HID Keyboard Emulation HOSTCFG command is used to select data output interface while the scanner is in composite... -
Page 16: Keyboard Country Layout
Keyboard Country Layout When the HS-1RS is set to USB HID Keyboard Emulation, use the following commands (without prefix “JDK”) or programming barcodes to set the specific Keyboard layout for your language. Default = United States. * United States: United Kingdom: Belgium: Denmark: France:... -
Page 17: Hid Keyboard Rate
HID Keyboard Rate If you use the HS-1RS in USB HID Keyboard mode, it is possible to change the speed of the data output when an RFID tag or barcode is read, akin to someone typing the data faster or slower on a keyboard. -
Page 18: Default Options
Default Options Custom Default Settings Scan the following code revert the unit to its custom default settings. Note: The HS-1RS must be power cycled after programming this command! To set custom defaults, please contact Jadak. Factory Default Settings Scan the following code revert the unit to its factory default settings. Note: The HS-1RS must be power cycled after programming this command! Page 18 HS-1RS User Guide... -
Page 19: Input/Output Settings
3 - Input/Output Settings Good Read Indicators Beeper Volume - Good Read The beeper volume codes modify the volume of the beep the imager emits on a good read. Default = High. * High Medium No Reads Not every trigger event will result in a successful barcode read. When there is no code read the HS-1RS may return a no read signer in the form of the characters NR. -
Page 20: Trigger Commands
Trigger Commands To scan barcodes, you need to ‘trigger’ the HS-1RS. This can be done in various ways. You can activate the HS-1RS by sending the trigger command TRGON serially or by pressing the trigger button on the scanner itself. Several supporting commands are provided to set the allowed trigger time-out (e.g., the maximum time that the scanner will take to keep looking for a barcode.) TRGON... -
Page 21: Trigger Time Out
Trigger Time Out This sets the maximum time how trigger procession continues during a scan attempt. This command is not valid in Presentation Trigger Mode. Use the command TRGTIME x (where ‘x’ is a value between 0 and 300.000 in 1ms steps), to set the time between 1ms and 300 seconds. -
Page 22: Re-Read Delay
Re-read Delay This sets the time period before the imager can read the same bar code a second time. Setting a proper re-read delay time protects against accidental re-reads of the same bar code. Use shorter delays in applications where repetitive bar code scanning is required. Several commonly used re-read delay menu command barcodes are included below. -
Page 23: Utilities
4 – Utilities Utilities Overview This chapter describes some utilities that can tell more about certain aspects of the HS-1RS hand scanner. Report the list of available Programming Commands All of the supported serial command of the imager, along with a short description and the current setting value will be serially output when this barcode is scanned. -
Page 24: Data Editing
5 - Data Editing Data Editing Overview When a bar code is scanned, additional information is sent to the host computer along with the bar code data. This group of bar code data and additional, user-defined data is called a “message string.”... -
Page 25: Barcode Prefix
Barcode Prefix Prefix characters are user-definable data characters that can be sent before scanned data. It’s possible for the HS-1RS to enable and set a specific prefix for all scanned Barcode data only. This can help to discern barcode data from RFID data when both are output alternately. Note: This Barcode Prefix will be separate from any set RFID prefixes. -
Page 26: Barcode Suffix
Barcode Suffix Suffix characters are user-definable data characters that can be sent after scanned data. It’s possible for the HS-1RS to enable and set a specific suffix for all scanned Barcode data only. Note: This Barcode Suffix will be separate from any set RFID suffixes or general suffixes. Barcode Suffix On/Off To enable or disable the Barcode suffix, scan the appropriate code below. -
Page 27: Rfid
6 - RFID RFID Overview Besides being able to scan 1D and 2D barcodes, the HS-1RS can also read RFID tags, using LF RFID technology at 125 KHz/134.2 KHz and HF RFID technology at 13.56 MHz. RFID Mode On/Off It is possible to enable or disable the RFID part of the HS-1RS. Scan one of the codes below to enable or disable RFID Scanning. -
Page 28: Lf Rfid Em4100 Tag
High Frequency (HF) tags: ISO14443A/MIFARE ISO14443B ISO15693 HID iClass FeliCa NFCP2P Topaz All RFID tags If you want to be able to read all type of RFID tags, scan the #RFIDALL 1 On code (Enable All). If on the other hand, you want to read only a particular type of RFID tag, scan #RFIDALL 0 (Disable All) followed by the RFID Enable (1) for that particular type of RFID. -
Page 29: Lf Rfid Hitag 2 Tag
LF RFID HITAG 2 tag Command #HITA2EN 1 enable; 0 disable; 2 reverse byte order LF RFID EM4x50 tag Command #EM415EN 1 enable; 0 disable; 2 reverse byte order LF RFID ISO FDX-B tag Command #ISOFDEN 1 enable; 0 disable; 2 reverse byte order Page 29 HS-1RS User Guide... -
Page 30: Lf Rfid Hid Prox Tag
LF RFID HID Prox tag Command #IHIDPREN 1 enable; 0 disable; 2 reverse byte order LF RFID ISO HDX/TIRIS tag Command #HTIRISEN 1 enable; 0 disable; 2 reverse byte order LF RFID COTAG tag Command #COTAGEN 1 enable; 0 disable; 2 reverse byte order LF RFID IOProx Command #IOPROXEN 1 enable;... -
Page 31: Lf Rfid Indala Tag
LF RFID Indala Command #INDITEN 1 enable; 0 disable; 2 reverse byte order LF RFID NexWatch tag Command #HOMEYEN 1 enable; 0 disable; 2 reverse byte order LF RFID AWID tag Command #AWID_EN 1 enable; 0 disable; 2 reverse byte order Page 31 HS-1RS User Guide... -
Page 32: Lf Rfid G-Prox Tag
LF RFID G-Prox tag Command #GPROXEN 1 enable; 0 disable; 2 reverse byte order LF RFID Pyramid tag Command #PYRAMEN 1 enable; 0 disable; 2 reverse byte order LF RFID Keri tag Command #KERI_EN 1 enable; 0 disable; 2 reverse byte order Page 32 HS-1RS User Guide... -
Page 33: Lf Rfid Deister Tag
LF RFID Deister tag Command #DEISTEN 1 enable; 0 disable; 2 reverse byte order LF RFID Cardax tag Command #CARDAEN 1 enable; 0 disable; 2 reverse byte order LF RFID Nedap tag Command #NEDAPEN 1 enable; 0 disable; 2 reverse byte order Page 33 HS-1RS User Guide... -
Page 34: Lf Rfid Idteck Tag
LF RFID IDTECK tag Command #IDTECEN 1 enable; 0 disable; 2 reverse byte order LF RFID PAC tag Command #PAC_ENA 1 enable; 0 disable; 2 reverse byte order LF RFID UltraProx tag Command #ULTRAEN 1 enable; 0 disable; 2 reverse byte order Page 34 LF RFID ICT tag HS-1RS User Guide... -
Page 35: Lf Rfid Isonas Tag
Command #ICT_ENA 1 enable; 0 disable; 2 reverse byte order LF RFID Isonas tag Command #ISONAEN 1 enable; 0 disable; 2 reverse byte order HF RFID ISO14443A/MIFARE tag Command #MIFAREN 1 enable; 0 disable; 2 reverse byte order HF RFID ISO14443B tag Command #ISO14EN 1 enable;... -
Page 36: Hf Rfid Iso15693 Tag
HF RFID ISO15693 tag Command #ISO15EN 1 enable; 0 disable; 2 reverse byte order HF RFID HID iClass tag Command #HIDICEN 1 enable; 0 disable; 2 reverse byte order HF RFID HID FeliCa tag Command #FRLICEN 1 enable; 0 disable; 2 reverse byte order Page 36 HS-1RS User Guide... -
Page 37: Hf Rfid Hid Srx Tag
HF RFID HID SRX tag Command #FRLICEN 1 enable; 0 disable; 2 reverse byte order HF RFID HID NFC Peer-to-Peer tag Command #NFCP2EN 1 enable; 0 disable; 2 reverse byte order HF RFID HID Topaz tag Command #TOPAZEN 1 enable; 0 disable; 2 reverse byte order Page 37 HS-1RS User Guide... -
Page 38: Rfid Re-Read Delay
RFID Re-read Delay This sets the time period before the HS-1RS can read the same RFID tag a second time. Setting a proper re-read delay time protects against accidental re-reads of the same tag. Several commonly used re-read delay menu command barcodes are included below. Use the command RFIDDLY x (where ‘x’... -
Page 39: Rfid Prefixes On/Off
RFID Prefixes On/Off To enable or disable RFID prefixes, scan the appropriate code below. Default = Disabled. Enable * Disable RFID Prefix Block String Use the command PRERBLK in combination with ASCII or hex characters to set the specific RFID Prefix string. See Appendix D for ASCII/hex conversion help. -
Page 40: Rfid Suffix Block String
Enable * Disable RFID Suffix Block String Use the following command in combination with ASCII or hex characters to set the specific RFID Suffix string. See for ASCII/hex conversion help. Appendix D Note: Hex characters must be preceded by \x to be recognized as hex instead of ASCII and it’s not possible to interject a Carriage Return in the middle of the block string. -
Page 41: Beeper Sounds
* Infinite Time Out Presentation Time Out 5.0 seconds Presentation Time Out 10 seconds Presentation Time Out 30 seconds Beeper Sounds The HS-1RS has the option to have its beeper controlled externally by a host. This can be useful for certain notifications. Eight different beeper tones are available in the HS- 1RS. -
Page 42: Led Indicators
Enable Power Up Beep #BEEPPWR Enable Good Read Beep #BEPGDRD Enable No Read Beep #BEPNORD Enable Ascii BEL Beep #BEEPBEL LED Indicators The HS-1RS also has the option to have its green and red LED controlled externally by a host. Page 42 This can be useful for certain notifications. -
Page 43: Vibration Indicator
1RS. Use the command LEDINDC x (where ‘x’ is a value between 0 and 5), to have the HS-1RS light up one of its LED Indicators in various ways. Example codes: Enable LED blink indications #BLKENAB Enable Good Read LED indications #BLKGDRD Enable No Read LED indications #BLKNORD... - Page 44 Enable Good Read vibration indications #VIBGDRD Enable No Read vibration indications #VIBNORD Page 44 HS-1RS User Guide...
-
Page 45: Imaging
7 - Imaging Imaging Overview The HS-1RS cannot be used to take images with. While this could be very helpful in applications such as patient identity verification, signature capturing, or any other situation where you need to take an image, the internal structure of the HS-1RS does not allow for such transmissions. However, there are several options to configure the HS-1RS for improved barcode finding and decoding that are related to image processing. -
Page 46: Auto Exposure
Auto Exposure Allow the imager to control gain and exposure settings automatically. Default = Enabled. Disable * Enable Maximum Exposure Set the maximum allowable exposure for the unit between 1 and 7874. Several commonly used Max Exposure menu command barcodes are included below. If a different value other than those provided is needed, it can be set either by sending the serial command EXP_MAX x (where ‘x’... -
Page 47: Image Width And Height
Image Width and Height Use these commands to show the image’s maximum width and height in pixels. Maximum Width of Image Maximum Height of Image Decode Window Decode Windowing is about defining a limited area within the scanner’s Field of View, where to look for a barcode, to improve performance. -
Page 48: Decode Window Left/Right
Decode Window Left/Right The Left and Right boundaries for the decode window can be set either by sending the serial command shown under the barcodes below with a value between 0 and 843, or by building a menu command barcode. Default Left boundary = 338. -
Page 49: Symbologies
8 - Symbologies This programming section contains menu selections for the following symbologies. • Aztec Code • GS-1 Databar Limited (RSS Limited) • Codabar • GS-1 Databar Expanded (RSS Expanded) • Code 11 • Interleaved 2 of 5 • Code 128 •... -
Page 50: Linear Symbologies Codabar
Linear Symbologies Codabar Codabar Defaults Set all Codabar settings to their default configuration with this code. Codabar On/Off Scan one of the codes below to enable or disable Codabar. Default = Enabled. * Enable Disable Codabar Minimum and Maximum Length Use the following commands in combination with numerical values to set the minimum and maximum length. -
Page 51: Code 11
Code 11 Code 11 Defaults Set all Code 11 settings to their default configuration with this code/command. Code 11 On/Off Scan one of the codes below to enable or disable Code 11. Default = Disabled. Enable * Disable Code 11 Minimum and Maximum Length Use the following commands in combination with numerical values to set the minimum and maximum length. -
Page 52: Code 11 Check Digit
Code 11 Check Digit The HS-1RS may look for a check digit to decide if the code is valid. Code 11 usually has 1 check digit and some codes have 2 check digits. Either option can be chosen to be validated. Default = 1 Check Digit Validate. -
Page 53: Code 128
Code 128 Code 128 Defaults Code 128 On/Off Scan one of the codes below to enable or disable Code 128. Default = Enabled. * Enable Disable Code 128 Minimum and Maximum Length Use the following commands in combination with numerical values to set the minimum and maximum length. -
Page 54: Code 39
Code 39 Code 39 Defaults Code 39 On/Off Scan one of the codes below to enable or disable Code 39. Default = Enabled. * Enable Disable Code 39 Minimum and Maximum Length Use the following commands in combination with numerical values to set the minimum and maximum length. -
Page 55: Code 39 Check Digit
Code 39 Check Digit Use the following commands to allow scanning of all Code 39’s (No Check Digits) or only allow codes with a Check Digit. Default = No Check Digits. * Disable C39 Check Digit Validate, but don’t Transmit Validate and Transmit Code 39 Convert to Code 32 / Pharmacode Code 32 is a variant of Code 39 used by the Italian pharmaceutical industry. -
Page 56: Code 93
Code 93 Code 93 Defaults Set all Code 93 settings to their default configuration with this code. Code 93 On/Off Scan one of the codes below to enable or disable Code 93. Default = Enabled. * Enable Disable Code 93 Minimum and Maximum Length Use the following commands in combination with numerical values to set the minimum and maximum length. -
Page 57: Composite Code
Composite Code GS 1 Composite Code Linear codes are combined with a unique 2D composite component to form a new class called GS1 Composite symbology. GS1 Composite symbologies allow for the co- existence of symbologies already in use. Default = Disabled. Enable * Disable Composite Code Minimum and Maximum Length... -
Page 58: Ean-8/Jan 8
EAN-8/JAN 8 EAN-8/JAN 8 Defaults Set the EAN-8 settings to their default configuration with this code. EAN-8/JAN 8 On/Off Scan one of the codes below to enable or disable EAN-8. Default = Enabled. * Enable Disable EAN-13/JAN 13 EAN-13/JAN 13 Defaults Set the EAN-13 settings to their default configuration with this code. -
Page 59: Gs1-128 (Formerly Ucc-Ean128)
GS1-128 (Formerly UCC-EAN128) Scan one of the codes below to enable or disable GS1-128. Default = Enabled. Enable Disable GS1 DataBar (Formerly RSS-14) Scan one of the codes below to enable or disable GS1 DataBar. Default = Enabled. Enable Disable GS1 DataBar Limited (Formerly RSS-Limited) Scan one of the codes below to enable or disable GS1 DataBar Limited. -
Page 60: Interleaved 2 Of 5
Interleaved 2 of 5 Interleaved 2 of 5 Defaults Set all Interleaved 2 of 5 settings to their default configuration with this code. Interleaved 2 of 5 On/Off Scan one of the codes below to enable or disable Interleaved 2 of 5. Default = Enabled. * Enable Disable Interleaved 2 of 5 Minimum and Maximum Length... -
Page 61: Interleaved 2 Of 5 Check Digit
Interleaved 2 of 5 Check Digit The scanner may look for a check digit to decide if the code is valid. Interleaved 2 of 5’s USS (Uniform Symbology Specification) Check digit can be validated and if desired, transmitted too. Default = Disabled. * Disable I 2 of 5 Check Digits USS Check Validate USS Check Validate &... -
Page 62: Matrix 2 Of 5 Minimum And Maximum Length
Matrix 2 of 5 Minimum and Maximum Length Use the following commands in combination with numerical values to set the minimum and maximum length. The minimum and maximum length for this barcode can be set either by sending the serial command shown under the barcodes below with a value between 1 and 55, or by building a menu command barcode. -
Page 63: Msi Minimum And Maximum Length
MSI Minimum and Maximum Length Use the following commands in combination with numerical values to set the minimum and maximum length. The minimum and maximum length for this barcode can be set either by sending the serial command shown under the barcodes below with a value between 4 and 48, or by building a menu command barcode. -
Page 64: Upc-A
UPC-A UPC-A Defaults Set the UPC-A settings to their default configuration with this code. UPC-A On/Off Scan one of the codes below to enable or disable UPC-A. Default = Enabled. * Enable Disable UPC-A Check Digit The check digit is the last character and is used to verify data integrity. This digit is always checked but it may be chosen whether or not to transmit it. -
Page 65: Upc-E On/Off
UPC-E On/Off Scan one of the codes below to enable or disable UPC-E(0). Default = Enabled. * Enable Disable UPC-E(0) Check Digit The check digit is the last character and is used to verify data integrity. This digit is always checked but it may be chosen whether or not to transmit it. -
Page 66: Stacked Symbologies Pdf417
1D Stacked Symbologies PDF417 PDF417 Defaults To set the default values for PDF417, scan this code: PDF417 On/Off Scan one of the codes below to enable or disable PDF417. Default = Enabled. * Enable Disable MicroPDF417 MicroPDF417 Defaults To set the default values for Micro PDF417, scan this code: MicroPDF417 On/Off Scan one of the codes below to enable or disable Micro PDF417. -
Page 67: Matrix Symbologies Aztec Code
2D Matrix Symbologies Aztec Code Aztec Code Defaults To set the default values for Aztec Code, scan this code: Aztec Code On/Off Scan one of the codes below to enable or disable Aztec Code. Default = Enabled. * Enable Disable Data Matrix Data Matrix Defaults To set the default values for Data Matrix, scan this code:... -
Page 68: Matrix Symbologies Maxi Code
2D Matrix Symbologies Maxi Code Maxi Code Defaults To set the default values for Maxi Code, scan this code: Maxi Code On/Off Scan one of the codes below to enable or disable Maxi Code. Default = Disabled. Enable * Disable QR Code QR Code Defaults To set the default values for QR Code, scan this code:... -
Page 69: Product Specifications
9 - Product Specifications Technology Notes RFID RF Frequency: 125 KHz (LF), 134.2 KHz (LF), 13.56 MHz (HF) Supported LF Cotag, HITAG 1, HIT S, HITAG 2, G-Prox*, HD Prox, Honeywell Transponders: NexWatch, Keri, Indala, EM4100, EM4102, CASI-RUSCO, ioPox, Pyramid*, EM4150, TIRIS/HDX, AWID, ISO FDX-B*, Deister*, Cardeck, PAC, Ultraprox*, ICT*, ISONAS* Supported HF ISO14443A/MIFARE, ISO14443B*, ISO15693, HID iClass,... -
Page 70: Usb
Idle Current: 100mA Agency: FCC Class B, Industry Canada (IC), ETSI EN 300 330 V2.1.1, RED 2014/53/EU, EN60601 compatible, CE, EN60950, ROHS, REACH, WEEE Environmental Operating Temp.: 32°F to 122°F (0°C to 50°C) Relative Humidity: 95% RH non-condensing, at +50°C IP54 Sealed Housing Environmental Sealing:... -
Page 71: 10 - Maintenance
10 - Maintenance Repairs Repairs and/or upgrades are not to be performed on this product. These services are to be performed by JADAK only. Please contact JADAK for your service needs. Maintenance The HS-1RS provides reliable and efficient operation with a minimum of care. Although specific maintenance is not required, the following periodic checks ensure dependable product operation: Cleaning the Scanning Window Reading performance may degrade if the scanner’s window is not clean. -
Page 72: Interface Cable
NOTE: The use of non-JADAK cables voids the warranty, only a JADAK cable can be used to keep the IP54 rating. Replacing the Interface Cable To Replace the JADAK HS-1RS Interface Cable: 1. Turn the power to the host system OFF. 2. Disconnect the imager’s cable from the terminal or computer. -
Page 73: 11 - Customer Support
11 - Customer Support Obtaining Technical Assistance or Factory Service JADAK provides support and service for all its products. To obtain warranty or non-warranty service, please complete the RMA form at the following link: https://www.jadaktech.com/support/rma-form/ If you need assistance installing or troubleshooting your scanner, please contact the JADAK office in your area. -
Page 74: Limited Warranty
Limited Warranty JADAK LLC (“JADAK”) warrants the HS-1RS to be free from defects in materials and workmanship and to conform to JADAK’s published specifications applicable to the products purchased at the time of shipment. This warranty does not cover the interface cable and does not include any JADAK product which is (i) improperly installed or used;... -
Page 75: Compliance And Ip Notices Statement Of Agency Compliance
Compliance and IP Notices Statement of Agency Compliance Model Number: HS-1RS FCC ID: QV5HS1RS IC: 5407A-HS1RS EU: CE The product is designed to support the following regulatory and safety standards as a standalone unit. The end user will need to verify general EMC compliance as implemented in their host system. - Page 76 L'appareil ne doit pas être co-localisé ou utilisé en conjonction avec une autre antenne ou un autre émetteur. Responsible Party: Novanta Address: 125 Middlesex Turnpike, Bedford, MA 01730, USA Internet Contact Information: www.novanta.com...
- Page 77 Page 77 HS-1RS User Guide...
-
Page 78: Appendices
Appendices Appendix A - Command Format The HS-1RS accepts a wide range of configuration commands. Commands can be sent to the imager wither by scanning menu bar symbol or via Serial commands sent from the host machine. The HS-1RS command format is. Send Command: #<parameter><space><argument><specifier>... - Page 79 Query Commands This section will describe in more detail how to use the query commands. Several special characters can be used to query the device about its settings: What is the default value for the setting? What is the device’s current ROM value for the setting? What is the device’s current RAM value for the setting? What is the range of possible values for the setting? Examples:...
- Page 80 Table A1-1: Example Output part from the “HELP” command Cmds Description Default Range #HELP Display cmd list #ECHO Echo data back to sender #DEFAULT Default All Settings #JDKPRIV [H]Set JProtocol into private mode #232FLOW RS232 Flow Control 0 - 1 #HOSTCFG Enable data interface CDC or HID 0 - 1...
- Page 81 #AWID_EN Enable RFID Tag: AWID (AWID) 0 - 1 #GPROXEN Enable RFID Tag: GPROX (G-Prox) 0 - 1 #PYRAMEN Enable RFID Tag: PYRAMID (Pyramid) 0 - 1 #KERI_EN Enable RFID Tag: KERI (Keri) 0 - 1 #DEISTEN Enable RFID Tag: DEISTER (Deister) 0 - 1 #CARDAEN Enable RFID Tag: CARDAX (Cardax)
- Page 82 #REVTIME [H]Report Build Time/Date Oct 22 2019 05:39:51 #REVBOOT Report Boot Revision Flextap Boot Local Build #RESET [H]Reboots the device #REBOOT [H]Reboots the device #FORCEBT [H]Force into Boot #DNLDAPP [H]Force into Boot #232DEFA Default RS232 Parameters #INDCATE Play an indication sequence. #BEPSOND Play a beep sequence.
- Page 83 #COMMINL Composite Code Min Symbol Length 1-2435 #128DEFA Default Code 128 Parameters #128ENAB Enable Decoding Code 128 #128MAXL Max Code 128 Symbol Length 0-55 #128MINL Min Code 128 Symbol Length 0-55 #ISBT128 Enable ISBT-128 #128APND [H]Code 128 Append #128CDPG [H]Code 128 Codepage 1|2|3|5|6|7|10|11|12|13|14|15|16|17|18|22|29|30|31|32|33|34|35|36|37|38|39|40|41|42|43|44|45|5 1|52|53|54|55|56|57|58|59|60|61|63|64|65|66|70|71|75|76|77|78|79|81|82|83|84|85|86|87|88|89|9 0|91|92|93|94...
- Page 84 #CDAMAXL [H]Codablock A Max Symbol Length 1-600 #CDAMINL [H]Codablock A Min Symbol Length 1-600 #CDFDEFA [H]Default Codablock F Parameters #CDFENAB [H]Enable Codablock F Decoding 2048 2048 2048 1-20 #CDFMAXL [H]Codablock F Max Symbol Length #CDFMINL [H]Codablock F Min Symbol Length 1-2048 #I25DEFA Default I25 Parameters...
- Page 85 #A25DEFA [H]Default Straight 2 of 5 Parameters #A25ENAB [H]Enable Straight 2 of 5 #A25MINL [H]Min Straight 2 of 5 Symbol Length 1-48 #A25MAXL [H]Max Straight 2 of 5 Symbol Length 1-48 #R25DEFA [H]Default R25 Parameters #R25ENAB [H]Enable Decoding R25 #R25MAXL [H]Max R25 Symbol Length 1-48 #R25MINL...
- Page 86 #UE0NSYS [H]UPC-E0 number system #TRGON Trigger ON Trigger OFF #TRGOFF Trigger Timeout(in milliseconds) 9900 9900 9900 #TRGTIME 300000 Trigger Mode 0=Manual, 1=Presentation #TRGMODE #SUFENAB [H]Enable Suffixes #SUFDEFA [H]Default All Suffixes #SUFBLOK [H]Suffix Block #SUFCLAL [H]Clear all Suffixes #PREENAB [H]Enable Prefixes #PREDEFA [H]Default All Prefixes #PREBLOK...
- Page 87 #DMXENAB Enable Data Matrix Decoding #DMXMINL Data Matrix Min Symbol Length 1-3116 Data Matrix Max Symbol Length 3116 3116 3116 #DMXMAXL 3116 [H]Data Matrix Code Page #DMXCDPG 1|2|3|5|6|7|10|11|12|13|14|15|16|17|18|22|29|30|31|32|33|34|35|36|37|38|39|40|41|42|43|44|45|5 1|52|53|54|55|56|57|58|59|60|61|63|64|65|66|70|71|75|76|77|78|79|81|82|83|84|85|86|87|88|89|9 0|91|92|93|94 #MAXDEFA Default Maxicode Parameters #MAXENAB Enable Maxicode Decoding #MAXMINL Maxicode Min Symbol Length 1-150 #MAXMAXL Maxicode Max Symbol Length...
- Page 88 #EXPSTRT [H]Exposure Start 1-7874 #EXP_FIX [H]Fixed Exposure Value 1-7874 #GAINMAX [H]Max Gain 1|2|3|4|6|8|16|32|64 #GAINSRT [H]Starting Gain 1|2|3|4|6|8|16|32|64 #LEDSPWR Illumination Intensity Percentage 0-off, 1-low,2-med,3-high 3 #AIMMODE Aimer Mode. 0 = off, 1 = alternating, 2 = continuous #TSTFLGS [P]Bit field of flags for testing #IMGLMTX [P]Number of black images to detect before imager reset 0-20...
- Page 89 #GS1VFNC [H]Program the GS1 variable length FNC1 as a different character N/A 00-FF #GS1PRGP [H]Program the Prefix character to be applied to all GS1 App Ids N/A 00-FF #PREFTAB [H]Enable/Disable inserting [HT] (TAB w/ KEYENAB = 1) character in between each app id0 #GS1ERRC [H]Enable/Disable error condition response for bad GS1 barcode format 0...
-
Page 90: Appendix A1-2 Command List And Standard Default Parameters
Appendix A1-2 Command List and Standard Default Parameters Command Range (if applicable) Default Value Description 128DEFA Default Code 128 parameters 128ENAB 0 to 1 Enable Decoding Code 128 128MAXL 0 to 55 Max Code 128 symbol length 128MINL 0 to 55 Min Code 128 symbol length ALLENAB 0 to 1... - Page 91 Command Range (if applicable) Default Value Description DMXENAB 0 to 1 Enable Data Matrix Decoding DNLDAPP Download a firmware file via XModem E13DEFA Default EAN13 parameters E13ENAB 0 to 1 Enable Decoding EAN13 EA8DEFA Default EAN8 Parameters EA8ENAB 0 to 1 Enable EAN8 Decoding ELEDDUR 0 to 1000...
- Page 92 Command Range (if applicable) Default Value Description PREBBLK Barcode Prefix Block PREBENA 0 to 1 Enable Barcode Prefix QRCDEFA Default QR Code parameters QRCENAB 0 to 1 Enable QR Code Decoding REVSOFT Report Software revision REVTIME Report Build Time RSEENAB 0 to 1 Enable RSS-Expanded (GS1 Databar Expanded) RSLENAB...
- Page 93 Appendix A1-2 RFID Command List and Standard Default Parameters Default Command Range (if applicable) Description Value Enable read RFID LF Tag: EM4102 EM410EN 0 to 2 (EM4x02/CASI-RUSCO (aka IDRO_A)) Enable read RFID LF Tag: HITAG1S HIT1SEN 0 to 2 (HITAG 1/HITAG S (aka IDRW_B)) Enable read RFID Tag: HITAG2 (HITAG HITA2EN 0 to 2...
-
Page 94: Appendix (Cont.) A1-2 Rfid Command List And Standard Default Parameters
Appendix (Cont.) A1-2 RFID Command List and Standard Default Parameters Command Range (if applicable) Default Value Description Enable read RFID HF Tag: MIFARE 0 to 2 MIFAREN (ISO14443A/MIFARE) 0 to 2 Enable read RFID HF Tag: ISO14443B ISO14EN (ISO14443B) 0 to 2 Enable read RFID HF Tag: ISO15693 ISO15EN (ISO15693) - Page 95 Appendix (Cont.) A1-2 RFID Command List and Standard Default Parameters Command Range (if applicable) Default Value Description 0 to 1 BEPGDRD Enable Good Read Beep 0 to 1 BEPNORD Enable No Read Beep 0 to 1 BLKENAB Enable LED blink indications 0 to 1 Enable Good Read LED BLKGDRD...
-
Page 96: Appendix B - Aim Ids
Appendix B - AIM IDs Barcode AIM ID AIM ID Modifiers Code 39, Code 39 Full ASCII, 0 No check character or Full ASCII processing. Code 32 1 Reader has checked one check character. 3 Reader has checked and stripped check character. 4 Reader has performed Full ASCII character conversion. - Page 97 Barcode AIM ID AIM ID Modifiers No option specified at this time. Always transmit 0. GS1 DataBar and GS1 DataBar Limited transmit with an Application GS1 DataBar Family Identifier “01”. Note: In GS1-128 emulation mode, GS1 DataBar is transmitted using Code 128 rules (i.e., ]C1). Example: A GS1 DataBar bar code 0110012345678902 is transmitted as ]e00110012345678902.
- Page 98 Barcode AIM ID AIM ID Modifiers TLC 39 0 Check digits are sent. 1 No check digit is sent. Example: An MSI bar code 4123, with a single check digit checked, is transmitted as ]M14123 QR Code, MicroQR 0 Model 1 symbol. 1 Model 2 / MicroQR symbol, ECI protocol not implemented.
- Page 99 Appendix C - Sample Bar Codes UPC-A Codabar Code 128 Code 39 Code 93 Interleaved 2 of 5 PDF-417 Composite Code MicroPDF Aztec Data Matrix QR Code MaxiCode Page 99 HS-1RS User Guide...
-
Page 100: Appendix D - Ascii Conversion Chart
Appendix D - ASCII Conversion Chart For these Imager engines, use the 2-digit Hex values to create an ASCII character. E.g., to create an F, use ‘46’ and to create an f, use ‘66’. The first 32 characters are unprintable. Char Char Char... - Page 101 Appendix D – Extended ASCII Conversion Chart Char Char Char Char € À à □ ¡ Á á ‚ ¢ Â â ƒ £ Ã ã „ ¤ Ä ä … ¥ Å å † ¦ Æ æ ‡ § Ç...
- Page 102 © 2021 Novanta Inc. and its affiliated companies. All rights reserved. Rev 03122021...
Need help?
Do you have a question about the Jadak HS-1RS and is the answer not in the manual?
Questions and answers