Table of Contents
Advertisement
Quick Links
Advertisement
Table of Contents

Related Manuals for AEG L6FB67400


Summary of Contents for AEG L6FB67400
- Page 1 L6FB67400 User Manual Washing Machine USER MANUAL...
-
Page 2: Table Of Contents
16. ACCESSORIES......................34 FOR PERFECT RESULTS Thank you for choosing this AEG product. We have created it to give you impeccable performance for many years, with innovative technologies that help make life simpler features you might not find on ordinary appliances. Please spend a few minutes reading to get the very best from it. -
Page 3: Safety Information
ENGLISH SAFETY INFORMATION Before the installation and use of the appliance, carefully read the supplied instructions. The manufacturer is not responsible for any injuries or damages that are the result of incorrect installation or usage. Always keep the instructions in a safe and accessible location for future reference. -
Page 4: Safety Instructions
The appliance must be connected to the water mains • using the new supplied hose sets, or other new hose sets supplied by the Authorised Service Centre. Old hose sets must not be reused. • If the mains power supply cable is damaged, it must •... -
Page 5: Installation
ENGLISH access to the mains plug after the • Follow the safety instructions on the installation. detergent packaging. • Do not touch the mains cable or the • Do not put flammable products or mains plug with wet hands. items that are wet with flammable •... - Page 6 2. Remove the external film. Make sure not to damage the hoses. 7. Remove the polystyrene protection from the bottom. 3. Remove the cardboard top and the polystyrene packaging materials. 8. Fully clean and dry the bottom of the appliance.
- Page 7 ENGLISH It is possible to see water • A (FRONT) = Front of the flowing from the drain hose. appliance This is due to the testing • B (BACK) = Rear of the appliance with the appliance of water 10. Remove the adhesive strip from the in factory.
- Page 8 Make sure that carpets do not stop the air circulation below the appliance. Make sure that the appliance does not touch the wall or other units. 2. Loosen or tighten the feet to adjust the level. WARNING! Do not put cardboard, wood 3.3 The inlet hose...
- Page 9 ENGLISH Do not use an extension hose if the inlet hose is too short. Contact the service centre for the replacement of the inlet hose. 3.4 Water-stop device The inlet hose has a water stop device. This device prevents water leaks in the hose because of its natural ageing.
-
Page 10: Product Description
5. Without the plastic hose guide: Put 6. Position the hose directly to a built-in the drain hose in the spigot and drain pipe in the room wall and tighten it with a clip. Refer to the tighten it with a clip. -
Page 11: Control Panel
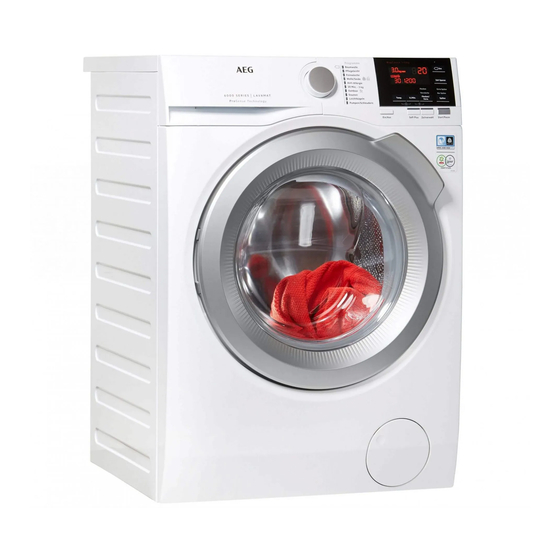
ENGLISH Worktop Drain hose Detergent dispenser Inlet hose connection Control panel Mains cable Door handle Transit bolts Rating plate Hose support Drain pump filter Feet for levelling the appliance 5. CONTROL PANEL 5.1 Control panel description Baumwolle 11 10 Programme dial •... - Page 12 5.2 Display Maximum load indicator. The indicator flashes during the laundry load estimation. Door locked indicator. Delay start indicator. The digital indicator can show: • Programme duration (e. g. • Delay time (e. g. • Cycle end ( ).
-
Page 13: Knob And Buttons
ENGLISH Rinse hold indicator. Extra silent indicator. Time saving indicator. 6. KNOB AND BUTTONS 6.1 Ein /Aus 6.4 U./Min. Pressing this button for a few seconds When you set a programme, the allows to activate or deactivate the appliance automatically sets the appliance. - Page 14 In some programmes the rinses are This option increases performed with more water. slightly the programme If you touch the Start/Pause button, duration. the appliance performs the only • Skipping wash phase - Nur Spülen draining phase. option The appliance performs only the...
-
Page 15: Programmes
ENGLISH After touching the Start/Pause button, This option increases slightly the display shows the indicator the programme duration. the selected delay time and the appliance begins the countdown. 6.10 Zeitvorwahl 6.11 Start/Pause With this option you can delay the start of a programme in a more convenient Touch the Start/Pause button to start, time. - Page 16 Programme Programme description Cotton and synthetic items lightly soiled or once worn. 20 Min. - 3 kg Synthetic sport items. This programme is designed to gently wash modern sports clothes such as gym, cycling or jogging Outdoor clothes and similar outdoor items. The recommended laundry load is 2 kg.
- Page 17 ENGLISH Programme Default tempera- Maximum spin speed Maximum load ture Spin speed range Temperature range 40 °C 1200 rpm 4 kg 60 °C - Cold 1200 rpm - 400 rpm Pflegeleicht 40 °C 1200 rpm 4 kg 40 °C - Cold 1200 rpm - 400 rpm Feinwäsche 40 °C...
- Page 18 ■ ■ ■ ■ ■ ■ ■ ■ ■ ■ U./Min. ■ ■ ■ ■ ■ ■ ■ ■ ■ ■ ■ ■ ■ ■ ■ ■ Flecken ■ ■ ■ ■ ■ Vorwäsche ■ ■ ■ ■ ■...
-
Page 19: Settings
ENGLISH 8. SETTINGS 8.1 Child Lock To deactivate/activate the acoustic signals, touch the Zeitvorwahl and the With this option you can prevent children Flecken/Vorw. buttons simultaneously for from playing with the control panel. about 6 seconds. • To activate/deactivate this option, If you deactivate the touch the U./Min. - Page 20 2. Shake the items before you put them in the appliance. Always follow the 3. Put the laundry in the drum, one item instructions that you find on at a time. the packaging of the Make sure not to put too much laundry detergent products, but we in the drum.
- Page 21 ENGLISH 4. To use liquid detergent, turn the flap The indicator of the Start/Pause button down. flashes. The display shows the maximum declared load for the programme, the default temperature, the maximum spin speed, the washing phase indicators (when available) and an indicative programme duration.
- Page 22 Changing the delay start after In this case, for 30 seconds, it is possible to pause the appliance and remove the the countdown has started exceeding garments. To change the delay start: Once removed the exceeding garments, touch the Start/Pause button to start the 1.
- Page 23 ENGLISH 10.13 End of the programme 2. Change the options. The given information in the display changes When the programme has finished, the accordingly. appliance stops automatically. The 3. Touch the button Start/Pause acoustic signals operate (if they are again. active).
-
Page 24: Hints And Tips
1. If necessary, touch the U./Min. button • You do not use the appliance for 5 to decrease the spin speed proposed minutes before you touch the Start/ by the appliance. Pause button. 2. Touch the Start/Pause button: Press the button Ein /Aus to activate the appliance again. -
Page 25: Care And Cleaning
ENGLISH 11.2 Stubborn stains • Use the recommended detergents for the type and colour of the fabric, the For some stains, water and detergent is programme temperature and the not sufficient. level of soil. We recommend that you pre-treat these 11.4 Ecological hints stains before you put the items in the appliance. - Page 26 The regular detergents already contain detergent into empty drum, in order water softening agents, but we to rinse out any left residues. recommend to run a cycle with empty 12.6 Cleaning the detergent drum and a descaling product occasionally.
- Page 27 ENGLISH WARNING! • Do not remove the filter while the appliance operates. • Do not clean the pump if the water in the appliance is hot. Wait until the water cools down Proceed as follows to clean the pump: 1. Open the pump cover. 4.
- Page 28 11. Put the filter back into the special guides by turning it clockwise. Make sure that you tighten the filter correctly to prevent leakages. 5. When the bowl is full of water, turn the filter back and empty the container.
- Page 29 ENGLISH 12.8 Cleaning the inlet hose and the valve filter It is recommended to clean both the filters of the inlet hose and valve occasionally to remove any deposit, collected over the time: 1. Remove the inlet hose from the tap and clean the filter.
-
Page 30: Troubleshooting
13. TROUBLESHOOTING WARNING! Refer to Safety chapters. 13.1 Introduction The appliance does not start or it stops during operation. First try to find a solution to the problem (refer to the table). If the problem persists, contact the Authorised Service Centre. - Page 31 ENGLISH Problem Possible solution • Make sure that the water tap is open. • Make sure that the pressure of the water supply is not too low. For this information, contact your local water authority. • Make sure that the water tap is not clogged. The appliance does not •...
-
Page 32: Consumption Values
Problem Possible solution • Make sure the levelling of the appliance is correct. Refer to The appliance makes an "Installation instruction". unusual noise and vi- • Make sure that the packaging and/or the transit bolts are brates. removed. Refer to "Installation instruction". -
Page 33: Technical Data
ENGLISH Programmes Load Energy Water Approxi- Remain- (kg) consump- consump- mate pro- ing mois- tion (kWh) tion (litre) gramme ture (%) duration (minutes) Baumwolle 60°C 1,80 Baumwolle 40°C 1,20 Pflegeleicht 40°C 0,80 Feinwäsche 40°C 0,55 Wolle/Seide 30°C 0,40 Standard cotton programmes 0,94 Standard 60°C cotton 0,52... -
Page 34: Accessories
The tumble dryer can be stacked on the top of the washing machine only by www.aeg.com/shop or from using the correct stacking kit authorised dealer manufactured and approved by AEG. Only appropriate Verify the compatible accessories approved by stacking kit by checking the AEG ensure the safety depth of your appliances. - Page 35 ENGLISH...
- Page 36 www.aeg.com/shop...
Need help?
Do you have a question about the L6FB67400 and is the answer not in the manual?
Questions and answers