Table of Contents
Advertisement
Quick Links
Advertisement
Table of Contents

Related Manuals for Parker PEPW-2000

Summary of Contents for Parker PEPW-2000
- Page 1 PRESSURE WASHER P E P W - 2 0 0 0 , 2 5 0 0 O W N E R S M A N U A L...
-
Page 2: Table Of Contents
PRODUCT FEATURES ......................14-15 PRE-OPERATION ........................16 All photographs and drawings in this manual are supplied by Parker Products Ltd. to help you with the operation and ASSEMBLY ............................. 17-24 maintenance of the product. The information contained in this manual was accurate at the time of production, however Parker Products Ltd. -
Page 3: General Safety
GENERAL SAFETY GENERAL SAFETY For safe operation and maintenance symbols are moulded in relief on the machine or shown on a label. • READ THIS MANUAL CAREFULLY BEFORE USING THIS MACHINE. • KNOW HOW to stop the unit and reduce pressure immediately. Be completely familiar with the controls. •... -
Page 4: Safety Symbols
SAFETY SYMBOLS SAFETY SYMBOLS A double-insulated product is marked with the WARNING! Use of this product can pose a This symbol, before a safety comment, indicates a words “double insulation” or “double Insulated”. danger to wildlife. Check areas, particularly PRECAUTION, a WARNING or a DANGER. -
Page 5: For Safe Operation
FOR SAFE OPERATION FOR SAFE OPERATION • PROPER USE OF THE ELECTRIC PRESSURE WASHER pressure is necessary to remove dirt and debris. High-pressure water WARNING - Unsuitable extension cables can be dangerous, if an This machine can be used by persons with reduced physical, flow can damage the work surface if not used properly! Always test the extension cable is used, it must be suitable for outdoor use and the sensory or mental abilities or lack of experience and knowledge... - Page 6 FOR SAFE OPERATION • • To ensure the units safety, only use original spare parts from the Some chemicals or detergents may be harmful if inhaled or ingested manufacturer or use spare parts approved by the manufacturer. causing severe injury. Use a respirator or mask whenever there is a •...
-
Page 7: What's In The Box
WHAT’S IN THE BOX WHAT’S IN THE BOX OPERATION GUN / LANCE STORAGE HOOK HOLSTER HOSE HOSE REEL REEL BRACKETS HIGH PRESSURE HOSE ACCESSORIES HOLDER HOSE REEL SCREWS HOSE INLET NOZZLE HANDLE CLIP FILTER MAIN BODY GRIP LANCE HANDLE (PEPW-2500) -
Page 8: Product Features
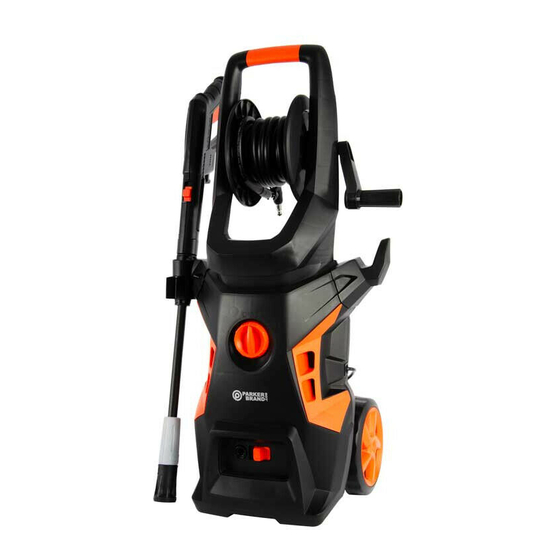
PRODUCT FEATURES PRODUCT FEATURES ERGONOMIC HOSE REEL HIGH PRESSURE GUN/LANCE GRIP HANDLE HANDLE HOSE STORAGE STORAGE HOLSTER STORAGE HOOK GUN/LANCE ACCESSORIES ADJUSTABLE HOLDER SPRAY NOZZLE POWER SWITCH HOSE INLET HIGH PRESSURE DETERGENT TOUGH PLASTIC CONNECTOR CONTAINER HOSE OUTLET WHEELS... -
Page 9: Pre-Operation
PRE-OPERATION ASSEMBLY INSPECT PRESSURE WASHER ATTACH ACCESSORIES HOLDER SECURE ACCESSORIES HOLDER Check the Pressure Washer is not damaged and all components are in good working order before use. Regular periodic inspection is required to ensure the Pressure Washer is suitable for the task. Before using the Pressure Washer a risk assessment should be carried out respecting the legislation in the country of use. -
Page 10: Assembly
ASSEMBLY ASSEMBLY ATTACH GRIP HANDLE SECURE GRIP HANDLE ATTACH GUN / LANCE HOLSTER ATTACH POWER CORD HOOK USING HOLSTER & HOOK Slide the grip handle on to the main body of the Secure the grip handle on to main body of the Attach the Gun / Lance Holster by sliding it Attach the Power Cord Hook by sliding it on to The Gun / Lance Holster and Power Cord Hook... - Page 11 ASSEMBLY ASSEMBLY FIT HOSE REEL BRACKETS ASSEMBLE HOSE REEL HANDLE ATTACH HANDLE TO REEL SECURE HOSE REEL Slide the Hose Reel Brackets on to the Hose Reel. Push the Hose Reel Handle through the Hose Reel Attach the assembled Hose Reel Handle to the hose Secure the assembled Hose Reel on to the Grip Handle Crank.
- Page 12 ASSEMBLY ASSEMBLY GUN & LANCE ATTACH GUN & LANCE TWIST & LOCK ASSEMBLED GUN & LANCE Locate the Gun and Lance for the pressure washer. Attach the Gun and Lance. The gun is spring Twist and lock the Lance in to place. Make sure the Once the Lance is attached to the gun it is ready to The gun and lance needs to be assembled loaded so there will be slight resistance when...
-
Page 13: Operation
ASSEMBLY OPERATION ATTACH HIGH PRESSURE HOSE ATTACH HIGH PRESSURE HOSE TO GUN STARTING THE MACHINE Make sure that the power switch is in the 'Off'(0) position. Ensure the high pressure hose is connected to both the machine and the gun correctly. Connect the garden hose to the water inlet fitting. - Page 14 OPERATION OPERATION STOPPING THE MACHINE SQUEEZE TRIGGER RELEASE TRIGGER Turn the power switch to the 'Off'(0) position. Turn off the water supply. Discharge the high-pressure water left in the machine. Disconnect high-pressure hose from the pressure washer and gun. Disconnect garden hose from the water inlet Drain detergent reservoir and flush with running water.
- Page 15 OPERATION OPERATION SAFETY LOCK ON SAFETY LOCK OFF ADJUSTABLE SPRAY NOZZLE DIRECT STREAM FAN SPRAY This pressure washer is equipped with a gun To unlock the trigger push the safety lock button The adjustable nozzle will allow you to use any Fully turn the adjustable nozzle in a clockwise Fully turn the adjustable nozzle in an trigger safety lock.
- Page 16 OPERATION OPERATION UNLOCK GUN ANGLE ROTATE GUN LOCK GUN ANGLE USING DETERGENTS REMOVE TANK The built-in detergent dispenser will allow you to Remove the cap on the detergent tank and remove Slide the button to “unlock”, to access the Rotating the gun will adjust the cleaning Slide the button to “lock”...
- Page 17 OPERATION OPERATION ADJUST PRESSURE PRESSURE SETTING DISCONNECT HOSE FROM GUN DISCONNECT HOSE FROM MACHINE HIGH Adjust the pressure by rotating the nozzle in either The machine will only dispense the detergent in the To disconnect the high pressure hose from the To disconnect the high pressure hose from the ma- direction indicated on the side of the nozzle.
-
Page 18: Maintenance
MAINTENANCE MAINTENANCE UNBLOCK LANCE INSERT NOZZLE PIN DISLODGE BLOCKAGES WATER INLET INLET RUBBER SEAL INLET FILTER Check the Nozzle jet regularly to ensure that Clean the Nozzle jet by inserting the Nozzle Pin Move the Nozzle pin back and forth whilst The water inlet must be inspected regularly Remove the water inlet and inspect. -
Page 19: Troubleshooting
MAINTENANCE TROUBLESHOOTING PROBLEM POSSIBLE CAUSE CORRECTIVE ACTION CLEAN - UP AND STORAGE • After disconnecting the water supply, and before disconnecting the high-pressure hose, turn the pressure cleaner on for 2-3 seconds, Power socket is faulty Check plug, socket, fuses. SHUTTING DOWN AND STORING THE PRESSURE WASHER until any remaining water in the pump exits. -
Page 20: Specification
Max. flow - 7.5 L/min 7.8 L/min In case of any fault please contact us directly or return the product to us, Parker Products Ltd, or an Max. water inlet pressure - 1.2 MPa 1.2 MPa authorised repair agent. -
Page 21: Declaration Of Conformity
Measured Sound Power Level - LwA: 87dB(A) / LwA: 87dB(A) Guaranteed Sounds Power Level - LwA: 89dB(A) / LwA: 89dB(A) Model/Type: PEPW-2000 / PEPW-2500 Having been type examined to the requirements of the directives by: TÜV SÜD Product Service LGA GmbH, Manufacturing Date/Serial Number: Ridlerstraße 65, 80339 München,... - Page 22 P E P W - 2 0 0 0 , 2 5 0 0 September 2021 Rev 1.0...
Need help?
Do you have a question about the PEPW-2000 and is the answer not in the manual?
Questions and answers