Table of Contents
Advertisement
Quick Links
Advertisement
Table of Contents

Summary of Contents for Salini SDF-4012S
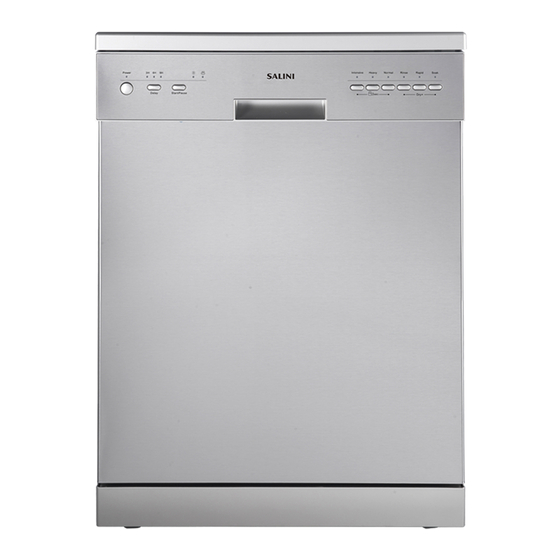
- Page 1 DISHWASHER User Manual SDF-4012S W W W. S AL IN I .CO M . AU...
-
Page 3: Table Of Contents
TABLE OF CONTENTS IMPORTANT SAFETY INFORMATION APPLIANCE OPERATION 6-14 CONTROL PANEL OVERVIEW COMPONENTS OVERVIEW 7-10 LOADING DISPENSERS 10-13 LOADING THE DISHWASHER 13-14 TURNING ON THE APPLIANCE WASHING PROGRAMS MAINTENANCE & CLEANING 16-18 INSTALLATION 18-20 TROUBLESHOOTING 21-24 TECHNICAL DATA & SPECIFICATION DECLARATION OF CONFORMITY DISPOSAL Installation of the appliance must be only be undertaken by a licensed installer. -
Page 4: Important Safety Information
IMPORTANT SAFETY INFORMATION IMPORTANT INFORMATION • Carefully read the following important information regarding installation safety and maintenance. • Keep this information booklet accessible for further consultations. • This appliance is designed for domestic household use and designed be installed under a kitchen bench top or freestanding. - Page 5 • The door should not be left in the open position since this could present a tripping hazard. • When loading items to be washed: - Locate sharp items so that they are not likely to damage the door seal; - Load sharp knives with the handles up to reduce the risk of cut-type injuries;...
-
Page 6: Appliance Operation
APPLIANCE OPERATION CONTROL PANEL OVERVIEW POWER SWITCH Controls the power supply. DELAY TIME Pressing the DELAY pad one time can select 3h delay time, continuous pressing second time will increase the delay hours to 6h, third time increase to 9h. Continuous pressing the fourth time can cancel the delay selection. -
Page 7: Components Overview
DISHWASHER COMPONENTS OVERVIEW Upper Basket Spray Arms Lower Basket Water Softener Cutlery Basket Detergent Dispenser Rinse Aid Dispenser Fork Shelf LOADING DISPENSERS Before using your dishwasher for the first time: a) Fill the rinse aid dispenser b) Understand the function and add appropriate detergent RINSE AID DISPENSER Rinse aid is automatically added during the last rinse, ensuring thorough rinsing, spot and streak free drying. - Page 8 FILL THE RINSE AID DISPENSER To open the dispenser, turn the cap to the “open” (left) arrow and lift it out. Pour the rinse aid into the dispenser, be careful not to overfill. Replace the cap by inserting it aligned with “open” arrow and turning it to the “closed” (right) arrow.
- Page 9 • Concentrated Detergent Based on their chemical composition, dishwasher can be split in two basic types: a) conventional, alkaline detergents with caustic components b) low alkaline concentrated detergents with natural enzymes The use of “normal” washing program in conjunction with concentrated detergents reduces pollution and is good for your dishes;...
-
Page 10: Loading The Dishwasher
THE DETERGENT DISPENSER The place of main wash cycle detergent placed (approximately 20g of detergent) The place of pre-wash cycle detergent placed (approximately 5g of detergent) If the dishes are heavily soiled, place an addi- tional detergent dose in the pre-wash detergent chamber. - Page 11 UPPER BASKET HEIGHT ADJUSTMENT Basket height adjustment mechanism on the upper basket of your machine is design to let you adjust the height of your upper basket upwards or downwards without removing it from your machine when it is full and create large spaces at the top or bottom area of your machine as needed. Basket of your machine is set to lower position in factory settings.
- Page 12 CUTLERY TRAY Cutlery should be placed in the cutlery tray with handles at the bottom: If the tray has side baskets, the spoon should be loaded individually into the appropriate slots, especially long utensils should be placed in the horizontal position at the front of the upper basket. 1 = Teaspoons 2 = Dessert Spoons 3 = Soup Spoons...
-
Page 13: Turning On The Appliance
• Do not put in items that are dirty of cigarette ash, candle wax, lacquer or paint • Do not overload your dishwasher. There is only space for 12 standard dishes, this is to ensure good results and for reasonable energy consumption •... - Page 14 Turn on the machine by pressing the “Power” button, then press the “program” button to select a desired wash program (See the section titled “WASH PROGRAM TABLE”.) Once the program is finished the appliance will beep If you open the door when washing, the machine pauses and warning alarm rings, LED1 (under “Inten- sive”...
-
Page 15: Washing Programs
WASHING PROGRAMS WASH PROGRAM TABLE Program Application Cycle Detergent Energy Water Description Pre/ Main Time (kWh) (min) Intensive For the heaviest soiled loads, such Pre-wash (40°) 5/25g 1.20 15.5 as pots, pans, casserole dishes and Main wash(55°) dishes that have been sitting with Rinse dried food on them for a while. -
Page 16: Maintenance & Cleaning
MAINTENANCE & CLEANING WARNING! Disconnect electrical power when undergoing cleaning or maintenance to avoid electric shock. To keep your dishwasher in good condition and optimise washing performance, we recommend following below: • Always crape off large food remnants before placing dishes and utensils into the dishwasher •... - Page 17 FILTER CLEANING & ASSEMBLY For best performance and results, the filter assembly must be cleaned regularly. The filter efficiently removes food particles from the wash water, allowing it to be recirculated during the cycle. For this reason, it is a good idea to remove the larger food particles trapped in the filter after each wash cycle by rinsing the semicircular filter and cup under running water.
-
Page 18: Installation
CAUTION! Do not spray cleaner directly onto door panel as it could damage electrical components. CLEANING THE DOOR, CONTROLS, INTERIOR & SURROUNDS To clean the edge around the door, panel and seals, you should use only a soft, warm and damp rag. To prevent penetration of water into the door lock and electrical components, do not use a spray cleaner of any kind. - Page 19 CONNECTING THE APPLIANCE TO WATER & ELECTRICITY WARNING! Installation of this appliance should only be attempted by an authorised installer following local laws and regulations. PLUMBING • The dishwasher should not stand on top of the water hoses. • The appliance must be connected to the water supply network using new piping. •...
- Page 20 POSITIONING THE APPLIANCE Position the appliance in the desired location. The back should rest against the wall behind it, and the sides, along the adjacent cabinets or wall. The dishwasher is equipped with water supply and drain hoses that can be positioned to the right or the left to facilitate proper installation. LEVELING THE APPLIANCE Once the appliance is positioned, adjust the feet (screwing them in or out) to adjust the height of the dishwasher, making it level.
-
Page 21: Troubleshooting
TROUBLESHOOTING Any electrical repairs to this appliance must conform to your local, state and federal regulations. If in any doubt, please contact the service center. • CAUTION: Always disconnect the unit from the power source when troubleshooting the unit. • Repairs may only be carried out by service engineers or an authorised service agent. - Page 22 TROUBLESHOOTING TABLE Problem Possible Cause Recommended Solution / More Information Dishwasher doesn’t run Fuse blown, or the circuit breaker Replace fuse or reset circuit breaker. Remove any other appliances sharing the same circuit with the dishwasher. Power supply is not turned on Make sure the dishwasher is turned on and the door is closed securely.
- Page 23 Problem Possible Cause Recommended Solution / More Information Spots and filming on Extremely hard water To remove spots from glassware: glasses and flatware Take out all metal utensils out of the dishwasher. Low inlet temperature Do not add detergent. Choose the longest cycle. Overloading the dishwasher Start the dishwasher and allow it to run for about 18 to 22 minutes, then it will...
- Page 24 Problem Possible Cause Recommended Solution / More Information Black or grey marks on Aluminium utensils have rubbed Use a mild abrasive cleaner to eliminate those dishes against dishes marks. Water standing on the Small amount is normal A small amount of clean water around the bottom of the tub outlet on the tub bottom keeps the water seal lubricated.
-
Page 25: Technical Data & Specification
TECHNICAL DATA & SPECIFICATION Specification Model SDF-4012S Appliance Freestanding Dishwasher External dimensions (height/width/depth) 600 x 600 x 845 mm Appliance Capacity 12 Place Setting Water Pressure 0.04--1.0MPa Hot Water Connection Max 60 ° C Rated Voltage / Frequency 220-240V / 50-60Hz... -
Page 26: Declaration Of Conformity
DECLARATION OF CONFORMITY AUSTRALIAN STANDARDS This product has been designed and manufactured to comply with all relevant Australian and New Zealand Standards. AS/NZS 60335.1 General Requirements for Domestic Electrical Appliances AS/NZS 60335.2.6 Specific Requirements for Domestic Electrical Cooking Appliances This appliance is SAA certified. Installation of the appliance must be only be undertaken by a licensed installer who can provide a compliance certificate. - Page 27 Copyright (C) SALINI Appliances 2020. All rights reserved. The product specifications in this booklet apply to the specific products and models described at the date of issue, these specifications or recommendations may change at any time. You should check with your Dealer for the latest issue, or visit our website for more information.
Need help?
Do you have a question about the SDF-4012S and is the answer not in the manual?
Questions and answers