Table of Contents
Advertisement
Quick Links
Advertisement
Table of Contents

Related Manuals for ThL 4000

Summary of Contents for ThL 4000
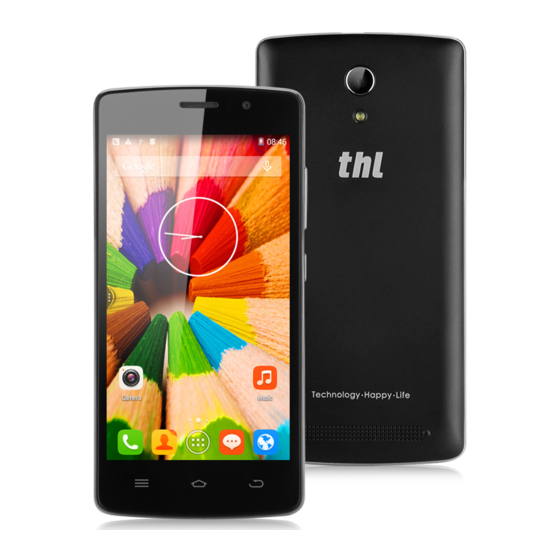
- Page 1 Model name:thl 4000 Brand name:thl...
-
Page 2: Table Of Contents
Contents Safety ........................3 Environment ......................4 1 Getting Started ....................5 1.1 Getting to know your touch phone ............ 5 1.2 Installing the SIM card, battery, and storage card ......5 1.3 Charging the Battery ................6 1.4 Starting up the device ................. 7 1.5 Status Icons .................. - Page 3 9.1 Calendar ................... 34 9.2 Alarm Clock ..................35 9.3 Calculator ..................36 10 Play Store* ....................37...
-
Page 4: Safety
Safety Never attempt to disassemble your phone. You alone are responsible for how you use your phone and any consequences of its use. As a general rule, always switch off your phone wherever the use of a phone is prohibited. Use of your phone is subject to safety measures designed to protect users and their environment. -
Page 5: Environment
manufacturers of such equipment will be able to give you any advice you may need in this area. Hospitals: Always make sure that your phone is switched off in hospitals when so instructed by warning signs or by medical staff. Road safety: Do not use your phone when driving. -
Page 6: Getting Started
1 Getting Started 1.1 Getting to know your touch phone 1.2 Installing the SIM card, battery, and storage card You need to remove the back cover before you can install the SIM card and battery. Also, make sure to always turn off the power before installing or replacing the SIM card and battery. -
Page 7: Charging The Battery
operation only). • Some legacy SIM cards may not function with your device. You should consult with your service provider for a replacement SIM card. There may be fees for this service. To install a memory card To have additional storage for your images, videos, music, and files, you can purchase a memory card and install it into your device. -
Page 8: Starting Up The Device
be used to charge the device. Connect the USB connector of the AC adapter to the sync connector on your device, and then plug in the AC adapter to an electrical outlet to start charging the battery. As the battery is being charged while the device is on, a charging icon appears in the title bar of the Home screen. - Page 9 touch activation, press POWER. You can increase the security of your phone by setting ‘Screen lock’ pattern. Once set, in order to unlock your screen, you’ll have to draw the correct unlock pattern. You can set your screen unlock pattern as follows: 1.
-
Page 10: Status Icons
4. To remove a shortcut or widget from your Home screen, touch & hold the item to enter “Remove mode”. Drag the item to ‘Remove’ button and release. You’ll know when your item is in ‘Remove’ because the item and the tab will turn red. - Page 11 Ringer is off Phone on mute Bluetooth is on Battery is low Connected Battery is very low! Connected Battery is charging earphone Read your notifications When you see a notification in the status bar, touch the bar and slide your finger down the screen to open the list of notifications displayed in the sliding window.
-
Page 12: Using Phone Features
2 Using phone features 2.1 Turning the phone function on and off To enable or disable Airplane Mode In many countries, you are required by law to turn off the phone while on board an aircraft. Another way to turn off the phone function is to switch your device to Airplane Mode. -
Page 13: Answering And Ending A Call
make a video call. Notice: • SIM slot 1 can be supported video call default (SIM1 card must be supported 3G network). • Your phone must be in of the normal WCDMA network coverage, and the other side (the receiver’s phone and SIM card) can also be supported the video call function of 3G. -
Page 14: Using Call History
• If you have one call in progress and one caller on hold, to end both calls, touch ‘End all’. 6. While on a call, you can conference up to six callers, counting yourself. Note that you can also have an additional caller on hold during a conference call, regardless of how many participants are on the conference. -
Page 15: Setting On Your Device
3 Setting on your device Control phone-wide settings from the Home settings screen: touch select Settings. 3.1 Wireless & networks SIM management You can select to activate or deactivate the SIM card you want to open. Set the default SIM to use voice call, message, and data connection. Wi -Fi 1. - Page 16 Volumes: Select to open the volume control, and then slide your finger along the volume bar to set an incoming call ring volume or alarm, playing back music, videos. Voice/video ring tone: Select to decide on a ring tone to use for incoming calls. Note that you can override this setting for individual contacts in the Edit contact details screens.
- Page 17 uninstall it from this screen. Select a specific application to: 1. Clear your user data (if you have any associated with a particular application). 2. Disassociate the application with any actions. 3. Uninstall - If you’ve downloaded an application from Android Market, you will be able to uninstall it from this screen by selecting Uninstall.
-
Page 18: Activesync
Time format: Select from 12 or 24 hour formats. Date format: Select from a variety of formats. Developer options If you are an application developer, you may be interested in these settings: USB debugging: If you want be able to communicate with your phone directly via USB, select ‘USB debugging’... - Page 19 Sync by application To control synchronization Contacts, you can do the following: 1. On the Home screen, then touch and select Settings. 2. Select Accounts & sync. When any of the applications are synchronizing, you will see the “sync” icon .
- Page 20 devices for 120 seconds. Name your Bluetooth device 1. Make sure you have turned Bluetooth on. 2. Select Settings > Bluetooth > Bluetooth settings (touch MENU)> Device name. 3. Type the name for your device in the dialog box, and then select ‘OK’. 4.
-
Page 21: Contacts
5 Contacts The contacts on your phone are synced with your account contacts stored on the Web. To view the contacts on your phone, touch and select People. Contacts belonging to a specific group (you can choose which group) are listed in the Contacts tab. - Page 22 associated with your contact. If you do not assign an icon, a default android icon will be assigned. 5. To save your contact, press BACK, or touch ‘Done’. Edit contact details You can always make changes to the information you’ve stored for a contact: 1 From Contacts, touch the contact you want to open the Contact details screen.
-
Page 23: Exchanging Messages
SIM contacts importer If you have stored names and phone numbers on your SIM card, you can add these to the Contacts stored on your phone by selecting this settings option. From the contact list, press MENU to select ‘Import/export’, you can select to import from SIM card or memory card, once the list of names and numbers appears you can: Import only certain names/numbers in the list - Select the name/number you... - Page 24 If you have selected to auto-retrieve your multimedia messages, then both the message header and body will download. If you are downloading only the headers, then you must first select the Download button to retrieve the message body. If you are concerned about the size of your data downloads, you can check the message size before you download.
- Page 25 to a multimedia message. 3. To add a subject, press MENU and select ‘Add subject’. If you add a subject, the message will convert to a multimedia message. 4. To add an attachment, touch ‘+’ icon. Adding an attachment will always convert the message to a multimedia message.
- Page 26 If you have a popular email account, the application will set everything up for you! Before you go to your Inbox, you can name the account (if you don’t, your email address will be used). You are also asked to type your name as you want it to display on outgoing messages.
- Page 27 ‘Folders’ to enter the Trash. Note that the message is only deleted from your phone, not from the account server. 7. Remove an email account: You can always remove a POP3 or IMAP email account from your phone. Go to your Inbox, press MENU and select ‘Accounts’. Your Accounts screen opens.
-
Page 28: Internet
7 Internet 7.1 Ways of Connecting to the Internet Your device’s networking capabilities allow you to access the Internet or your corporate network through WLAN, GPRS, EDGE (if available), or WCDMA (if SIM card supported). You can also add and set up a VPN or proxy connection. WLAN WLAN provides wireless Internet access over distances of up to 100 meters (300 feet). - Page 29 Open a new window: From a Web page, press MENU and select ‘Windows’. The Current windows screen opens, showing the Web page you started from, plus a “new window”. Select ‘New window’. Your home page opens in a new window. To return to one of the other windows, press MENU and select ‘Windows’.
-
Page 30: Experiencing Multimedia
following: 1. Before you can download Web applications, you must explicitly “allow” downloading from the Home > Settings screen: On the Home screen, then press and select Settings. Select ‘Security’, then select ‘Unknown sources’ check box. 2. All items downloaded form the Web are stored on your memory card, so be sure you have a card installed in your phone before you download from the Browser. - Page 31 5. When finished, close the USB drive window and eject the drive as required by your computer's operating system. Take a picture Captured pictures are saved to the “DCIM” folder on your memory card or the phone. Before you take a picture, wipe the sensor window (on the back cover) to remove any small amounts of oil.
- Page 32 2. Share a picture: In full-screen view, press MENU and select Share. Select to share your picture via Messaging (MMS), or another application (if you have another application installed on your phone that supports sharing). 3. Set as wallpaper: In full-screen view, press MENU and select Set picture as. From the menu that opens select Wallpaper.
-
Page 33: Music
8.2 Music To open your music Library, on the Home screen, touch Music icon. Your music is organized into four categories: Artists, Albums, Songs, and Playlists. Select a category to view the lists within each. Once in a category, keep selecting until you reach the music you want to play. For example, if you select the Artists category, you will see a list of artists in A-Z order. - Page 34 playlist) to open the context menu. Select Play to begin play and go to the Playback screen. You can do the following using the Playback screen: 1. Shuffle songs: Shuffle plays songs in random order. Touch to toggle shuffle on and off. When the con is grey, shuffle is off. 2.
-
Page 35: Fm Radio
2. Touch & hold the song in the list to open the context menu. 3. Select Use as phone ringtone. The ringtone is set as your default incoming call ringtone. 4. Now, when you go to Home > Settings > Audio profiles, and select a phone ringtone, your song will be listed as an option. -
Page 36: Alarm Clock
• Select date & time. • Name that appears in Day view. • Description can be as long as you like. • Select a calendar if you display more than one. • Set a default reminder time. • Set online presence: available or busy. •... -
Page 37: Calculator
another ring tone that will play when the alarm rings. (When you select a ring tone, it plays briefly.) Note that when your alarm goes off, the ring tone will play a maximum of five minutes. Vibrate: Select this check box to have your phone vibrate when it goes off. Once your alarm goes off, you will receive an alert with the options to Snooze (for 10 minutes) or Dismiss. -
Page 38: Play Store
Calculator panels Two calculator’s panels are available: basic and advanced. Use the Basic panel to enter numbers and perform basic addition, subtraction, multiplication, and division. Use the Advanced panel to insert advanced operators or delimiters, such as sine, cosine, tangent, square root, parentheses, etc. Switch back and forth between calculator panels by pressing MENU and selecting ‘Advanced panel’... - Page 39 2. The Item details screen appears. Read more about the item on this screen, including its overall rating and comments by users. If you scroll down to the about the developer section, you can view more applications by this developer or send the developer an email message.
- Page 40 1. From the Android Market Home screen, press MENU and select ‘Downloads’. 2. Select the item you want to uninstall. The Item details screen appears. 3. Select ‘Uninstall’ button at the bottom of the screen. Open downloaded item 1. From the Android Market Home screen, press MENU and select ‘Downloads’. 2.
- Page 41 review: 1. From the Android Market Home screen, press MENU and select ‘Downloads’. Select the item to open its details screen. 2. Press MENU and select ‘Clear my review’. 3. Your rating and comments are removed...
- Page 42 FCC RF Exposure Information and Statement The SAR limit of USA (FCC) is 1.6 W/kg averaged over on one gram of tissue. Device types: thl 4000 (FCCID: 2ADTWTHL4000) has also been tested against this SAR limit. The highest SAR value reported under this standard during product certification for use at the ear is 0.309 W/kg and when properly worn on...
- Page 43 correct the interference by one or more of the following measures: - Reorient or relocate the receiving antenna. - Increase the separation between the equipment and receiver. -Connect the equipment into an outlet on a circuit different from that to which the receiver is connected.
Need help?
Do you have a question about the 4000 and is the answer not in the manual?
Questions and answers