Advertisement
Quick Links
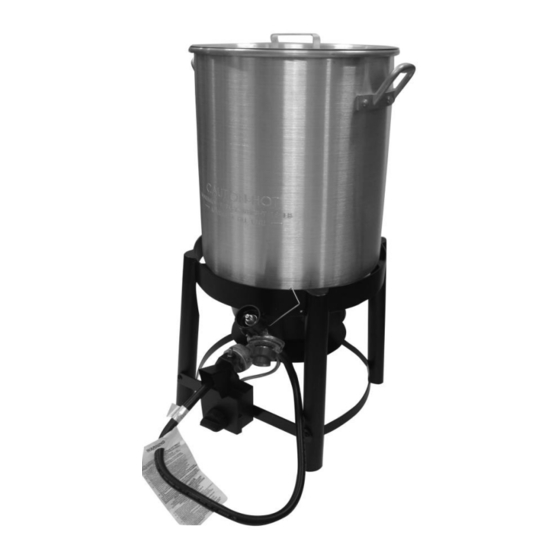
36 QT. TURKEY FRYER
Model: TF2038101-MM-01
Assembly, Use and Care Manual
Tools required:
Phillips screwdriver / Adjustable wrench (Not included)
To installer or person assembling this appliance: Leave this manual with this appliance for future
reference.
This instruction manual contains important information necessary for the proper assembly and
safe use of the appliance.
Read and follow all warnings and instructions before assembling and using the appliance.
Follow all warnings and instructions when using the appliance.
Keep this manual for future reference.
For assistance, contact customer service at customerservice@rankam.com
or at 1 – 888 – 837 – 1380, 8:00am – 5:00pm, Pacific Standard Time, Monday to Friday
TF2038101-MM-01 English
Should you encounter any problem,
CALL US FIRST.
DO NOT return product to the retail store.
WE CAN HELP.
P. 1
For Outdoor Use Only
20190508 Ver1
Advertisement

Subscribe to Our Youtube Channel
Summary of Contents for Member's Mark TF2038101-MM-01
- Page 1 36 QT. TURKEY FRYER Model: TF2038101-MM-01 For Outdoor Use Only Assembly, Use and Care Manual Tools required: Phillips screwdriver / Adjustable wrench (Not included) To installer or person assembling this appliance: Leave this manual with this appliance for future reference.
- Page 2 Do not attempt to extinguish an oil or grease fire with water. Failure to follow these instructions could result in fire, explosion or burn hazard which could cause property damage, personal injury or death. P. 2 TF2038101-MM-01 English 20190508 Ver1...
-
Page 3: Prop 65 Warning
Warning: Indicates a potentially hazardous situation which, if not avoided, will result in death or serious injury. CAUTION CAUTION: Indicates a potentially hazardous situation or unsafe practice which, if not avoided, may result in minor or moderate injury. P. 3 TF2038101-MM-01 English 20190508 Ver1... - Page 4 16. Do not move the appliance when in use. Allow the cooking vessel to cool to 115°F (45°C) before moving or storing. 17. Do not leave the appliance unattended, keep children and pets away from the appliance at all times. 18. Please wear gloves while assembling the fryer. P. 4 TF2038101-MM-01 English 20190508 Ver1...
- Page 5 Never drop food or accessories into hot cooking liquid. Lower food and accessories slowly into the cooking liquid in order to prevent splashing or overflow. When removing food from the appliance care should be taken to avoid burns from hot cooking liquids. P. 5 TF2038101-MM-01 English 20190508 Ver1...
- Page 6 Dealer should NEVER fill LP tank more than 80% of LP tank volume. Volume of propane in tanks will vary by temperature. A frosty regulator indicates gas overfill. Immediately close LP tank valve and call LP gas dealer for assistance. P. 6 TF2038101-MM-01 English 20190508 Ver1...
- Page 7 5. Hold regulator, insert nipple (B) into Type 1 outlet. Hand tighten coupling nut, holding regulator in a straight line (C) with LP Type 1 outlet so as not to cross thread the connection. P. 7 TF2038101-MM-01 English 20190508 Ver1...
- Page 8 Customer Service Center at 1 – 888 – 837 – 1380. Use only replacement parts specified by manufacturer. 6. Always close LP tank valve after performing tank leak test by turning OPD hand wheel clockwise P. 8 TF2038101-MM-01 English 20190508 Ver1...
- Page 9 If the burner does not ignite with valve open OR if burner flame is accidentally extinguished after lighting, gas will continue to flow out of the burner and could accidentally ignite with risk of injury. P. 9 TF2038101-MM-01 English 20190508 Ver1...
- Page 10 Do not block holes in bottom or sides of appliance. Check burner flames regularly. Use appliance only in well-ventilated space. NEVER use in enclosed space such as carport, garage, porch, covered patio, or under ANY overhead construction. P. 10 TF2038101-MM-01 English 20190508 Ver1...
- Page 11 Replace corroded or damaged burners that would emit excess gas. Cooking surfaces, pots and pans: Clean the cooking surface with soapy water and a nylon cleaning pad. Product Diagram P. 11 TF2038101-MM-01 English 20190508 Ver1...
- Page 12 Timer Control Box, Gas Hose & Regulator Assembly 5. Timer Control Box 6. Heat Shield 7. Hook 8. 36QT Pot Bracket 9. Lid 10. Strainer Basket 11. T-Star Stand 12. Lifter 13. 15” Thermometer 14. Wind Shield P. 12 TF2038101-MM-01 English 20190508 Ver1...
- Page 13 3. Attach the Wind Shield (14) to the Steel Stand (3) by using 4pcs of Bolt M6 x 12 (A) and Nut M6 (B). 4. Attach the Timer Box Bracket (5) to the Steel Stand (3) using 2pcs of Bolt M6 x 12 (A). P. 13 TF2038101-MM-01 English 20190508 Ver1...
- Page 14 Prior to lighting, position thermometer clip so that at least 3” of thermometer tip is submerged in oil. Reposition thermometer as necessary to cook. Continue to use thermometer until burner is turned off. P. 14 TF2038101-MM-01 English 20190508 Ver1...
- Page 15 Check your hose at both ends for proper connection. Also, place the LP tank and hose so that they are not located directly next to the fryer. Center the pot over the burner on the cooker. P. 15 TF2038101-MM-01 English 20190508 Ver1...
- Page 16 Using a meat thermometer, check for an internal meat temperature of 180°F. Remove T-Star Stand (11) and allow the turkey to “rest” for 15 minutes to allow the juices to settle into the turkey. Slice and serve! P. 16 TF2038101-MM-01 English 20190508 Ver1...
-
Page 17: Troubleshooting
LP tank valve. Disconnect the regulator from the LP tank and wait one minute. Reconnect the regulator control valve to the LP tank valve and slowly open the LP tank valve until it is fully open. P. 17 TF2038101-MM-01 English 20190508 Ver1... -
Page 18: Limited Warranty
1 – 888 – 837 – 1380, 8:00am – 5:00pm, Pacific Standard Time, Monday to Friday Manufacturer Information RANKAM (CHINA) MANUFACTURING COMPANY LIMITED Address: 18/F., New Lee Wah Centre, 88 Tokwawan Road, Kowloon, Hong Kong P. 18 TF2038101-MM-01 English 20190508 Ver1... - Page 19 P. 19 TF2038101-MM-01 English 20190508 Ver1...
Need help?
Do you have a question about the TF2038101-MM-01 and is the answer not in the manual?
Questions and answers