Subscribe to Our Youtube Channel
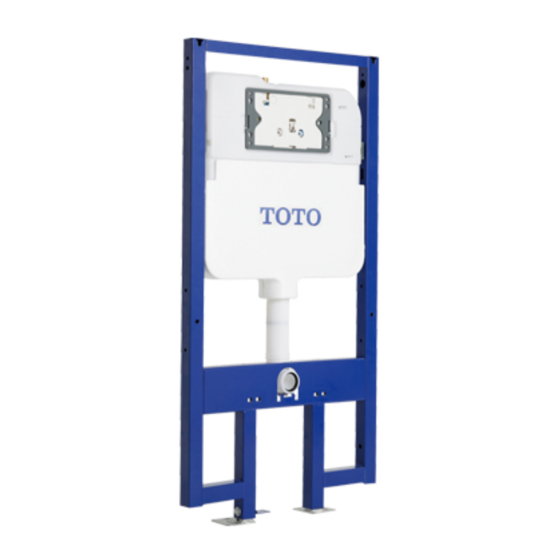
Summary of Contents for Toto WH173B Series
- Page 1 WH171B(系列) WH172B(系列) WH173B(系列) WH171A WH172A WH173SG WH171B(SERIES) WH172B(SERIES) WH173B(SERIES) WH171A WH172A WH173SG 563403-2 2019.09...
- Page 2 Cautions 提示: Caution: Neglecting this sign may result in misunderstanding of the installation instructions, which can lead to injuries or damage to property. 重要提示: Important: 1. Functions of the manual concealed cistern: storage water, inlet and outlet calve vessel, frame of wall-hung toilet, The function reflected in the manual actuator panel instructions.
-
Page 3: Self Diagnosis And Troubleshooting
Self diagnosis and troubleshooting 温馨提示: Note: Users may fix the problems on their own if the corrective action is to be taken by the user according to the chart below. Non-professionals are prohibited from disassembling and repairing the product. Please contact the relevant professionals for futher troubleshooting to avoid aggravating the problem. -
Page 4: Accessories List
INSTALLATION INSTRUCTION FOR MANUAL CONCEALED CISTERN 重要提示: Important: 1. Please read through this Instructions carefully prior to installation,and our company shall not be responsible for any loss caused by not installating according with this Instructions. Lubricants are provided for the installation. -
Page 5: Included Parts
Included Parts Check to make sure you have all these parts from the package: Parts in Bag 1 In Wall Tank (Carrier) Outlet Pipe Inlet Pipe Mud Guard Mud Guard Installation Manual Push Plate Rough In Push Plate Rough In Parts in Bag 2 Parts in Bag 3 Seal Gasket A... - Page 6 110/130 45° , hen the installation 置2 tion 2 置1 tion 1 5 (B档) 130 (B档) (W=110/130) 管位置。 ocation als!)
- Page 7 110/130 提示 : 排污管侧向安装角度一般不超过 45° , 否则很可能会影响排污效果。 Note: The drainage function may be affected when the installation angle of drainage pipe exceed 45° 位置2 Position 2 位置1 Position 1 位置1 Position1: 65 (A档)/W=85 (B档) 位置2 Position2: W=110 (A档)/130 (B档) 排污管侧向45度输出时,只能装在位置2(W=110/130) When excretory tube lean 45°, it can only be fixed in Position 2(W=80/100).
- Page 8 墙脚组装、地脚调节: Install Wall-fixing bracket and adjust floor-fixing bracket 170: Bolt length of 75 mm 170: Bolt length of 120 mm 在安装墙及地面钻孔:( 10X深60) 膨胀螺栓的使用方法: Drill on the main wall and floor Install Expansion Bolts 4 9 0 10mm As shown on picture: 6 5 0 1.
- Page 9 调节支架的水平和竖直,并锁紧螺栓: Adjust horizontally and vertically, and tighten lag screw: “Click” “Click’’ “Click’’ “Click” “Click’’ “Click’’...
- Page 10 装入装修嵌件安装: Install Plug: For the fixing of the long screw, there are two groups of screw holes on the bracket which are of different distance. Please choose the right position according to the size of the toilet bowl. “Click’’ “Click’’ Important remind: When the concealed tank fixed completely, it is important to test leaking with water upon 12 hours before fixing wall.
- Page 11 装修墙厚度范围20~60mm (从固定支架外面算起,到贴砖后完成面) The thickness of fixed wall is 20~60mm (measured from the front of frame to the finished tile surface) It is forbidden to use unsustainable, ductile or 预留推板 light-weight material to fix the Push Plate covering. Such as foam board Rough-In etc.
- Page 12 安装坐便器: Install the toilet Add lubricant onto the Rubber Gaskets of two Straight Pipes and set them into Bowl. (Flush Pipe seal Gasket assembly see 3.1, Set Straight Pipes into Flush Bend and 3.2 and 3.3). Drain Bend properly, and marks lines. Flush Pipe Seal Seal Gasket A install Seal Gasket B install.
- Page 13 Chamfer and trim the cutting edges on the shortened Straight Take out the sponge with silicon oil and smear it on connecting pipes (as shows). edges of Straight Pipe and Bends. 安装坐便器: Install the toilet: Toilet bowl type Proceed to step 2. Adjusting length for Bolt is d+25mm as shows.
- Page 14 维修保养 Servicing procedures 更换冲水阀 Replacing the Flush Valve Remove the splash guard and pull it out. Close the shutoff valve in the tank, and then push the button on the actuator to flush the water. Push on the tab to remove the actuator. Tilt the two pull-up rods of the flush valve to the right.
- Page 15 清洁进水阀滤嘴 Cleaning the Filter of the Fill Valve 按上述操作,关闭进水角阀,然后拆下进水阀。 如图A所示,拆开进水阀,然后用水清洗图A过滤网, 或者用刷子清除污物。 按照与上述相反的步骤操作,便能将进水阀安装回原 来的位置。 1. Close the water shutoff valve, and then remove the fill valve as described above. 2. As shown in pic A, disassemble the fill valve and clean the filter screen in FIG.
- Page 16 1002, Kamla Executive Park,Opposite Vazir Glass Works, Andheri Kurla Road, Andheri (E), Mumbai - 400059.Maharashtra, India Contact : +91-22-43112-111/112 扫描二维码, 服务预约,方便快捷 合格证 本品经检查判定合格 执行标准:GB26730-2011 产品名称:见包装箱上的标签 产品型号:见包装箱上的标签 检验日期:见包装箱上的标签 检 验 员:QC001 制 造 商: 厦门和利多卫浴科技有限公司 厂 址: 厦门海沧区霞飞东路2号...


Need help?
Do you have a question about the WH173B Series and is the answer not in the manual?
Questions and answers