
Related Manuals for Opticstar PX-35C COOLAIR


Summary of Contents for Opticstar PX-35C COOLAIR
- Page 1 Opticstar PX-35C COOLAIR Colour CCD Video Camera Microsoft Windows (64-bit & 32-bit) 7/8/10 OPTICSTAR...
- Page 2 Opticstar PX-35C CoolAir. © Opticstar Ltd, 2021. CAUTION 1. Please read and follow the installation instructions on the following pages for a trouble-free installation! 2. Do not drop your camera as this can result in serious damage. 3. Only use the supplied power supply unit if your camera comes with one.
-
Page 3: Table Of Contents
Opticstar PX-35C CoolAir. © Opticstar Ltd, 2021. CONTENTS Introduction ..................................3 Software Support ................................. 3 Package Contents ................................ 3 System Requirements..............................3 Camera Installation ................................4 Installing Software for Windows DirectShow ......................5 Installing Software Drivers for Windows........................7 Verifying Successful Installation ..........................8 Installing etAMCAP ................................ -
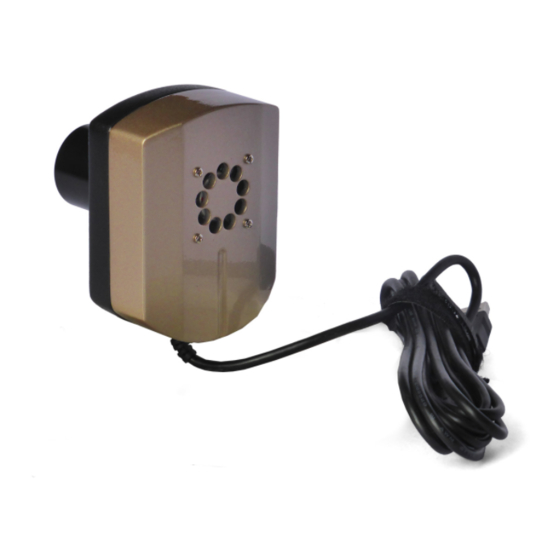
Page 4: Introduction
Opticstar PX-35C CoolAir. © Opticstar Ltd, 2021. Introduction The PX-35C COOLAIR is an astronomy video camera. It is well suited for imaging the planets, the Moon and the Sun. The camera is also suitable for microscopy when fitted with an appropriate attachment. -
Page 5: Camera Installation
1. Windows DirectShow software for the PX-35C. 2. Windows software drivers for the PX-35C. 3. EtAMCAP application software for using the camera. 4. Opticstar View application software with more advanced functions and usability. The first step is to install software that makes the PX-35C compatible with Microsoft’s Windows DirectShow model. -
Page 6: Installing Software For Windows Directshow
2. Navigate to the DirectShow folder on the CD and run Opticstar_PX- 35C_DirectShow.exe 3. A message will appear “Welcome to the Opticstar PX-35C Camera Directshow Plug-in Setup Wizard”. Click on the Next button to continue. Step 3: Open the appropriate installation program. - Page 7 DirectShow support can be removed from the Windows Control Panel independently of the camera’s Windows software drivers. Click the Add / Remove Programs icon (on XP) or Programs and Features (on 7/8/10) and remove the entry headed “Opticstar PX-35C DirectShow…”. Updated: 03/09/2021...
-
Page 8: Installing Software Drivers For Windows
Opticstar PX-35C CoolAir. © Opticstar Ltd, 2021. Installing Software Drivers for Windows Desktop computers have USB 2.0 ports on the front and the back. Sometimes, the ports at the front are not fully USB 2.0 compliant in terms of bandwidth and power. Please use one of the ports connected directly to the motherboard if possible. -
Page 9: Verifying Successful Installation
Opticstar PX-35C CoolAir. © Opticstar Ltd, 2021. Step 5: Install driver software. Step 7: Install driver software 7. Windows will copy the installation files and display the following message “Windows has successfully updated your driver software”. 8. If Windows asks to restart the computer, please do so. -
Page 10: Installing Etamcap
Opticstar PX-35C CoolAir. © Opticstar Ltd, 2021. Installing etAMCAP You can test that the camera been installed successfully by running the etAMCAP program. The etAMCAP.EXE can be found on the accompanying CD inside the etAMCAP folder. Copy this to your computer’s desktop by dragging it... -
Page 11: Automatic Exposure Time
Opticstar PX-35C CoolAir. © Opticstar Ltd, 2021. Typically, when imaging a planet, most of the area around the planet is remains black and unused. In such cases, the region of interest (ROI) can be selected so that only the image area of the planet is downloaded on the computer. -
Page 12: Installing Opticstar View
1. To install View, navigate to the View folder on the CD and open the View_setup.exe file. 2. Windows will display “Welcome to the Opticstar View Setup Wizard”. Click the Next button to continue. Installing Opticstar View. Running Opticstar View. -
Page 13: Camera Control
Opticstar PX-35C CoolAir. © Opticstar Ltd, 2021. Camera Control Run View with the camera connected to the computer. On the right-hand side panel of the application, under the Capture tab, the camera will be identified as “Opticstar PX- 35C”. By default, the camera will be running as soon as View opens. -
Page 14: Colour Adjustment Tab
Opticstar PX-35C CoolAir. © Opticstar Ltd, 2021. Colour Adjustment Tab The first three slider bars labelled: R Gain, G Gain and B Gain, can be used to manually adjust the red, green and blue colour reproduction of the camera. Alternatively, the camera can automatically set these values by pressing the White Balance button. -
Page 15: Image Capture
Opticstar PX-35C CoolAir. © Opticstar Ltd, 2021. Image Capture There is a second group of user controls on the right-hand side panel, headed Camera Capture Config. The Capture button can be used to capture a single frame or a series of frames in BMP format. -
Page 16: Image Processing
Opticstar PX-35C CoolAir. © Opticstar Ltd, 2021. Image Processing View can be used to perform measurements on the captured image(s). It is also possible to apply various filters and perform image processing operations. A brief outline of View’s image processing functions is listed below: •... -
Page 17: Troubleshooting
Opticstar PX-35C CoolAir. © Opticstar Ltd, 2021. Troubleshooting If you experience difficulty in installing the camera software and drivers this may be due to a number of reasons related to your computer, operating system and other devices already connected to it. The following sections outline the most common problems and suggest ways in which you should be able to solve them. -
Page 18: Support
For support regarding the PX-35C please email Opticstar at: info@opticstar.com. Other Software There is some freely available third-party software that may be of interest to some users. Please note that Opticstar cannot guarantee the suitability the software. • Deep Sky Stacker. (http://deepskystacker.free.fr). • RegiStax. (http://www.astronomie.be/registax/) These programs can be used to post-process video files captured in EtAMCAP and View. -
Page 19: Camera Specification
Opticstar PX-35C CoolAir. © Opticstar Ltd, 2021. Camera Specification Specification PX-35C COOLAIR 1/4” CCD Sensor Format Sensor Model Sony ICX098BQ 5.6μm x 5.6μm Pixel size Max. Resolution 640 x 480 pixels Speed 30fps at 640x480 30fps at 320x240 (ROI) Data Readout... - Page 20 Opticstar PX-35C CoolAir. © Opticstar Ltd, 2021. OPTICSTAR Opticstar Ltd, 87 Washway Road, Sale, Greater Manchester, M33 7TQ, United Kingdom. Email: info@opticstar.com • Web: www.opticstar.com Updated: 03/09/2021...
Need help?
Do you have a question about the PX-35C COOLAIR and is the answer not in the manual?
Questions and answers