
Related Manuals for Easymax MU


Summary of Contents for Easymax MU
- Page 1 MU Self-Monitoring Blood Glucose System User’s Manual Please read this User’s Manual thoroughly before using your blood glucose meter.
- Page 2 ® The EASYMAX MU Self-Monitoring Blood Glucose Test System is intended for the quantitative measurement of glucose in fresh capillary whole blood and venous blood from fingertip, palm and forearm. Testing is done outside the body (In Vitro diagnostic use). It is indicated for self-testing (over the counter [OTC]) by persons with diabetes, or in clinical settings by healthcare professionals, as an aid to monitor the effectiveness of diabetes control.
- Page 3 Standard Accessories ® Your new EASYMAX MU Blood Glucose Meter and accessories work together to measure the amount of glucose in your blood. The system includes: • Blood Glucose Meter • User’s Manual • Alkaline Battery (2 ct.) • Warranty Card •...
- Page 4 ® Although the EASYMAX MU SMBG System is easy to use, you may need to consult with your healthcare professional (this may be your doctor, pharmacist or diabetes nurse educator) for instructions on how to use the system. Only the correct use of...
- Page 5 ® EASYMAX MU Blood Glucose Meter is designed and approved for testing fresh capillary whole blood and venous blood samples from your fingertip, palm and forearm. The meter is for in vitro diagnostic use ONLY (for testing outside the body). It should not be used to diagnose diabetes.
- Page 6 Please dispose device according to the local rule of the disposition of electronic device / accessory waste. Warning for potential biohazard: Healthcare professionals using this system on multiple patients should be aware that all products or objects that come in contact with human blood, even after cleaning, should be handled as if capable of transmitting a viral disease.
- Page 7 Health-Related Information If you are experiencing dehydration, frequent urination, have low blood pressure, in shock or hyperosmolar hyperglycemic nonketotic coma (HHNKC), you may get a test result that is lower than what your blood glucose really is. If you think you are dehydrated, call your healthcare professional right away.
- Page 8 Explanation of Symbols Consult instructions for use Caution Batch code Do not reuse In vitro diagnostic medical 1.5V(AAA) x 2 batteries only device Use by Temperature limitation Manufacturer Catalogue number Serial number Control Authorized representative in Sufficient for the European Community Blood glucose test result in Keep away from sunlight mg/dL...
- Page 9 Explanation of Meter Symbols Date User-flagging (on the left side) (patient number) Time Apply Control (on the right side) Solution Apply blood (Before Noon) Unit (After Noon) Result / Message Battery Insert a strip Temperature...
-
Page 10: Table Of Contents
Table of Contents Chapter 1: Understanding Your Meter ..................12 ® The EASYMAX MU Blood Glucose Meter ................12 ® The EASYMAX Blood Glucose Test Strip And Accessories ............ 13 Inserting Batteries ........................14 Setting The Time, Date And Medical Record — First Time Use ..........15 ®... - Page 11 Symptoms Of High Or Low Blood Glucose ................. 36 Comparing Your Meter Result To A Lab Result ................37 Chapter 4: Meter Memory, Setup ....................38 Memory, Storing Test Results ..................... 38 Viewing And Deleting Test Results ..................... 39 Running With Your Computer ..................... 40 Chapter 5: Maintenance And Troubleshooting ................
-
Page 12: Chapter 1: Understanding Your Meter
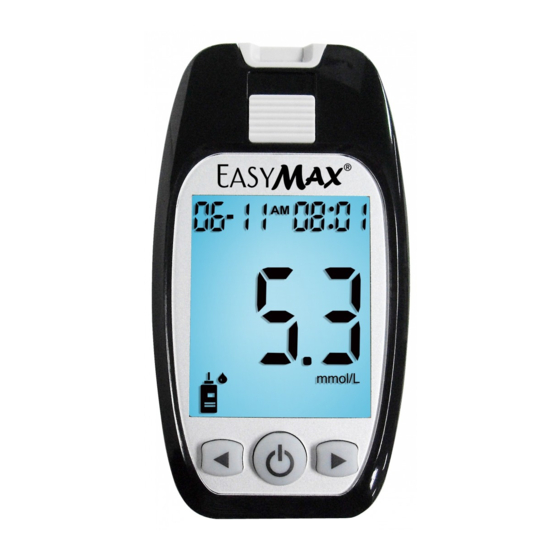
Chapter 1: Understanding Your Meter ® The EASYMAX MU Blood Glucose Meter Strip Ejector- Test Strip Slot- Push the Strip Ejector to remove Insert test strip here. the strip. Display- Battery Door- Show results, patient Flip open the numbers, and battery door by messages. -
Page 13: The Easymax ® Blood Glucose Test Strip And Accessories
® The EASYMAX Blood Glucose Test Strip and Accessories Lancing Device Blood Glucose Test Strip Test Strip Bottle Electrode Sliding barrel Control Solution Bottle Pull on until it clicks and then release to Sleeve- enable lancing device. Hand Hold Area... -
Page 14: Inserting Batteries
Inserting Batteries 1. Open the battery door on the back of the meter by pushing the tab in the direction of the arrow and pulling the door up. 2. Insert two batteries. The meter will beep to confirm the batteries are inserted correctly. 3. -
Page 15: Setting The Time, Date And Medical Record - First Time Use
Setting the Time, Date and Medical Record — First Time Use Setting the current time and date in your meter is important if you use the meter memory. 1. Press (Power Button) 2. Press (Right Button) 3. The screen display flashes the last and hold the button until for 2 seconds to get into 2-digits of the year. - Page 16 4. Repeat step 3 to set the date and time. 5. Press (Left Button) or (Right Button) to The flashing field is the one you are turn on/off the user-flagging and press currently setting. (Power Button) to confirm the setting. When the function of is on, it allows you to keep testing records of multiple users separate by marking them from 001-999.
-
Page 17: Using Easymax Blood Glucose Test Strips
Do not touch the test strip with wet hands. Do not bend, cut, or twist the test strips. ® EASYMAX MU Self-Monitoring Blood Glucose Test System is a “no code” system and does not require any meter calibration. -
Page 18: Chapter 2: Control Solution Testing
Why Run A Control Solution Test ® We recommend that you run the EASYMAX Level 2 control test because it lets you know that your meter and test strips are working properly to give reliable results. You should run the control solution tests when: ... -
Page 19: About The Control Solutions
Left over control solution should not be added back into the control bottle. Store control solution at room temperature, between 2°C - 30°C (36°F - 86°F). Do not freeze. ® If you would like to purchase EASYMAX Control Solutions, please contact your local dealer. -
Page 20: Running A Control Solution Test
Running A Control Solution Test You need the meter, a test strip, and control solution. 3. Place the meter on a flat surface, like a table. 1. Put a test strip into the 4. Remove the control solution meter in the direction of the 2. - Page 21 Strip Ejector 6. Touch the drop to the blood collection 7. Do not remove the test 8. Push the Strip Ejector area at the tip of the test strip. strip until you confirm to eject the test strip. Do not put control solution on the that the reading falls 9.
-
Page 22: Understanding Control Solution Test Results
Understanding Control Solution Test Results The label on your test strip bottle shows the acceptable ranges for the Control Solutions. The result you get should be inside the acceptable range for the appropriate control solution level. Make sure you compare the result to the correct level of control. When the control solution result is inside the range on the test strip bottle, your test strips and your meter are working properly. - Page 23 Troubleshooting Check Action Was the test strip exposed to open air for If yes, repeat the control test with properly a long period of time? stored strips. If the cap was not tight, or the bottle was left Does test strip cap close tightly? Or was test uncapped, open a new bottle of test strips.
-
Page 24: Chapter 3: Testing Your Blood Glucose
Chapter 3: Testing Your Blood Glucose Using The Lancing Device The best depth setting is the lowest number that draws enough blood for a test. Try different settings to find the one that’s right for you. Please do not share your lancing device with anyone. And always use a new, sterile lancet. Lancets are for one time use only. -
Page 25: Inserting A Lancet Into The Lancing Device
Inserting A Lancet Into The Lancing Device You must first load the lancet into the lancing device to get it ready for use. 1. Unscrew the Cap. 3. Recap the front cap. 2. Insert the lancet into the lancing device firmly then twist off the protective cover. - Page 26 4. Select the desired 5. Pull on the sliding barrel of the 6. Set the lancing device penetration depth. lancing device until it clicks and aside until later in the then release. test. Now the lancing device is ready. Do not prick your finger until your meter and strip are prepared.
-
Page 27: Running A Blood Glucose Test With Blood From Your Fingertip
Running A Blood Glucose Test With Blood From Your Fingertip 1. Wash your hands with 2. Insert a test strip into the meter in the 4. Place the lancing soap and warm water. direction of the arrow. The meter turns device against the pad Rinse and dry thoroughly. - Page 28 Apply blood to the edge of Do not apply blood on the test strip. top of the test strip. Be sure to get enough Not enough blood on blood on strip to make it to strip to get a test result. the confirmation window.
- Page 29 Strip Ejector 7. The meter starts to count down from 8. Push the Strip Ejector to eject the test strip 5 seconds and then displays the test & dispose of both strip & lancet properly. result. 9. After discarding, wash hands thoroughly with soap and water.
-
Page 30: Alternate Site Testing (Optional)
Alternate Site Testing (Optional) Understanding Alternate Site Testing (AST) What is AST? What is the advantage of AST? Besides the fingertip, you can test your You have the option of testing other places on forearm or palm. your body besides the fingertip. Consult your healthcare professional before you begin using the forearm or palm for testing. - Page 31 Fingertip test only: If sick If blood glucose is low After exercising Two hours or less after eating When you have just taken insulin After injecting rapid-acting insulin (two hours or less) If you often do not notice when your blood glucose is low, do a fingertip test. AST Results: ...
-
Page 32: Running A Blood Glucose Test With Blood From Your Forearm (Optional)
Running A Blood Glucose Test With Blood From Your Forearm (Optional) Please use the clear cap with the lancing device for AST testing. 1. Massage the puncture 2. Press and hold the device 3. Press the trigger button to area of forearm for a with clear adjustable tip activate the lancing device. -
Page 33: Running A Blood Glucose Test With Blood From Your Palm (Optional)
Running A Blood Glucose Test With Blood From Your Palm (Optional) 1. Massage the puncture area 2. Press and hold the device 3. Press the trigger button to of palm for a few seconds. with one clear adjustable activate the lancing device. tip against the palm. -
Page 34: Discarding Used Lancets
Discarding Used Lancets 1. Unscrew and remove the 2. Without touching the used 3. Pointing the lancing device cap. lancet, stick the lancet tip toward a container for sharp into its protective cover. or biohazard material, slide the ejection button down to release the covered lancet into the container. -
Page 35: Understanding Your Test Results
Understanding Your Test Results ® The EASYMAX Blood Glucose test strips are plasma referenced and calibrated for easier comparison to lab results. The normal fasting blood glucose range for non-pregnant adults with diabetes is 70-130 mg/dL (3.9~7.2 mmol/L)*. Two hours after meals, the blood glucose range for non-pregnant adults with diabetes is less than 180 mg/dL (10 mmol/L). -
Page 36: Symptoms Of High Or Low Blood Glucose
Symptoms Of High Or Low Blood Glucose Being aware of the symptoms of high or low blood glucose can help you understand your test results and decide what to do if they seem unusual. Here are the most common symptoms: Greater than 240 mg/dL (13.3 mmol/L) Below 60 mg/dL (3.3 mmol/L) What It Means:... -
Page 37: Comparing Your Meter Result To A Lab Result
In comparison to the YSI, EASYMAX® met the EN ISO 15197:2013 standard, whereby 95% of the blood glucose values measured must lie within the following ranges: either ±15 mg/dL (± 0.83 mmol/L) of the measured average value when using the reference measuring procedure for blood glucose concentrations <100 mg/dL (<5.55 mmol/L) or ±15% for blood glucose concentrations of... -
Page 38: Chapter 4: Meter Memory, Setup
Chapter 4: Meter Memory, Setup Memory, Storing Test Results Your meter stores a maximum of 480 test results with the time and date of the test. You can review them at any time. When the memory is full, the oldest result is dropped as the latest is added, so it is very important to have the correct time and date set in the meter. -
Page 39: Viewing And Deleting Test Results
Viewing And Deleting Test Results Each review requires the user to go back to the main screen (testing mode) by pressing the (Power Button). 3. To delete a test result, press (Left Button) for more than 2 seconds and display shows “dEL”, press (Power 1. -
Page 40: Running With Your Computer
Running With Your Computer To Transfer data, the meter can be turned on or turned off. 1. Use the USB cable to 2. The meter starts to transfer 3. When all data is uploaded connect to the meter and data to the GlucoManager from the meter to the PC, your computer. -
Page 41: Chapter 5: Maintenance And Troubleshooting
Chapter 5: Maintenance And Troubleshooting Inserting Batteries The meter uses two alkaline 1.5V (AAA) batteries. Batteries will normally last for more than 2000 tests. Other types of 1.5V (AAA) batteries are also acceptable, but the capacity of test times may differ. Insert the batteries when you first use the meter or replace with new batteries when the “LP”... -
Page 42: Cleaning Your Meter
Cleaning Your Meter ® Caring for your EASYMAX MU SMBG system does not require special cleaning. Please keep the meter free of dirt, dust, bloodstain, and water stains. Follow these guidelines carefully to help you get the best performance possible: Do Not: ... -
Page 43: Maintenance And Testing
Maintenance And Testing Your meter needs little or no maintenance with normal use. It automatically tests its own systems every time you turn it on and lets you know if something is wrong. (See "Screen Messages" and what to do about them.) To make sure the display is working properly, turn off the meter. -
Page 44: Screen Messages And Troubleshooting
Screen Messages And Troubleshooting Never make treatment decisions based on an error message. If you have any concerns, please contact your local dealer or healthcare professional. Message What it means? What to do? Humidified / Used strips Repeat the test with a new strip. The meter has detected a Refer to pages 27-29 for information on problem with the test strip. - Page 45 Message What it means? What to do? System error Replace the batteries first. There may be a problem with the Refer to page 14 and 41. If this error meter. message (Err 001) appears again, please contact your local dealer. Memory Error Replace the batteries first.
- Page 46 Message What it means? What to do? Volume detector error Replace with a new strip. The volume of blood or If Err appears again, please control solution is NOT contact your local dealer. enough. Test result is higher Re-check your glucose level. If the result is HI again, obtain and than 630 mg/dL follow instructions from your...
- Page 47 Message What it means? What to do? The “HF” and thermometer icon Relocate the meter to a location with appears. Temperature is too temperature between 10°C - 40°C high, outside the required range (50°F - 104°F). of 10°C - 40°C (50°F - 104°F). This alerts users that an incorrect result may occur if the test continues.
-
Page 48: Chapter 6: Technical Information
Chapter 6: Technical Information Specifications ® Brand name EASYMAX MU Blood Glucose Meter Range 20~630 mg/dL (1.1~35.0 mmol/L) Test time 5 seconds Memory sets 480 test results Temp. 10°C - 40°C (50°F -104°F) Operating condition Relative Humidity R.H. ≦ 90% Temp. -
Page 49: Limitations
2. Lipemic samples: Cholesterol level up to 500 mg/dL (12.92 mmol/L) and triglycerides up to 3,000 mg/dL (33.6 mmol/L) do not affect the results. Grossly lipemic patient samples have not ® been tested and are not recommended for testing with EASYMAX MU Blood Glucose Meter. ®... - Page 50 4. DO NOT use during xylose absorption testing. Xylose in the blood will interfere Self-Monitoring Blood Glucose System. 5. Interfering Substances depend on the concentration. The below substances up to the test concentration will not affect the test results. Bias Glucose 80 mg/dL 250 mg/dL...
-
Page 51: Device Information
MU SMBG System, ® EASYMAX Blood Glucose Test Strips, ® EASYMAX MU Blood Glucose Meter. EASYMAX US Office 9550 S. Eastern Ave. Suite 253 Las Vegas, NV 89123 www.easymaxdiabetescare.com Obelis s.a. Boulevard Général Wahis 53, B-1030 Brussels, Belgium TEL:(32) 2.732.59 54 FAX:(32) 2.732.60 03...
Need help?
Do you have a question about the MU and is the answer not in the manual?
Questions and answers