Advertisement
Quick Links
Advertisement

Summary of Contents for Magikist iCoin CP900
- Page 1 iCoin Model CP900 Electronic Multi-Coin Acceptor Instruction Manual v 1.3...
-
Page 3: Electrical Connection
1A, 125VAC, 60VDC to pulse. Following are the wiring connections for several brands of timers. If your timer is not listed, consult your supplier for further information. Magikist MagikTimer MT580 or iTimer MT580U YELLOW-24VAC HOT #2 terminal BLACK-COMMON #3 terminal... -
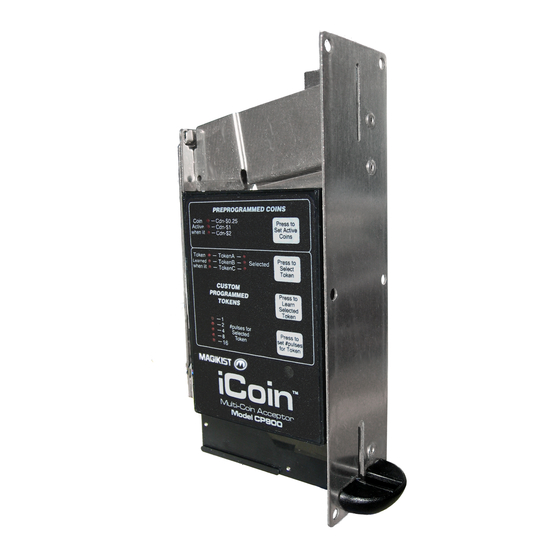
Page 4: Display Panel And Buttons
Grace Timer & PEM7 timer YELLOW-#3 terminal BLACK-#1 terminal BLUE-#4 terminal Dixmor DigitTimer 3 YELLOW-red wire on timer BLACK-green wire on timer BLUE-brown wire on timer Ginsan GS7 timer YELLOW-24VAC #3 terminal BLACK-24VAC #1 terminal BLUE-#4 terminal DISPLAY PANEL AND BUTTONS The iCoin utilizes a display panel and pushbuttons for setup and self-diagnostics. - Page 5 $0.25 and Cdn-$1 are lit as in figure 5.1, then the iCoin will accept both the Canadian quarter and $1 coin. If the indicator lights for Cdn-$1 and Cdn-$2 are lit, as in figure 5.2, then the iCoin will accept both the Canadian $1 and $2 coins.
- Page 6 TOKEN SETUP The iCoin can be easily programmed to accept up to 3 different tokens of your choice. Ensure that you have selected good quality tokens, and that other operators in your area are not using a similar size token of the same alloy. The iCoin is compatible with most tokens.
- Page 7 “click” of its kicker. After both samples have been accepted by the iCoin, the indicator light under Learned next to the current selected token will be lit, indicating that the token has been learned. At this time you will need to press the Press to set# pulses for Token pushbutton until the panel display showing the #pulses for Selected Token is set so that your token will give the correct number of pulses (and thus the correct value) to the timer when the token is accepted.
- Page 8 PULSE SPEED Some older timers may not be fast enough to correctly accept multiple pulses from the iCoin. These timers require a slower pulse speed from the iCoin. The speed at which the iCoin sends pulses to the timer can be easily set to either normal speed or slow speed.
- Page 9 10) HINGED DOOR ACCESS Should a bent or damaged coin become stuck in the coin acceptor, the iCoin CP900 features full access to the internal coin path. By gently pulling back on the right side of the display panel as shown in figure 10.1, the hinged door will pull back to allow cleaning and removal of damaged coins.
- Page 10 APPENDIX For future reference, write down the serial# located on the bottom of the black box of the coin acceptor. In addition, when learning tokens, record the details of each token on the following lines: SERIAL# ___________________________________ TokenA Description ____________________________________________ TokenB Description ____________________________________________ TokenC Description ____________________________________________...
Need help?
Do you have a question about the iCoin CP900 and is the answer not in the manual?
Questions and answers