
Related Manuals for ZComax XN-2050

Summary of Contents for ZComax XN-2050
- Page 1 IEEE 802.11n Draft 2.0 2.4GHz Wireless Broadband Router User’s Manual Version: 2.0 Date of Issue: November 2009...
- Page 2 Copyright Copyright © 2009 all rights reserved. No part of this publication may be reproduced, adapted, stored in a retrieval system, translated into any language, or transmitted in any form or by any means without the written permission of the supplier. About This Manual This user’s manual is intended to guide professional installer to install the Wireless Broadband Router and how to build the infrastructure centered on it.
- Page 3 FCC Information This device complies with Part 15 of the FCC Rules. Operation is subject to the following two conditions: (1) this device may not cause harmful interference, and (2) this device must accept any interference received; including interference that may cause undesired operation.
- Page 4 2. This equipment complies with FCC RF radiation exposure limits set forth for an uncontrolled environment. This equipment should be installed and operated with a minimum distance of 20 centimeters between the radiator and your body. For product available in the USA market, only channel 1~11 can be operated. Selection of other channels is not possible.
-
Page 5: Table Of Contents
CONTENTS Chapter 1 Introduction ..................2 Introduction ....................... 2 Key Feature and Benefits .................. 2 Typical Application..................... 3 Wireless Infrastructure ................. 3 Wireless Infrastructure with Stations Attaching to a Wired LAN ....3 Connecting the Wireless LAN Micro Access Point to your network....3 Chapter 2 Hardware Installation ................ - Page 6 PPPoE: ....................36 PPTP: ....................38 L2TP: ....................41 Firewall......................43 Port Filtering....................43 IP Filtering....................44 MAC Filtering ..................... 45 Port Forwarding ..................46 URL Filtering ....................47 DMZ ......................47 QoS ......................... 48 Chapter 5 Management ..................49 Status ......................
- Page 7 FIGURE Figure 1 The Wireless Broadband Router Application .......... 3 Figure 2 The Wireless Broadband Router LED Panel........... 5 Figure 3 The Wireless Broadband Router Back Panel.......... 6 Figure 4 Login Page....................7 Figure 5 Step1 - Setup Operation Mode ............... 8 Figure 6 Step2 –...
- Page 8 Figure 33 PPPoE Settings .................. 36 Figure 34 PPTP Settings ..................38 Figure 35 L2TP Settings ..................41 Figure 36 Port Filter Settings ................43 Figure 37 IP Filtering Settings................44 Figure 38 MAC Filter Settings ................45 Figure 39 Port Forwarding Settings ..............46 Figure 40 URL Filter Settings................
- Page 9 TABLE Table 1 LED Description Table ................5 Table 2 The Wireless Broadband Router Port Description Table ......6...
-
Page 10: Chapter 1 Introduction
Chapter 1 Introduction Introduction Congratulations on your purchase of the outstanding Wireless Broadband Router. This product is specifically designed for small office and home office needs. It provides a complete SOHO solution for Internet surfing and is easy to configure and operate even for non-technical users. Instructions for installing and configuring the Wireless Router can be found in this manual. -
Page 11: Typical Application
Typical Application The IEEE802.11n (Draft 2.0) 2.4GHz Wireless Broadband Router can be configured in a variety of network system configurations. Wireless Infrastructure In a wireless infrastructure, the IEEE 802.11n (Draft 2.0) 2.4GHz Wireless Broadband Router can act as an Access Point with repeater. The Access Point connects the wireless clients together. The Access Point acts as a center point for all wireless communications. -
Page 12: Chapter 2 Hardware Installation
Chapter 2 Hardware Installation This chapter describes initial setup of the Wireless Broadband Router. Product Package Before installation, make sure that you have the following items: IEEE 802.11n (Draft 2.0) 2.4GHz Wireless Broadband Router…………………. x 1 Ethernet Cable……………………………………………………….…..…….….…..x 1 Power Adapter………………………………………………………….……….….….x 1 Product CD ………………………………………………………….……………….x 1 If any of the above items is not included or damaged, please contact your local dealer for support. -
Page 13: Mechanical Description
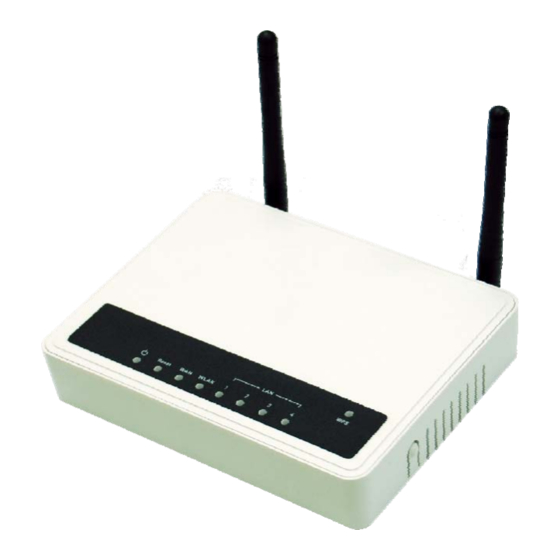
Mechanical Description Top panel of the Wireless Router: The following table provides an overview of each LED activity: Figure 2 The Wireless Broadband Router LED Panel LED Definition Color Description Steady Green Power enabled On/Off: Press Reset button more then 6 seconds, the Reset Green LED will on and then off to indicate reset progress start. - Page 14 Back panel of the Wireless Router: Figure 3 The Wireless Broadband Router Back Panel Ports: Port Description To reset the system settings to factory defaults. Push the reset button and Reset hold it for more than 6 seconds and the Reset LED will on and off. Then release the button, and the Wireless Broadband Router will reboot.
-
Page 15: Chapter 3 Setup Wizard
Chapter 3 Setup Wizard The IEEE 802.11n (Draft 2.0) 2.4GHz Wireless Broadband Router allows configuration only via Web. This chapter descripts how to configure the Wireless Broadband Router via Web page, and the basic configuration. How to Access the Web-based Configuration Utility The following gives instructions guiding you through the installations of the Wireless Broadband Router. -
Page 16: Setup Wizard
Setup Wizard Use the following buttons to navigate the wizard screens: Cancel: Click Cancel in any wizard screen to return to the main wizards screen. All unsaved custom settings will be lost. Back: Click Back to return to the last screen. Next: Click Next to continue to the next screen. - Page 17 Step2. Configure the Time Zone Setting. Check the Enable NTP client update and select the Time Zone and NTP server for your geographical location if need, and click Next. Figure 6 Step2 – Time Zone Settings Step3. Configure the LAN interface, you may change the IP address and Subnet Mask of the device and click Next, or if not to change the IP address and Subnet Mask, click Next to the next step.
- Page 18 Figure 8 Step4 – WAN Interface Settings Chapter 3 Setup Wizard Page 10...
- Page 19 Step5. Configure the Wireless Basic Setting, you may configure the Wireless Basic Settings include Band, Mode, Network Type, SSID, Channel Width, Control Sideband, and Channel Number, and click Next. Figure 9 Step5 – Wireless Basic Settings Step6. Configure Wireless Security; you may configure the wireless security setting to WEP, WPA (TKIP), WPA2 (AES) or WPA2 Mixed, and click Finish to complete the setup wizard.
-
Page 20: Chapter 4 Advance Settings
Chapter 4 Advance Settings Operation Mode The Wireless Broadband Router supports three modes for the network application. You can select the operation mode according to your network environment. Gateway: This is traditional gateway configuration. It always connects internet via ADSL/Cable Modem. LAN interface, WAN interface, Wireless interface, NAT and Firewall modules are applied to this mode. -
Page 21: Wireless Settings
Wireless Settings Basic Your wireless settings will impact the coverage and the performance of your wireless LAN. The wireless settings allow you to set the following configuration items: AP Mode You can configure the Wireless Broadband Router to AP Mode to be an Access Point of the real world. - Page 22 2.4GHz (B+G), 2.4GHz (G+N), and 2.4GHz (B+G+N) six options to be selected. Mode: You may select the Mode from the drop-down list. The options are AP, Client, WDS, and AP+WDS. Multiple AP: The device support multiple SSID, press Multiple AP button to configure the settings. SSID: Network ID is used for identifying the wireless LAN (WLAN).
- Page 23 The basic transfer rates should be set depending on the speed of your wireless network. Specify rate of data transmission. Select the desired rate from the drop-down menu and choose “Auto” to adapt the rate to the best available. Associated Clients: Press Show Active Clients button to display the associated client list.
-
Page 24: Client Mode
Client Mode You can configure the Wireless Broadband Router to Client Mode to be the wireless client of the real world. When set the mode to Client Mode, you can configure the Network Type, SSID, and to enable Broadcast SSID or disable. Figure 13 Client Mode Settings Enable Mac Clone (Single Ethernet Client) Select the check box to enable this function when set to Client Mode. -
Page 25: Wds
You can configure the device to WDS Mode to be a wireless bridge and establish a wireless link with other Access Points. When set the mode to WDS, you can configure the Channel Width, Channel Number, and to enable Broadcast SSID or disable. Figure 14 WDS Settings Chapter 4 Advance Settings Page 17... -
Page 26: Ap+Wds
AP+WDS You can configure the device to AP+WDS Mode to be a wireless bridge and Access Points. When set the mode to AP+WDS, you can configure the SSID, Channel Width, Channel Number, and to enable Broadcast SSID or disable. Figure 15 AP+WDS Settings Chapter 4 Advance Settings Page 18... -
Page 27: Advance
Advance This page provides more technical settings on wireless LAN. These settings should not be changed unless you know what effect will take. Figure 16 Wireless Advance Settings Fragment Threshold: Fragmentation mechanism is used for improving the efficiency when there is high traffic within the wireless network. - Page 28 Traffic Indicator Maps, and the Traffic Indicator Message (TIM). Preamble Type: The Preamble defines the length of the PLCP synchronization field for communication between the Access Point and Network Card. Select the appropriate preamble type and press the Apply button to set it. The default setting is “Long Preamble”. IAPP The IEEE 802.11f Inter-Access Point Protocol (IAPP) supports Access Point Vendor interoperability, enabling roaming of 802.11 Stations within IP subnet.
-
Page 29: Security
Security Wireless security is to protect the wireless communication between wireless stations, Access Points, and your wired network. Select the SSID that you want to enable the wireless security, and configure the encryption settings. Figure 17 Wireless Security Settings Encryption: You may select encryption type to WEP, WPA, WPA2, and WPA-Mixed from the drop-down list. -
Page 30: Wep
To prevent unauthorized wireless stations from accessing data transmitted over the network, the Access Point Security Settings window offers WEP features, making your data transmission over air more secure and allows you to specify Encryption Key(s) if you enable encryption for the Access Point. - Page 31 Figure 19 802.1x Enable 802.1x Authentication: 802.1x Authentication is for WEP with RADIUS Server. When you select the 802.1x Authentication check box, please input the RADIUS server information. IEEE 802.1x is a standard for network access control (port based), which was introduced especially for distributing encryption keys in a wireless network.
-
Page 32: Wpa & Wpa2
Key Length/Key Format/Encryption Key: You may drop-down the list to set WEP key length, Key Format, and input Encryption Key. You may enter key value manually: 64 bits WEP: Enter 5 ASCII characters or 10 hexadecimal digits (between 0-9, a-f and A-F). 128 bits WEP: Enter 13 ASCII characters or 26 hexadecimal digits (between 0-9, a-f and A-F). - Page 33 Figure 22 WPA-Mixed Settings Authentication Mode: The wireless router provides two options to user: Enterprise (RADIUS) and Personal (Pre-Shared Key). If you select Enterprise, then you must enter RADIUS Server information, otherwise, you should enter Pre-Shared Key Format and key value. WPA/WPA2/WPA-Mixed Cipher Suite: If encryption is WPA, then the WPA cipher default value is TKIP only.
-
Page 34: Access Control
Access Control The Access Control allows you to configure AP to give exclusive access to wireless stations or exclude them from accessing AP. Select Allow Listed to allow the wireless stations to access wireless network. Input the MAC Address, Comment and press Apply Changes to add the allow rule into the Current Access Control List. -
Page 35: Wds Setting
WDS Setting Extend the range of your network without having to use cables to link the Access Points by using the Wireless Distribution System (WDS): Put simply, you can link the Access Points wirelessly. Under WDS, your Access Points are still functioning as a regular Access Point, which can provide the link services to wireless clients. -
Page 36: Site Survey
Figure 25 WDS Application Site Survey The Wireless Broadband Router provide scan tool to scan the wireless network that exist in your environment. If you set to Client Mode, you can select the SSID and presses Connect button to associate the Access Point. Press the Refresh button to flash Access Point list and select the AP to connect. - Page 37 connect to AP in the Client PIN Number field, and then press Start PIN to start WPS progress. When use Self-PIN Number, input that Self-PIN Number that generate by the Wireless Broadband Router to wireless station utility, and start to WPS progress. When use Push Button, press “Start PBC”...
-
Page 38: Schedule
Schedule The Wireless Broadband Router provides to setup wireless schedule rule function, select the Enable Wireless Schedule check box to start this feature. Before enable this feature, remember to configure the system time first. Figure 29 Wireless Schedule Settings Chapter 4 Advance Settings Page 30... -
Page 39: Tcp/Ip Settings
TCP/IP Settings The configuration page provides 2 items for you to monitor and configure the Wireless Router: Wide Area Network and Local Area Network. Wide Area Network (WAN) The status of the WAN port will be displayed as well as the connection type. Local Area Network (LAN) The IP address, DHCP server and DHCP IP arrange are displayed. -
Page 40: Wan Interface Setup
DHCP Client Range: If the DHCP Server setting is “Enable”, you may specify the start and end address of the IP address pool. Static DHCP: This function allow you to reserve IP addresses, and assign the same IP address to the network device with the specified MAC address any time it requests an IP address. -
Page 41: Static Ip
Static IP: You may enter WAN IP Address, Subnet Mask, Gateway settings provided by your ISP. Figure 31 WAN Static IP Settings IP Address/Subnet Mask/Default Gateway: Input a fix IP Address, Subnet Mask, and Default Gateway that provide by your ISP. MTU Size: Change the MTU size that your ISP provided. -
Page 42: Dhcp Client
Enable IGMP Proxy You can select it according to your request. Enable Ping Access on WAN You can select it to enable WAN ICMP response. Enable Web Server Access on WAN You can select it when you want to configure the Wireless Broadband Router from the WAN interface. - Page 43 the Host Name on DHCP Server. MTU Size: Change the MTU size that your ISP provided. The default value is 1492 and range is 1400 to 1492 bytes. Attain DNS Automatically: You can select this option to get DNS address from the DHCP server. Set DNS Manually: You can select Set DNS Manually, and input at most three DNS servers in the below field.
-
Page 44: Pppoe
PPPoE: When you select PPPoE for WAN interface, you need to input user name, password, connection type, and idle time. Figure 33 PPPoE Settings User Name and Password: The account and password are that your ISP assigned to you. For security, this field appears blank. - Page 45 You can select the connection type from pull-down list. There are Continuous, Connect on Demand and Manual three types to select. Continuous connection type means to setup the connection through PPPoE protocol whenever this Wireless Broadband Router is powered on. Connect on Demand connection type means to setup the connection through PPPoE protocol whenever you send the data packets out through the WAN interface;...
-
Page 46: Pptp
PPTP: The PPTP (Point-to-Point Tunneling Protocol) allow user to make a tunnel with remote site directly to secure the data transmission among the connection. User can use embedded PPTP client supported by this Wireless Broadband Router to make a VPN connection Figure 34 PPTP Settings IP Address and Subnet Mask: Input the private IP address and subnet mask that your ISP assigned to you. - Page 47 Input the IP address of the PPTP server that your ISP provided. User Name and Password: Input the user name and password that your ISP assigned to you to login PPTP server. I Connection Type: You can select the connection type from pull-down list. There are Continuous, Connect on Demand and Manual three types to select.
- Page 48 Enable Ping Access on WAN You can select it to enable WAN ICMP response. Enable Web Server Access on WAN You can select it when you want to configure the Wireless Broadband Router from the WAN interface. Enable IPsec/PPTP/L2TP pass through on VPN connection: You can select the VPN protocol according your request.
-
Page 49: L2Tp
L2TP: L2TP (Layer 2 Tunneling Protocol) is a tunneling protocol used to support virtual private networks (VPNs). Figure 35 L2TP Settings IP Address and Subnet Mask: The private IP address and subnet mask that your ISP assigned to you. Server IP Address: Input the IP address of the L2TP server that your ISP provided. - Page 50 User Name and Password: Input the user name and password that your ISP assigned to you. Connection Type: You can select the connection type from pull-down list. There are Continuous, Connect on Demand and Manual three types to select. Continuous connection type means to setup the connection through L2TP protocol whenever this Wireless Broadband Router is powered on.
-
Page 51: Firewall
Firewall The firewall is a system or group of systems that enforce an access control policy between two networks. It may also be defined as a mechanism used to protect a trusted network from an un-trusted network. The wireless router has capabilities of Port Filtering, IP Filtering, MAC Filtering, Port Forwarding, URL filtering, and DMZ. -
Page 52: Ip Filtering
IP Filtering The IP Filtering gives you the ability to block access only the IP address that you specify. Figure 37 IP Filtering Settings Select Enable IP Filtering to activate this setting. Clear this check box to disable it. Enter the Local IP Address that you want to filter and select Protocol from the drop-down list box. You can assign the filter protocol to TCP, UDP or both. -
Page 53: Mac Filtering
MAC Filtering The MAC filter allows you to configure the device to exclude devices from accessing the Wireless Broadband Router. Every Ethernet device has a unique MAC address. The MAC address is assigned at the factory and consists of six pairs of hexadecimal characters, for example, 001970000002. -
Page 54: Port Forwarding
Port Forwarding Entries in this table allow you to automatically redirect common network services to a specific machine behind the NAT firewall. These settings are only necessary if you wish to host some sort of server like a web server or mail server on the private local network behind your Gateway's NAT firewall. -
Page 55: Url Filtering
URL Filtering The URL Filtering gives you the ability to block access only to the URL address you specify. Figure 40 URL Filter Settings Enter the URL Address and click Apply Changes to save the settings. Click Reset to start configuring this part of the screen again. -
Page 56: Qos
The Wireless Broadband Router, provide the QoS to let the users setup the QoS rules to control the network traffic. Figure 42 QoS Settings You can setup the QoS rule to Restricted maximum bandwidth or Guaranteed minimum bandwidth by input MAC address or IP address according to your network environment. And the QoS rules table will be list below. -
Page 57: Chapter 5 Management
Chapter 5 Management Status You may check current status, device information and basic settings of the Wireless Broadband Router on this page. Figure 44 Status Page Chapter 5 Management Page 49... -
Page 58: Statistics
Statistics You may check the packet counters for transmission and reception regarding to wireless and Ethernet networks on this page. Figure 45 Statistics Page DDNS Dynamic DNS is a service that provides you with a valid, unchanging internet domain name (an URL) to go with that (possibly ever changing) IP-address. -
Page 59: Time Zone Setting
Time Zone Setting You may synchronize System Log’s timestamp with a publish time server over the Internet. Figure 47 Time Zone Settings Chapter 5 Management Page 51... -
Page 60: Denial-Of-Service
Denial-of-Service The firewall must be active to protect against Denial of Service (DoS) attacks. A denial-of-service attack is characterized by an explicit attempt by hackers to prevent legitimate users of a service from using that service. Figure 48 Denial-of-Service Settings Chapter 5 Management Page 52... -
Page 61: Log
You can view logs and alert messages in the screen. Once the log table is full, old logs are deleted as new logs are created. Enable the system log, and select the category event that you need. Figure 49 System Log Page Upgrade Firmware This page allows you upgrade firmware via WEB. -
Page 62: Save/Load Setting
Please make sure that you have downloaded the latest and correct firmware from the product support website and store it in local drive before upgrading the firmware of the IEEE 802.11n (Draft 2.0) 2.4GHz Wireless Broadband Router. To upgrade the latest firmware, complete the following: Using browser to access (http://192.168.1.254) AP’s main page. -
Page 63: Password
Do not power off the unit when it is being resetting. Password Here allow you to change the Access Point’s password, do the following: Figure 52 Password Settings 1. To change the current password, choose the “Password” option from the “Management” section in the Wireless Router’s left page. -
Page 64: Chapter 6 Universal Repeater And Wisp Concept
Chapter 6 Universal Repeater and WISP Concept Universal Repeater The Wireless Broadband Router supports Universal Repeater Mode to extend the wireless network coverage. When enable Universal Repeater Mode, the Wireless Broadband Router acts as a Wireless Access Point and Wireless Client at the same time. It uses Wireless Client function to connect to a Root AP (any AP) and uses AP function to service all wireless stations within its coverage. - Page 65 Step5. After configure all settings, press “Apply Changes”. Figure 54 Universal Repeater Configure Progress Chapter 6 Universal Repeater and WISP Concept Page 57...
-
Page 66: Wisp Mode
WISP Mode The Wireless Broadband Router provides the Wireless ISP Mode to let user access Internet via wireless WAN. In this mode, all Ethernet will be bridge together and wireless will be client mode to connect to the ISP’s Access Point and access Internet. Follow the steps to configure the WISP Mode. -
Page 67: How To Configure Wisp Mode
How to Configure WISP Mode Step1. Configure to Client Mode under Wireless Basic Settings page, and input SSID of the AP1 that connect to ISP. Figure 56 WISP Step1 - Setup the Mode Settings Chapter 6 Universal Repeater and WISP Concept Page 59... - Page 68 Step2. Configure the Operation Mode to Wireless ISP. Figure 57 WISP Step2 - Setup Operation Mode Settings Step3. Configure the WAN Access Type that the ISP provided via AP1. Figure 58 WISP Step3 - Setup WAN Port Settings Chapter 6 Universal Repeater and WISP Concept Page 60...
-
Page 69: Chapter 7 Limited Warranty
Chapter 7 Limited Warranty This Warranty constitutes the sole and exclusive remedy of any buyer or reseller’s equipment and the sole and exclusive liability of the supplier in connection with the products and is in lieu of all other warranties, express, implied or statutory, including, but not limited to, any implied warranty of merchantability of fitness for a particular use and all other obligations or liabilities of the supplier. - Page 70 Please complete the information below and include it along with your products. Name: Title: Company: Telephone: Fax: Email: City/State/ZIP code: Country: Product Name: Serial Number: MAC Address: Invoice Date: Product Description: If you have any further questions, please contact your local authorized reseller for support. Chapter 7 Limited Warranty Page 62...
-
Page 71: Chapter 8 Service Support
Chapter 8 Service Support If you have any further trouble using the Wireless Broadband Router or you would like to require additional support, you may contact the supplier for support. Chapter 8 Service Support Page 63...
Need help?
Do you have a question about the XN-2050 and is the answer not in the manual?
Questions and answers