Advertisement
Table of Contents
EVENT BUDGET TENT
ASSEMBLY HARDWARE
D.
B.
E.
C.
FRAME & CANOPY ASSEMBLY
DISCLAIMER: Tents should always be staked down with Premium Tent Stake Kit and weighed down. Tents should not be used in inclement
weather, including thunderstorms, heavy rains, lightning, and high winds. No grill or any type of open flame is to be used under or near the
tent. User must read and observe assembly instructions. If this is not done correctly, it may result in damage to the unit, injury, or death, and
all warranties will be void. All warranties will be void if hardware is used with any print not produced by us. Properly care for prints to keep
them in great condition. Prints should never be dragged along the ground or stored without being properly folded and free from moisture.
Make sure print is completely dried from any weather, and fold and store in a clean, dry place. We don't recommend storing print on frame.
A. Frame
A.
B. Canopy
C. (4) Steel Stakes
D. Carry Bag
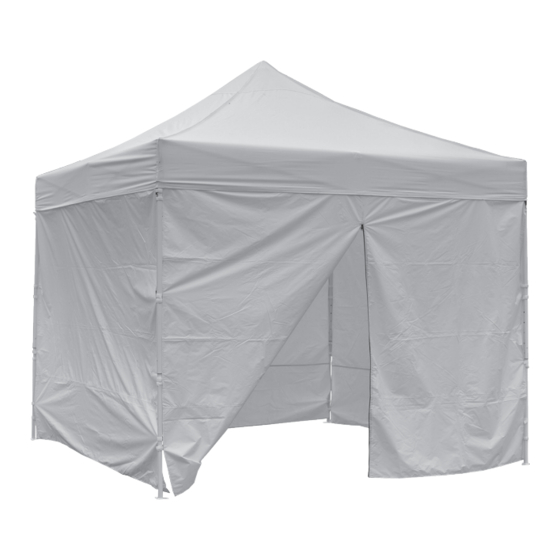
E. (4) Walls (Optional)
1.
3.
5.
7.
Assembly Instructions
NOTE: It is recommended to use 2+ people for tent assembly.
1. Set the frame on the ground and expand approximately one
third of the way outward.
2.
2. Place the canopy over the frame. Make sure the corners of
the canopy line up with the corners of the frame.
3. Attach the loop adhesive, located on the inside of the
canopy, to the hook adhesive located around the top corners of
the frame.
4. Completely expand the frame outward. The locking clips will
4.
snap into place to indicate full expansion of the frame.
5. Line up hook-and-loop fasteners on inside of the canopy
with the frame to help keep canopy secure.
6. Pull up the legs of the frame to the desired height, making
sure the locking clips snap into place.
7. If the tent is being used in grass or soil, use a rubber mallet
6.
to hammer the stakes through the holes in the feet to keep the
frame secure.
8. Tent frame and canopy assembly is now complete.
NOTE: Remove canopy prior to collapsing and storing the
frame. Do not store the frame with the canopy attached.
8.
R1.111518
Advertisement
Table of Contents

Related Manuals for Vispronet EVENT BUDGET TENT

Summary of Contents for Vispronet EVENT BUDGET TENT
- Page 1 EVENT BUDGET TENT Assembly Instructions R1.111518 ASSEMBLY HARDWARE A. Frame B. Canopy C. (4) Steel Stakes D. Carry Bag E. (4) Walls (Optional) FRAME & CANOPY ASSEMBLY NOTE: It is recommended to use 2+ people for tent assembly. 1. Set the frame on the ground and expand approximately one third of the way outward.
- Page 2 EVENT BUDGET TENT Assembly Instructions R1.111518 WALL ASSEMBLY 1. When adding tent wall(s), the legs of the frame must be at their maximum extension height. 2. Attach the wall’s hook adhesive to the loop adhesive on the tent valance. 3. Secure the sides of the wall by wrapping the hook-and-loop adhesive tabs around the tent legs.
Need help?
Do you have a question about the EVENT BUDGET TENT and is the answer not in the manual?
Questions and answers