Table of Contents
Advertisement
Quick Links
Monteringsanvisning
Uniguard
UG-3-O-MB
Superflow
Montering och placering.
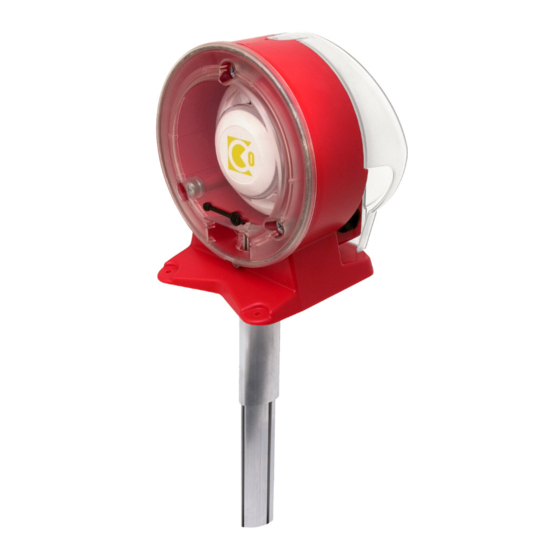
Uniguard skall placeras i flödesriktningen, enligt riktningspilen
(se Uniguardfotens form eller ovansidan huset). Uniguard är
lägesoberoende och kan monteras på valfri sida av kanalen.
Vi rekommenderar att Uniguard monteras på minst samma avstånd
från kyl- och värmebatterier eller luftfuktare som luftflödesgivare.
Den bör dessutom placeras så, att avståndet till närmaste störning
i kanalen (t.ex. böj, filter eller spjäll) - i luftflödesriktningen räknat
- är minst lika stort som 3 x kanalens diameter. Närmaste placering
efter sådan störning bör vara 5 x kanaldiametern.
Observera fotens form av en pil, vilken skall peka i luftströmmens riktning.
Note the foot's shape of an arrow, which shall be installed in the air flow direction.
d
h
Exempel på installation
vid böjd trumdel.
Example of location after
change of duct direction.
5 d
h
Hydraulisk diameter
Exempel på installation
med störkällor:
- fläkt
- spjäll
- ljuddämpare
- batteri
- luftbehandlingsaggregat
- kanalböj
- avgrening
- dimensionsförändring
Phone: +46 31-69 53 00 Fax: +46 31-29 32 91 info@calectro.se www.calectro.se
Installation instruction
SV
Uniguard
Mounting and positioning.
The Uniguard should be installed with the air flow direction
arrows (see the Uniguard foot's shape or on the housing top)
corresponding to the direction of the air flow in the duct. The
Uniguard can be installed on any side of the duct.
We recommend that the Uniguard is mounted at an equal distance
from heating, cooling, or humidity devices, and similar to the siting
for flow monitors.
A distance of 3 times the duct diameter should be left before a
damper, filter or change of the duct direction, and 5 times the
diameter after these devices.
Exempel på installation
vid returluftintag.
Returluftintag.
Example of location after
Air inlet.
air inlet.
5 d
h
CIRKULÄR KANAL
CIRCULAR DUCT
d = D
h
d =
h
Ø D
MIN 5xd h
MIN 3xd h
UG-3
UG-3
FLÄKT
FAN
MIN 3xd h
MIN 5xd h
UG-3
MIN 5xd h
UG-3
MIN 3xd h
AVGRENING
LUFTBEHANDLINGSAGGREGAT
DUCT BRANCHING
AIR HANDLING UNIT
UG-3-O-MB
Superflow
Vid stora temperaturskillnader t.ex. utomhus eller på kallvindar
måste Uniguard isoleras från omgivande luft. Se punkt 10.
Where large temperature variations occur, e.g. on outdoor
locations or in areas subject to external temperatures (roof,
attics), the Uniguard should be insulated, see para 10.
REKTANGULÄR KANAL
RECTANGULAR DUCT
2xHxW
H+W
H
W
MIN 5xd h
UG-3
KANALBÖJ
DUCT BEND
UG-3
UG-3
FRÅNLUFT / RETURN AIR
TILLUFT / INLET AIR
EN
Hydraulic diameter
Example of installation at
sources of interference:
- fan
- damper
- silencer
- battery
- air handling unit
- duct bend
- duct branching
- duct narrowing or expansion
Advertisement
Table of Contents

Summary of Contents for CALECTRO Uniguard Superflow UG-3-O-MB
- Page 1 MIN 5xd h UG-3 - dimensionsförändring - duct narrowing or expansion FRÅNLUFT / RETURN AIR MIN 3xd h TILLUFT / INLET AIR AVGRENING LUFTBEHANDLINGSAGGREGAT DUCT BRANCHING AIR HANDLING UNIT Phone: +46 31-69 53 00 Fax: +46 31-29 32 91 info@calectro.se www.calectro.se...
- Page 2 Borra hål i kanalen: Drill a hole in the duct: • Håltagning utan UG-beslag, ø 38 mm. • Without UG-bracket, ø 38 mm. • Håltagning med UG-beslag och/eller venturirör • With UG-bracket and/or venturi pipe with booster med monterad fläkt, ø 51 mm (se punkt 11). fan, ø...
- Page 3 • Montera röret och detektorn på kanalen. • Mount the pipe and the detector on the duct. • Fäst Uniguard på 3 punkter vid pilarnas • Secure the bottom of the Uniguard with markering. the 3 screws, positions marked. NOTE - IMPORTANT! OBS VIKTIGT! The air flow direction arrows (see Riktningspilarna (se Uniguardfotens...
-
Page 4: Electrical Installation
Elinstallation. Electrical installation. Snäpplås. Snap locking. • Öppna locket över kopplingshuset genom • Remove the cover by opening the snap att lyfta på snäpplåset. locking. • För in kabeln genom valfri Klikseal • Enter the cable through one of the kabelgenomföring. -
Page 5: Modbus Configuration
Modbuskonfigurering. Modbus configuration. DIPSWITCH Pos. Address 0=1 (binary) Address 0=0 (binary) Address 1=1 (binary) Address 1=0 (binary) Address 2=1 (binary) Address 2=0 (binary) Address 3=1 (binary) Address 3=0 (binary) Address 4=1 (binary) Address 4=0 (binary) Address 5=1 (binary) Address 5=0 (binary) Address 6=1 (binary) Address 6=0 (binary) Address 7=1 (binary) - Page 6 Funktionskontroll. Test of detector. Kontrollera detektorn med Check the detector with smoke detector rökdetektorprovare RDP-300. tester RDP-300. • För "testhålspluggen" åt sidan och spraya • Move the "test hole plug" to the side and därefter kortvarigt. briefly release a spray of aerosol. Vid utlöst larm lyser dioden röd på...
- Page 7 Anvisningsskylt bör monteras. For outdoor location use protection Use insulation cover of 100-200 mm and cover e.g. Calectro´s UG-COVER. protect the entire Uniguard. A sign should be used to show location of the detector. UG-bracket for circular or insulated UG-beslag, rund eller isolerad plan kanal.
-
Page 8: Final Checks
Alternativt returnera den till Calectro för återvinning. unsorted waste. Alternatively return it to Calectro for recycling.

Need help?
Do you have a question about the Uniguard Superflow UG-3-O-MB and is the answer not in the manual?
Questions and answers