Table of Contents
Advertisement
Quick Links
INSTRUCTIONAL BOOK
CARE & USE/INSTALLATION
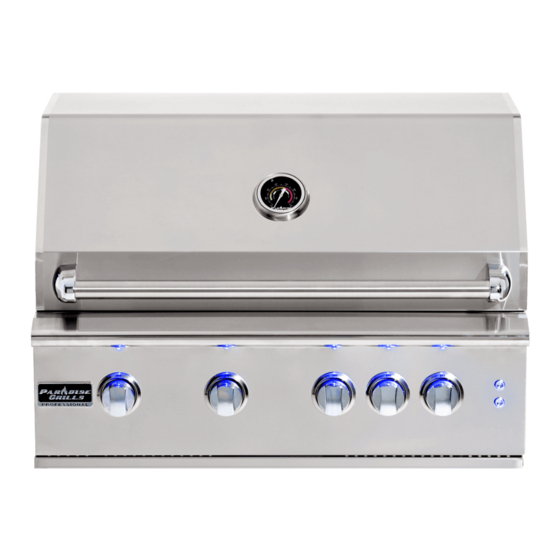
Model GS-32 Propane/NG, Model GSL-32 Propane / NG
and Model GSL-SB2 Propane/NG
DANGER - IF YOU SMELL GAS:
I - Shut off the gas supply to the appliance at its
source.
2 - Extinguish any open flames.
3 - Open grill hood to release any accumulation
of gas vapor.
4 - If a gas odor persists, Keep away from
your appliance a n d contact your gas supplier
or fire department immediately.
PLEASE LEAVE THESE INSTRUCTIONS WITH THE CONSUMER.
PLEASE RETAIN THESE INSTRUCTIONS FOR FUTURE REFERENCE
ATTENTION INSTALLER:
ATTENTION CONSUMER:
- CONTACT INFORMATION -
735 Central Florida Pkwy, Ste#102
Orlando, FL 32824
800-604-2023
www.myparadisegrill.com
Paradise Grilling Systems Instructional Book
WARNING
I – Do not store or use gasoline or other
flammable liquids or vapor in the vicinity of this
or any other appliance
2 – An LP cylinder not connected for use shall
not be stored in the vicinity of this or any other
appliances.
Advertisement
Table of Contents

Summary of Contents for Paradise Datacom GS-32
- Page 1 INSTRUCTIONAL BOOK CARE & USE/INSTALLATION Model GS-32 Propane/NG, Model GSL-32 Propane / NG and Model GSL-SB2 Propane/NG DANGER - IF YOU SMELL GAS: WARNING I – Do not store or use gasoline or other I - Shut off the gas supply to the appliance at its source.
- Page 2 THIS MANUAL APPLIES TO THE FOLLOWING: Model:GS-32N/P PREMIUM GRILL Model: GSL-32N/P PROFESSIONAL GRILL BBQ Dimensions 30 3/8 x 8 x 21" BBQ Dimensions 30 3/8 x 8 x 21" BTU Output 12,000 BTU per Burner x4 BTU Output 12,000 BTU per Burner x4 Infrared Back Burner 12,000 BTU x1 Infrared Back Burner...
- Page 3 Model: GSL-SB2 N/P DOUBLE SIDE BURNER BBQ Dimensions 12 Y2 20 5/8 8" Total BTU Output 24,000 BTU Number of Burners 12,000 BTU Orifice Size mm LP 1.05mm Orifice Si z e mm NG 1.6mm Drip tray Stainless Steel Burner Aluminum &...
-
Page 4: Safety And Installation Instructions
Safety and Installation Instructions When using your grill, please read and follow these basic precautions: GRILL INSTALLATION This gas grill must be installed in accordance with all local codes. If installation is planned in an area with no local codes, the gas grill must be installed in accord with the National Fuel Gas Code ANSI Z223.1 and storage and handling of liquefied petroleum gases, ANSI/NFPA 58 or CSA B149.1 natural gas and propane installation code. - Page 5 Safety and Installation Instructions Location of your Barbecue Most importantly, this is an outdoor appliance. Ensure your barbecue is positioned safely away from anything that can catch fire. Under no circumstance is this barbecue to be used indoors. This includes garages or any other enclosed area.
-
Page 6: Safety And Installation Warnings
Maintenance Access: When your barbecue is installed, you should be able to access the gas supply line including the gas piping or hose, gas regulator, gas cylinder and any shut off valves. Partial Enclosures: Many backyards have areas that are partially closed off, such as balconies and pergolas. - Page 7 Keep any electrical supply cord and fuel supply hose away from any heated surfaces and dripping grease. Do not twist the gas supply hose. Before each use, visually inspect the gas supply hose for cracks, cuts or excessive wear. Replace the hose if necessary. Never test the grill for gas leaks using a lighted match or any other open flame;...
-
Page 8: Natural Gas Requirements
with the unit and set to 11" water column pressure. The gas valves used in the grills are preset at the factory for Natural Gas or Liquid Propane operation. Please contact your dealer and use a licensed contractor or installer to convert your grill to a different gas type. -
Page 9: Checking For Gas Leaks
Connection Slide the grill forward to gain access to the regulator and gas connection point in the rear. Connect a suitable natural gas flex connector to the grill regulator. Check the grill controls to ensure all control valves are in the full OFF position. Turn on the main gas supply and check all connections for leaks using soapy water as Described in the leak testing procedure section. - Page 10 Apply the leak-testing solution by spraying it on joints of the gas delivery system. Blowing bubbles in the soap solution indicates that a leak is present. Stop a leak by tightening the loose joint or by replacing the faulty part with a replacement part recommended by the manufacturer.
-
Page 11: Lp Tank Requirements
Liquid Propane (LP) Gas Requirements LP TANK REQUIREMENTS: a collar to protect the cylinder threads on the customer supplied tank. an arrangement for gas vapor withdrawal. a safety relief device having direct communication with the vapor space of the cylinder. a method of mounting. -
Page 12: Never Use An Open Flame To Check For Leaks
Transporting and Storing LP Gas Transport only one cylinder at a time. Ensure the cylinder is secured in an upright position with the control valve turned off and the dust cap in place. Store cylinders outdoors and out of reach of children. -
Page 13: Installing The Grill In A Bbq Island
Installing the Grill in a BBQ Island You will need a second person to help you avoid damaging the grill or your barbecue island. Before installing a grill in any island or cut out, make sure that the opening is not bigger than the outside frame of the grill unit. -
Page 14: Building Bbq Specifications
Minimum clearance to adjacent combustible construction at 14” from sides & 16” from back MODEL DESCRIPTION WIDTH DEPTH HEIGHT 21 1/4 ” 8 1/2” 4 Burne r 30 5/8” GS-32 30 5/8 ” 21 1/4” 8 1/2” GSL-32 4 Burner Lighted 20 3/4” Side Burne r GSL-SB2 10 3/4"... - Page 15 Installation Method for Propane Installation Method for Natural Gas Connection Method for Dual Side Burner When connecting your Side Burner to LP or NG No Regulator is required on the Side Burner. Paradise Grilling Systems Instructional Book...
-
Page 16: Bbq Specifications
BBQ SPECIFICATIONS NOTE: “ALWAYS” have equipment measured by Contractor before building. NOTE: Check with City and Fire department for Local Building Codes. A Permit may be required for outdoor Kitchen Construction. Paradise Grilling Systems Instructional Book... -
Page 17: Electrical Precautions
ELECTRICAL PRECAUTIONS: Extension cords are available and may be used if care is exercised in their use. If an extension cord is used: • the marked electrical rating of the cord set or extension cord should be at least as great as the electrical rating of the appliance, and, •... - Page 18 GENERAL USE AND CARE NOTE: The manufacturer cannot be held responsible for damage or injury caused by improper use of this appliance. ➢ Be certain your appliance is properly installed and grounded by a qualified technician in accordance with applicable codes. To guarantee the electrical safety of this appliance, continuity must exist between the appliance and an effective grounding system.
-
Page 19: Unit Installation
Safety and Installation Instructions UNIT INSTALLATION: Your Paradise Grilling Systems Grill comes pre-assembled and requires very little setup. We do however; recommend the use of professional help during the installation of your unit as improper installation may affect your warranty. Remove the unit from the box along with all accessories and check that no damage has occurred to the unit or any parts. -
Page 20: Lighting Instructions
Lighting Instructions Caution: Never operate the grill unattended. Do not operate the rotisserie burner with the hood closed. Prior to using your grill, verify that all of the following is correct: ❒ The burner tube is free of insects and insect nests, webs, etc. ❒... -
Page 21: Lighting The Grill
Lighting the Grill 1. Open the hood. 2. Keep your face as far away from the burners as possible. 3. Slowly rotate the burner knob counter-clockwise to the high position. 4. You will hear a loud click as the electronic lighter produces a spark. Listen for the sound of the gas igniting. -
Page 22: First Time Operation
First Time Operation MAIN BURNERS: Before cooking with your grill for the first time, burn off any foreign matter and rid the unit of any odors by operating the unit for about five minutes. When lit, the flame should have a bluish color to it. It may have a tint of yellow and adjustment to the air shutters can be made to obtain a blue flame and proper gas flow. - Page 23 Fuel (Gas) Conversion Instructions for Paradise Grilling Systems Gas grills. CAUTION: This should only by performed by a licensed gas professional. NATURAL GAS TO PROPANE CONVERSION - Main Burners: Currently all grills are supplied with a regulator set at a pressure of 4” water column. Fuel Conversion of Main Burners: 1.
- Page 24 10. Replace burner flame tamers and cooking grills 11. If necessary, adjust the LOW flame setting screw located under the knob on the front of the valve Rear Burner For the Summer Sizzler 4 Burner, replace the back burner orifice by removing the plate on the rear of the BBQ and carefully removing the fitting.
-
Page 25: Warranty Registration
Warranty Registration If you have purchased a Paradise Grilling Systems Grill you must maintain your original receipt to get service on the grill. The warranty is for original owners only and cannot be transferred to new owners. You should retain your sales slip or invoice. All Natural and LP Gas grills must have a qualified installer complete the installation for the warranty to be in effect. - Page 26 Paradise Grilling Systems Instructional Book...
- Page 29 GSL Double Side Burner – GSL-SB2...
- Page 30 Thank you for your purchase of this great product by Paradise Grilling Systems. We know you will have many years of enjoyment using this grill and have many fun and memorable times around the barbecue. Family and fun is what this is all about and creating memories that will last a lifetime.
Need help?
Do you have a question about the GS-32 and is the answer not in the manual?
Questions and answers