
Subscribe to Our Youtube Channel
Related Manuals for Aaeon POP-150


Summary of Contents for Aaeon POP-150
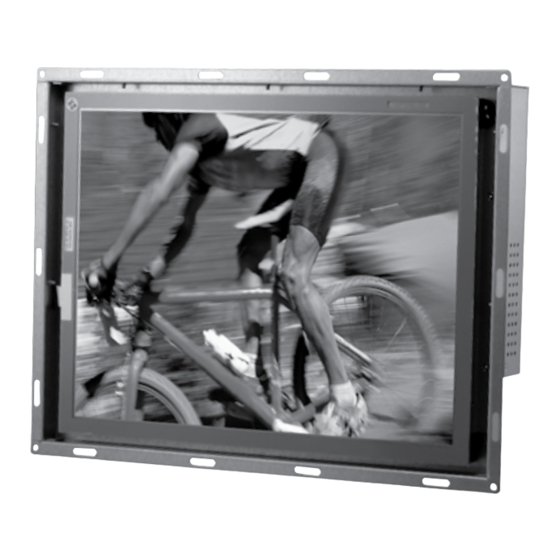
- Page 1 P o i n t o f P r o m o t i o n P O P - 1 5 0 POP-150 ® ® Intel Celeron 600MHz/ 1.5GHz Processor Point of Promotion Panel PC With 15” 4:3 TFT LCD POP-150 Manual 1st Ed. February 2009...
- Page 2 AAEON assumes no liabilities resulting from errors or omissions in this document, or from the use of the information contained herein. AAEON reserves the right to make changes in the product design without notice to its users.
- Page 3 P o i n t o f P r o m o t i o n P O P - 1 5 0 Acknowledgments All other products’ name or trademarks are properties of their respective owners. • Award is a trademark of Award Software International, Inc. •...
- Page 4 P O P - 1 5 0 Packing List Before you begin operating your PC, please make sure that the following materials are enclosed: • POP-150 Panel PC • PS/2 Y type keyboard / mouse cable • CD-ROM for manual (in PDF format) If any of these items should be missing or damaged, please contact your distributor or sales representative immediately.
- Page 5 P o i n t o f P r o m o t i o n P O P - 1 5 0 Safety & Warranty 1. Read these safety instructions carefully. 2. Keep this user's manual for later reference. 3.
- Page 6 P o i n t o f P r o m o t i o n P O P - 1 5 0 The equipment does not work well, or you cannot get it to work according to the user’s manual. The equipment has been dropped and damaged.
- Page 7 P o i n t o f P r o m o t i o n P O P - 1 5 0 Below Table for China RoHS Requirements 产品中有毒有害物质或元素名称及含量 AAEON Panel PC/ Workstation 有毒有害物质或元素 部件名称 铅 汞 镉 六价铬...
-
Page 8: Table Of Contents
P o i n t o f P r o m o t i o n P O P - 1 5 0 Contents Chapter 1 General Information 1.1 Introduction..............1-2 1.2 Specification .............. 1-3 1.3 Dimension ..............1-5 Chapter 2 Hardware Installation 2.1 Open-frame Mounting Installation ...... -
Page 9: Chapter 1 General Information
P o i n t o f P r o m o t i o n P O P - 1 5 0 Chapter General Information 1- 1 Chapter 1 General Information... -
Page 10: Introduction
TFT LCD display, onboard Ethernet controller, multi-COM port interfaces and an audio controller. With a built-in Compact Flash socket, the POP-150 is as compact and user friendly as a multi-function computer. In addition, its Open-frame design makes it fitted to a variety of cutout installation in building & public field. In addition, it can be wall mounted or DIN Rail mounted. -
Page 11: Specification
P o i n t o f P r o m o t i o n P O P - 1 5 0 1.2 Specification System ® ® Onboard Intel Celeron 1.5GHz/600MHz Processor System Memory 512MB ® LCD / CRT Controller Intel 852GM Ethernet... - Page 12 P o i n t o f P r o m o t i o n P O P - 1 5 0 Gross Weight 15.4 lb (7Kg) Environmental Operating Temperature 32 F~104 F (0 C~40 Storage Temperature F ~140 F (-20 C~60 Operating Humidity...
- Page 13 P o i n t o f P r o m o t i o n P O P - 1 5 0 Note: All AAEON's LCD products are manufactured with High precision technology. However, in all LCD panels there maybe a small number of defective pixels that do not change color.
- Page 14 P o i n t o f P r o m o t i o n P O P - 1 5 0 1.3 Dimension Unit: mm 1- 6 Chapter 1 General Information...
-
Page 15: Chapter 2 Hardware Installation
P o i n t o f P r o m o t i o n P O P - 1 5 0 Chapter Hardware Installation Chapter 2 Quick Installation Guide... -
Page 16: Open-Frame Mounting Installation
P o i n t o f P r o m o t i o n P O P - 1 5 0 2.1 Open-frame Mounting Installation The display panel can be mounted into the wall. You will need at least 4 screws and Follow the steps below: Step 1: Prepare required screws on the wall as the hole for mounting on the Bezel of Panel PC... -
Page 17: Com 1/2 Connector
P o i n t o f P r o m o t i o n P O P - 1 5 0 2.2 COM 1 / 2 Connector Signal Signal DCD1 RXD1 TXD1 DTR1 DSR1 RTS1 CTS1 COM2/ RS-422 Mode Signal Signal TXD-... -
Page 18: Chapter 3 Award Bios Setup
P o i n t o f P r o m o t i o n P O P - 1 5 0 Chapter Award BIOS Setup Chapter 3 Award BIOS Setup... - Page 19 3. The CMOS memory has lost power and the configuration information has been erased. The POP-150 CMOS memory has an integral lithium battery backup for data retention. However, you will need to replace the complete unit when it finally runs down.
- Page 20 P o i n t o f P r o m o t i o n P O P - 1 5 0 3.2 Award BIOS Setup Awards BIOS ROM has a built-in Setup program that allows users to modify the basic system configuration. This type of information is stored in battery-backed CMOS RAM so that it retains the Setup information when the power is turned off.
- Page 21 Save CMOS value changes to CMOS and exit setup. Exit Without Saving Abandon all CMOS value changes and exit setup. You can refer to the "AAEON BIOS Item Description.pdf" file in the CD for the meaning of each setting in this chapter.
-
Page 22: Chapter 4 Driver Installation
P o i n t o f P r o m o t i o n P O P - 1 5 0 Chapter Driver Installation 4 - 1 Chapter 4 Driver Installation... - Page 23 P o i n t o f P r o m o t i o n P O P - 1 5 0 There are several installation ways depending on the driver package under different Operating System application. The Autorun program will run automatically. However, if the Autorun program cannot be run smoothly, please follow the sequence below to install the drivers: Step 1 - Intel INF Update for Windows 9x-2003 Driver...
- Page 24 P O P - 1 5 0 4.1 Installation Insert the POP-150 CD-ROM into the CD-ROM drive and install the drivers from Step 1 to Step 5 in order. Step 1 – Install Intel INF Update for Windows 9x-2003 Driver 1.
- Page 25 P o i n t o f P r o m o t i o n P O P - 1 5 0 5. The system will help you install the driver automatically Step 4 – Install Realtek AC97 codec Driver 1.
Need help?
Do you have a question about the POP-150 and is the answer not in the manual?
Questions and answers