Table of Contents
Advertisement
Visit the Frigidaire Web Site at:
http://www.frigidaire.com
Gas
Range
Welcome .......................................... 2
ES510 Control, Self-Cleaning Oven
Important Safety Instructions .....3-4
with Deep Well Style Cooktop
Features at a Glance ...................... 5
Before Setting Oven Controls ....... 6
Setting Surface Controls ............... 7
Warming Drawer Controls ..........8-9
Control Pad Features ................... 10
Setting Oven Controls ............. 11-24
Self Cleaning ........................... 25-27
Adjusting Oven Temperature ....... 27
General Care & Cleaning ....... 28-30
Questions or for Service Call:
31
1-800-944-9044
Solutions to Common Problems ........................
(U.S.)
1-800-668-4606
(Canada)
Warranty ......................... Back Page
READ AND SAVE THESE INSTRUCTIONS
p/n 316417126 (0605)
Advertisement
Table of Contents

Related Manuals for Frigidaire PLGFZ390EC


Summary of Contents for Frigidaire PLGFZ390EC
-
Page 1: Table Of Contents
Visit the Frigidaire Web Site at: http://www.frigidaire.com Range Welcome ... 2 ES510 Control, Self-Cleaning Oven Important Safety Instructions ...3-4 with Deep Well Style Cooktop Features at a Glance ... 5 Before Setting Oven Controls ... 6 Setting Surface Controls ... 7 Warming Drawer Controls ...8-9... -
Page 2: Welcome
DO NOT cut or remove the grounding prong from this plug. For personal safety, the range must be properly grounded. For maximum safety, the power cord must be plugged into an electrical outlet that is correctly polarized and properly grounded. -
Page 3: Important Safety Instructions
Ask your dealer to recommend a qualified technician and an authorized repair service. Know how to disconnect the power to the range at the circuit breaker or fuse box in case of an emergency. • User servicing—Do not repair or replace any part of the appliance unless specifically recommended in the manuals. -
Page 4: Important Safety Instructions
• Do Not Heat Unopened Food Containers—Buildup of pressure may cause container to burst and result in injury. • Remove the oven door from any unused range if it is to be stored or discarded. IMPORTANT—ELECTRIC IGNITION MODELS ONLY: Do not attempt to operate the oven during a power failure. -
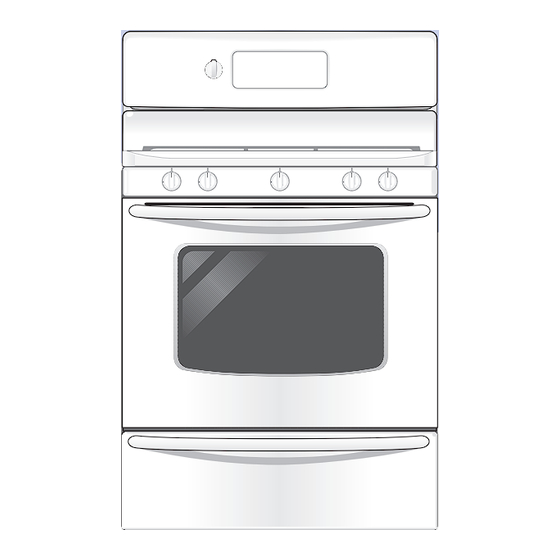
Page 5: Features At A Glance
26. Broil Pan (some models). 27. Broil Pan Insert (some models). 28. Roasting Rack. 29. Leveling Legs & Anti-tip Bracket (included). Burner Drip pans (some models). NOTE: The features of your range may vary according to model type & color. Features At A Glance... -
Page 6: Before Setting Oven Controls
Before Setting Oven Controls Fig. 1 Oven Racks Your range is equipped with one or more Flat Oven Rack(s). Place the rack(s) into the positions shown in Fig. 2. Refer to the following Recommended Rack Positions for Broiling, Baking & Roasting for complete information. -
Page 7: Setting Surface Controls
Setting Surface Controls Setting Surface Controls Your range may be equipped with different sized surface burners. The ability to heat food quicker and in larger volumes increases as the burner size increases. The SIMMER burner (some models) is best used for simmering delicate food items such as sauces, etc. -
Page 8: Warming Drawer Controls
Setting Warming Drawer Controls Arranging Warming Drawer Rack Positions The rack can be used in 2 ways: • In the upright position to allow low profile food items to be placed both under and on top of the rack (for example, rolls or biscuits on top of the rack and a casserole dish underneath). - Page 9 To Replace the Warming Drawer: 1. Pull the bearing glides to the front of the chassis glide (See Fig. 2). 2. Align the glide on each side of the drawer with the glide slots on the range. Fig. 1 3. Push the drawer into the range until levers “click” (approximately 2”). Pull the drawer open again to seat bearing glides into position.
-
Page 10: Control Pad Features
READ THE INSTRUCTIONS CAREFULLY BEFORE USING THE OVEN. For satisfactory use of your oven, become familiar with the various features and functions of the oven as described below. Detailed instructions for each feature and function follow later in this Use & Care Guide. OVEN LIGHT—Use to turn the... -
Page 11: Setting Oven Controls
12 or 24 hour time of day operation. The clock has been preset at the factory for the 12 hour operation. When the range is first plugged in, or when the power supply to the range has been interrupted, the timer in the display will flash with power failure "PF"... - Page 12 Setting Continuous Bake or 12 Hour Energy Saving The TIMER ON/OFF and CLEAN control has a factory preset built-in 12 Hour Energy Saving feature that will shut off the oven if the oven control is left on for more than 11 hours and 59 minutes. The oven can be programmed to override this feature for Continuous Baking. INSTRUCTIONS To set the control for Continuous Bake or 12 Hour Energy Saving features:...
- Page 13 Setting Oven Lockout Feature pad controls the Oven Lockout feature. The Oven Lockout feature automatically locks the oven door, prevents the Warming Drawer and most oven controls from being turned ON. It does not disable the clock, Kitchen Timer or the interior oven light.
- Page 14 INSTRUCTIONS To change control from normal sound operation to silent control operation: 1. To tell if your range is set for normal or silent operation press and hold for 7 seconds. "0:00" will appear and "DELAY" will flash in the display (Fig. 1).
- Page 15 Setting Bake The BAKE pad controls normal baking. The oven can be programmed to bake at any temperature from 170°F to 550°F (The sample shown below is for 350°F). INSTRUCTIONS To set the Bake Temperature to 350°F: 1. Arrange interior oven racks and place food in oven. 2.
- Page 16 Setting Timed Bake The BAKE and BAKE TIME will turn the oven OFF after cooking for the desired amount of time you selected. INSTRUCTIONS To program the oven to begin baking immediately and to shut off automatically: (example below to bake at 350°F for 50 minutes): 1.
- Page 17 Setting Delayed Timed Bake The BAKE , BAKE TIME timer of the Delayed Timed Bake will turn the oven ON and OFF at the time you select in advance. INSTRUCTIONS To program the oven for a Delay Start (Delayed Timed Bake) and to shut off automatically (example for baking at 350°F for 50 minutes and starting at 5:30): 1.
- Page 18 Setting Broil pad controls the Broil feature. When broiling, heat radiates downward from the oven broiler for even coverage. The Broil feature is preset to start broiling at 550°F however, the Broil feature temperature may be set at any temperature between 400°F and 550°F.
- Page 19 Benefits of Convection Bake: —Some foods cook up to 25 to 30% faster, saving time and energy. —Multiple rack baking. —No special pans or bakeware needed. Setting Convection Bake The CONV BAKE pad controls the Convection Bake feature. Use the Convection Bake feature when cooking speed is desired. The oven can be programmed for Convection Bake at any temperature between 325°...
- Page 20 Setting Convection Roast The CONV ROAST pad is designed to give optimum cooking performance for this feature. The Convection Roast pad combines a cook cycle with the convection fan and element to roast meats and poultry. Preheating is not necessary for meats and poultry.
- Page 21 To set the Convection Convert Feature CONV CONVERT pad is used to automatically convert a standard baking recipe for convection baking. When set properly, this feature is designed to display the actual converted (reduced) temperature in display. Convection Convert may ONLY be used with a Bake, Timed Bake or a Delayed Timed Bake setting. When used with a Timed Bake or a Delayed Timed Bake setting, the Convection Convert feature will display a "CF"...
- Page 22 Using the Favorite Setting Feature FAVORITE SETTING pad is used to record and recall your favorite recipe settings. This feature may store and recall from 1 to 3 different settings. The Favorite Setting feature may be used with Bake or a Timed Bake. This feature will not work with any other function including a Delayed Timed Bake setting.
- Page 23 Setting the Sabbath Feature (for use on the Jewish Sabbath & Holidays) BAKE TIME and START TIME pads are used to set the Sabbath feature. The Sabbath feature may only be used with the pad. The oven temperature may be set higher or lower after setting the Sabbath feature (the oven temperature adjustment feature should be used only during Jewish Holidays), however the display will not visibly show and no audible tones will be provided when a change occurs.
-
Page 24: Setting Oven Controls
Setting the Sabbath Feature (cont’d) It is recommended that any oven temperature change with the Sabbath feature activated be followed with 2 presses of the START pad. This will insure the oven remains ON even if the attempt to set the oven temperature was lower or higher than the oven control can accept. -
Page 25: Self Cleaning
During the Self-Cleaning cycle, the outside of the range can become very hot to the touch. DO NOT leave small children unattended near the appliance. - Page 26 2 hours (using Speed Clean), 3 hours (using Clean) to 4 hours (using Maxx Clean). During the Self-Cleaning cycle, the outside of the range can become very hot to the touch. DO NOT leave small children unattended near the appliance.
-
Page 27: Adjusting Oven Temperature
INSTRUCTIONS When the Self-Clean cycle is done: 1. The time of day,"DOOR LOCKED" and "CLEAN" icon will remain in the display. 2. Once the oven has cooled down for approximately 1 HOUR, and the "DOOR LOCKED" icon is no longer displayed, the oven door can then be opened. - Page 28 Easy Care™ Stainless Your range finish is may be made with Easy Care™ Stainless Steel (some models). Clean the stainless with warm soapy water using a clean sponge or cloth. Rinse with clean water and dry Steel (some models) with a soft clean cloth.
- Page 29 Cleaning the Contoured Cooktop Well Areas, Burner Cap, Burner Head and Burner Drip Pans (some models) The contoured well areas, burner cap, burner head and burner drip pans (some models) should be routinely cleaned. Keeping the burner ports clean will prevent improper ignition and an uneven flame. Refer to the following instructions: THE COOKTOP IS NOT REMOVABLE.
- Page 30 4. Replace glass shield over bulb and snap wire holder into place. 5. Turn power back on again at the main source (or plug the range back in). 6. The clock will then need to be reset. To reset, see Setting the Clock and Minute Timer in this Use &...
-
Page 31: General Care & Cleaning
Range is not level - (1) Poor installation. Place oven rack in center of oven. Place a level on the oven rack. Adjust leveling legs at base of range until the oven rack is level. (2) Be sure floor is level, strong & stable enough to adequately support range. -
Page 32: Warranty
Major Appliance Warranty Information Your appliance is covered by a one year limited warranty. For one year from your original date of purchase, Electrolux will pay all costs for repairing or replacing any parts of this appliance that prove to be defective in materials or workmanship when such appliance is installed, used and maintained in accordance with the provided instructions.
Need help?
Do you have a question about the PLGFZ390EC and is the answer not in the manual?
Questions and answers