Advertisement
Quick Links
NiteSafe™
Twin Motion Activated Floodlight
To Begin
WARNING: Review important safety instructions before installation.
Check to make sure you have the following:
Rear housing cover
Floodlight
Hardware Kit (Actual hardware may differ from illustration.)
Items Required
Installation Time: 45 Minutes.
Phillips
Screwdriver
Safety Glassess
Drill
Preparation
WARNING: LEDs can be damaged by electro static discharge (ESD) shock. Before
installation, discharge yourself by touching a grounded bare metal surface to remove this
hazard. To avoid damage, do not remove the clear lens over the LED module.
IMPORTANT SAFETY INSTRUCTIONS
1. Do NOT touch LEDs.
2. Do NOT remove the protective clear LED lens.
3. Do NOT look directly at lighted LEDs for any length of time.
4. Electrical requirements: 4.5V DC.
Fixture can only be wall mounted. NOT suitable for ground mount or eave mount
installations. Different wall materials require different types of fixing devices. Use fixing
devices suitable for your walls, sold separately.
Select the installation location carefully. Do not install in areas having pedestrian or
motorized traffic, pools or bodies of water, or trees/bushes that move in the wind. All of
these may trigger the motion sensor and may be disruptive to the intended operation of
the light.
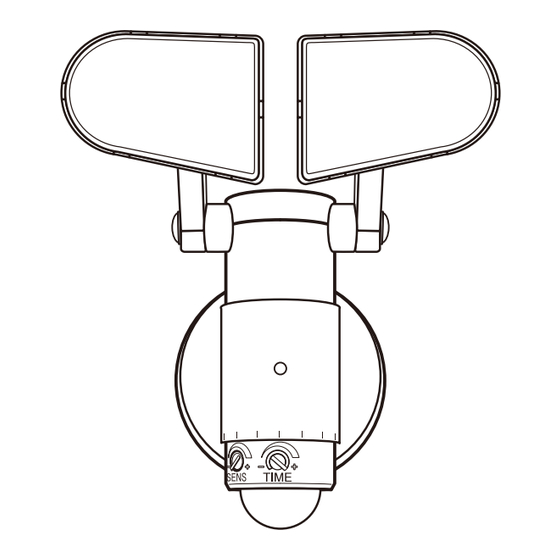
Fixture Installation
Fig. 1
Light head
Low battery
indicator
motion sensor
Fig. 6
Step Ladder
Soft Cloth
Fig. 7
3/16" Drill bit
Remove the rear housing cover by turning
counter-clockwise until it comes loose
(Fig. 1).
For mounting to concrete or masonry, install the
wallplugs, by drilling two 3/16-in. pilot holes into
the mounting surface. Insert the wallplugs into
the holes and tap them into place so they are
flush with the surface (Fig. 2). Place the rear
Fig. 2
housing cover, with the writing facing away from
the wall, over the mounting location and secure
the rear housing cover to the mounting surface
Fig. 3
with screws provided (Fig . 3).
Fig. 4
Fig. 5
Insert 3 new alkaline C size batteries (not included)
into the battery compartment and orient them with
the "+" and "-" markings on the back of the battery
compartment (Fig. 6). Re-attach the battery
compartment cover by aligning the legs on the lower
edge of the battery compartment cover onto the
fixture body and close the cover until the catch at the
top engages. Replace the screw. Do not mix old and
new batteries. Cold weather may have a negative
impact on battery life.
Remove the screw on the battery
compartment cover (Fig. 4) with your
fingertip, pull up on the battery
compartment catch and pull outward to
remove the battery compartment cover
(Fig. 5).
Attach the floodlight to the rear
housing cover by positioning the
floodlight over the rear housing
cover at an angle. Engage the
floodlight into the grooves of the
rear housing cover and secure
by twisting clockwise until the
floodlight is seated vertically
(Fig. 7)
Advertisement

Related Manuals for Xtralite NiteSafe


Summary of Contents for Xtralite NiteSafe
- Page 1 NiteSafe™ Preparation Twin Motion Activated Floodlight WARNING: LEDs can be damaged by electro static discharge (ESD) shock. Before installation, discharge yourself by touching a grounded bare metal surface to remove this hazard. To avoid damage, do not remove the clear lens over the LED module.
- Page 2 One Year Limited Warranty - Made in China Fig. 1 For further product information visit www.xtra-lite.com xtralite is a trading name of Remove the screw on the battery Trinity Xtras Ltd a Company registered in England No 4325172 compartment cover (Fig. 2). With your...
Need help?
Do you have a question about the NiteSafe and is the answer not in the manual?
Questions and answers