Advertisement
Quick Links
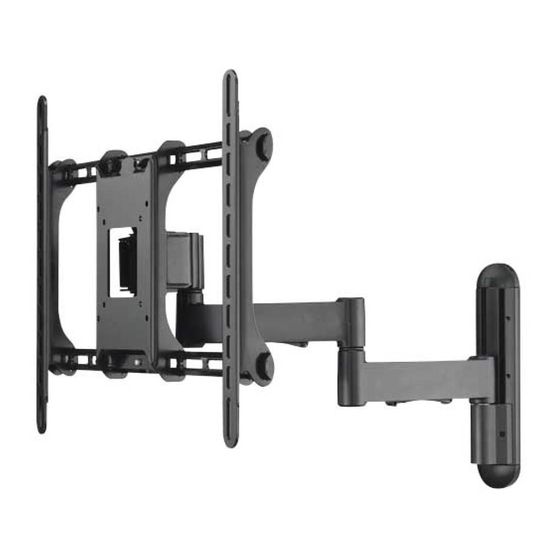
SMF1
(6903-300139 <02>)
Installation video available at simplicity-av.com
Wood
5mm
(3/16 in.)
Milestone AV Technologies
2221 Hwy 36 West
Saint Paul, MN 55113 USA
Customer Service
888-333-1376 • 952-277-3956 • info@simplicity-av.com
www.simplicity-av.com
©2009 Milestone AV Technologies, a Duchossois Group Company.
All rights reserved. Simplicity is a Milestone brand.
All other brand names or marks are used for identification purposes and are trademarks of their respective owners.
Advertisement

Related Manuals for Simplicity SMF1


Summary of Contents for Simplicity SMF1
- Page 1 888-333-1376 • 952-277-3956 • info@simplicity-av.com www.simplicity-av.com ©2009 Milestone AV Technologies, a Duchossois Group Company. All rights reserved. Simplicity is a Milestone brand. All other brand names or marks are used for identification purposes and are trademarks of their respective owners.
- Page 2 El instalador debe verificar la seguridad de cualquier método de instalación o la utilización de material no suministrado o recomendado por Simplicity. El tabique tiene que ser capaz de soportar hasta cinco veces el peso del monitor y el soporte combinados. Si tiene alguna duda sobre si la pared será...
- Page 3 CAUTION: English CAUTION: Avoid potential personal injuries and property damage! Do not use this product for any purpose not explicitly specified by Milestone. Ù The wall must be capable of supporting five times the weight of the monitor and mount combined. Ù...
- Page 4 English WARNING This product contains CAUTION/WARNING Wood Stud Walls Tools Required Choose an Option small items that could be a choking hazard Français ATTENTION Ce produit contient Structure de murs en bois Outils nécessaires Sélectionnez une option ATTENTION de petites pièces qui peuvent représenter un risque d’étouffement.
- Page 5 English HEAVY! You will need Troubleshooting and Loosen/Tighten assistance with this step. Maintenance Français TRÈS LOURD ! Cette étape Dévisser/visser Dépannage et maintenance requiert deux personnes. Español ¡PESADO! Necesitará ayuda Resolución de problemas y Aflojar/Ajustar para realizar esta operación. mantenimiento 6903-300139 <02>...
- Page 6 Antes de iniciar el ensamblaje, comprobar que se encuentran incluidas y en buenas condiciones todas las piezas. Si falta o está deteriorada alguna pieza, no devuelva el artículo a su concesionario; póngase en contacto con el servicio de atención al cliente de Simplicity. ¡No utilice nunca piezas deterioradas! ¡ATENCIÓN! Este producto contiene piezas de pequeño tamaño que podrían significar un peligro al ser ingeridas.
- Page 7 [03] x 2 [04] x1 [01] x 1 [02] x 1 [05] x 2 [06] x 1 1/4 x 2.5 in. 10-24 M6 / M8 [09] x1 [07] x 3 [10] x 4 [08] x 2 M4 / M5 M6 / M8 M4 / M5 [15] x 1 [11] x 8...
-
Page 8: Install Brackets
CAUTION: English Install Brackets Determine the bolt diameter for your monitor and your TV type. For TVs with an irregular/obstructed back, see 2-1 or 3-1. Ù For TVs with a flat/unobstructed back, see 2-2 or 3-2. Ù If you need extra space to accommodate cables, recesses, or protrusions, see an installation option (2-1 or 3-1) that uses spacers. Ensure that the brackets are level on the back of the TV. - Page 9 English Determine TV Hole Spacing Français Déterminez l’écart entre les trous du téléviseur. Español Determine el espacio de los orificios del televisor English English Continue with Step 2 Continue with Step 3 Français Français Continuez à l’étape 2 Continuez à l’étape 3 Español Español Continúe con el paso 2...
- Page 10 160 −> 400mm 75/100mm 6.3 −> 15.75” 2.95/3.94” [03] 130 −> 325mm 75/100mm 5.12 −> 12.80” 2.95/3.94” [14] [14] [11] [11] [11] [11] [20] [21] M5 30mm spacers [13] acers [10] [22] 6903-300139 <02>...
- Page 11 160 −> 400mm 75/100mm 6.3 −> 15.75” 2.95/3.94” [03] 130 −> 325mm 75/100mm 5.12 −> 12.80” 2.95/3.94” [11] [11] [17] [18] M5 12mm screws [10] [19] 6903-300139 <02>...
- Page 12 CAUTION: English CAUTION: Screw [16] must pass through both the crossbar [05] and the nut plates so both sides are fully engaged. Français ATTENTION: La vis [16] doit passer à travers la barre transversale [05] et les plaques à écrous, de manière à ce que les deux côtés soient entièrement engagés. Español PRECAUCIÓN: El tornillo [16] debe pasar por la barra transversal [5] y por las placas de tuercas, de modo que ambos lados se conecten por completo.
- Page 13 75/100mm 2.95/3.94” 75/100mm 2.95/3.94” [01] [14] [14] [11] [11] [20] [21] 6903-300139 <02>...
- Page 14 75/100mm 2.95/3.94” 75/100mm 2.95/3.94” [01] [11] [11] [18] [17] 6903-300139 <02>...
- Page 15 3/16 in. English Install Wall Plate - Wood Stud Mounting CAUTION: Avoid potential injuries or property damage! Do not over-tighten the lag bolts [07]. Tighten the lag bolts [07] only until they are pulled firmly against the wall plate [04]. Any material covering the wall must not exceed 16 mm (5/8 in.). Français Installez la plaque murale - Fixation sur montants de bois ATTENTION! Évitez de possibles blessures corporelles ou dommages matériels! Ne pas trop serrer les boulons tire-fond [07].
- Page 16 [04] 16 mm (5/8 in.) [07] 63.5mm 2.5 in. Do not over-tighten the lag bolts. Ne pas trop serrer les boulons tire-fond. No apriete excesivamente los pernos. 6903-300139 <02>...
- Page 17 [02] [04] [09] [25] 2.4mm 3/32” 6903-300139 <02>...
- Page 18 [06] [08] 6903-300139 <02>...
- Page 19 CAUTION: English Hang the TV onto the Wall Plate CAUTION: Avoid potential injuries or property damage! Be sure to install the flange nut [15] and washer [12] securely. This will prevent the TV from separating away from the wall mount. HEAVY! You will need assistance with this step.
- Page 20 6903-300139 <02>...
- Page 21 English Arrange Cables and Add Plates NOTE: Pull the arm to its full extension before routing the cables through the channels, then loosely route the cables. This will give the cables enough slack to prevent excess tension when adjusting the position of the arm. For clarity, TV is not shown.
- Page 22 English A: Adjust left/right swivel tension. B: Adjust up/down tilt tension. C: Adjust arm extend/retract tension. For clarity, TV is not shown. Français A: Réglez la tension de pivotement à gauche/droite. B: Réglez la tension d’inclinaison vers le haut/bas. C: Réglez la tension d’extension/rétraction des bras. Par souci de clarté, le téléviseur n’est pas illustré.
- Page 23 6903-300139 <02>...
- Page 24 English Milestone AV Technologies and its affiliated corporations and subsidiaries (collectively, “Milestone”), intend to make this manual accurate and complete. However, Milestone makes no claim that the information contained herein covers all details, conditions, or variations. Nor does it provide for every possible contingency in connection with the installation or use of this product. The information contained in this document is subject to change without notice or obligation of any kind.
Need help?
Do you have a question about the SMF1 and is the answer not in the manual?
Questions and answers